|
|
 Rank: Semi-Pro Level 1  Groups: Registered
Joined: 25/05/2015 Posts: 66 Points: 204 Location: Minneapolis
|
I needed to distract myself while the upper hull comes together, so I completed my first kit in…20 years? And it’s another Falcon, of course - the Revell (aka Fine Moulds)1/72, and I can see how this kit got its reputation; it’s a great challenge to build (hundreds and hundreds of pieces the size of a grain of rice), beautifully crafted and a real learning experience to paint. I wanted to get an idea of how the big one might look, plus experiment with techniques I’m going to use (airbrush and oil). And several months later, I’m excited about the results. The kit came with decals, but i decided to paint the whole thing, preferring colour I can mix myself. Now I hope my brother - who’ll be getting this as a very late birthday present - enjoys it too. Thanks for looking! 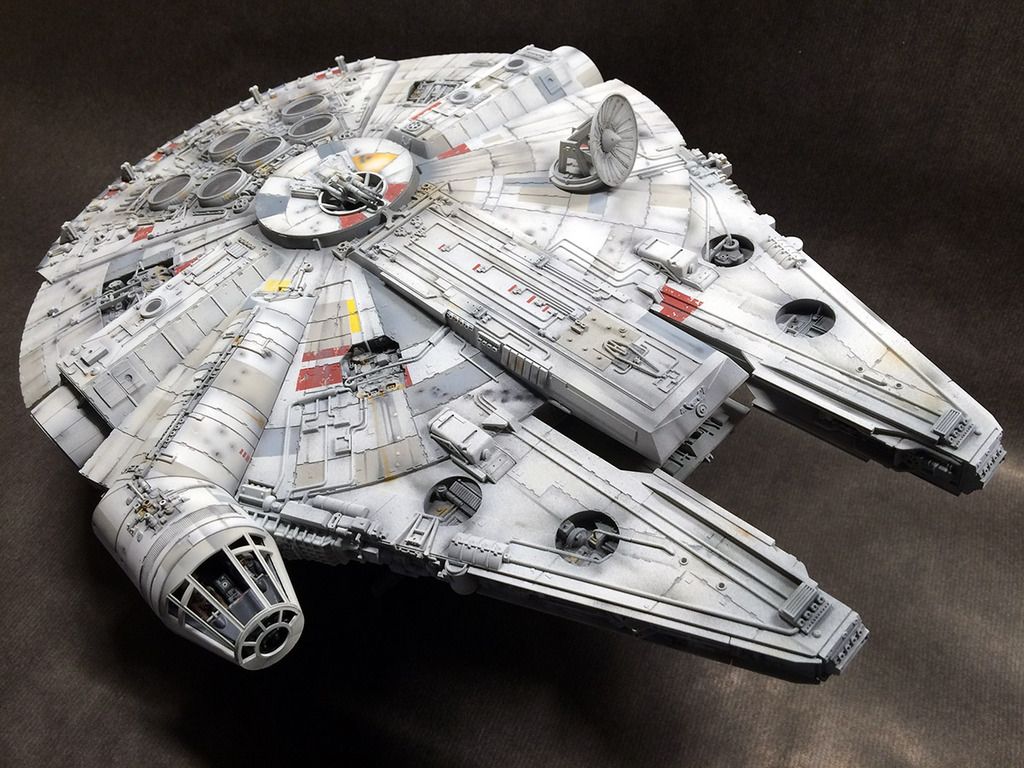 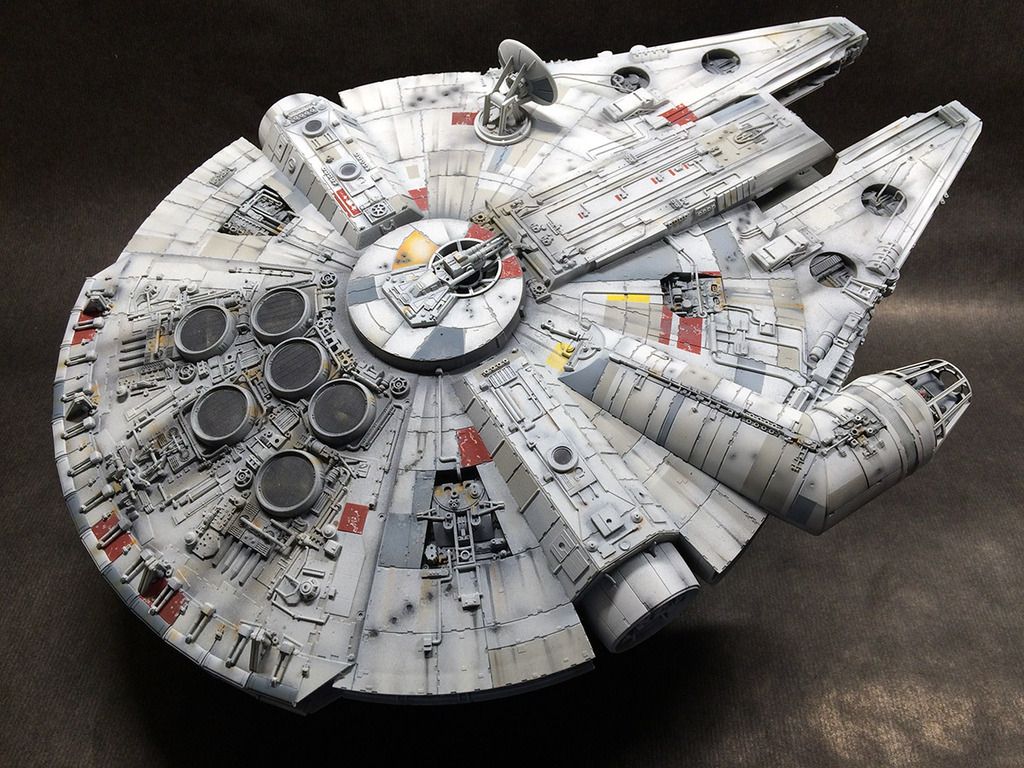 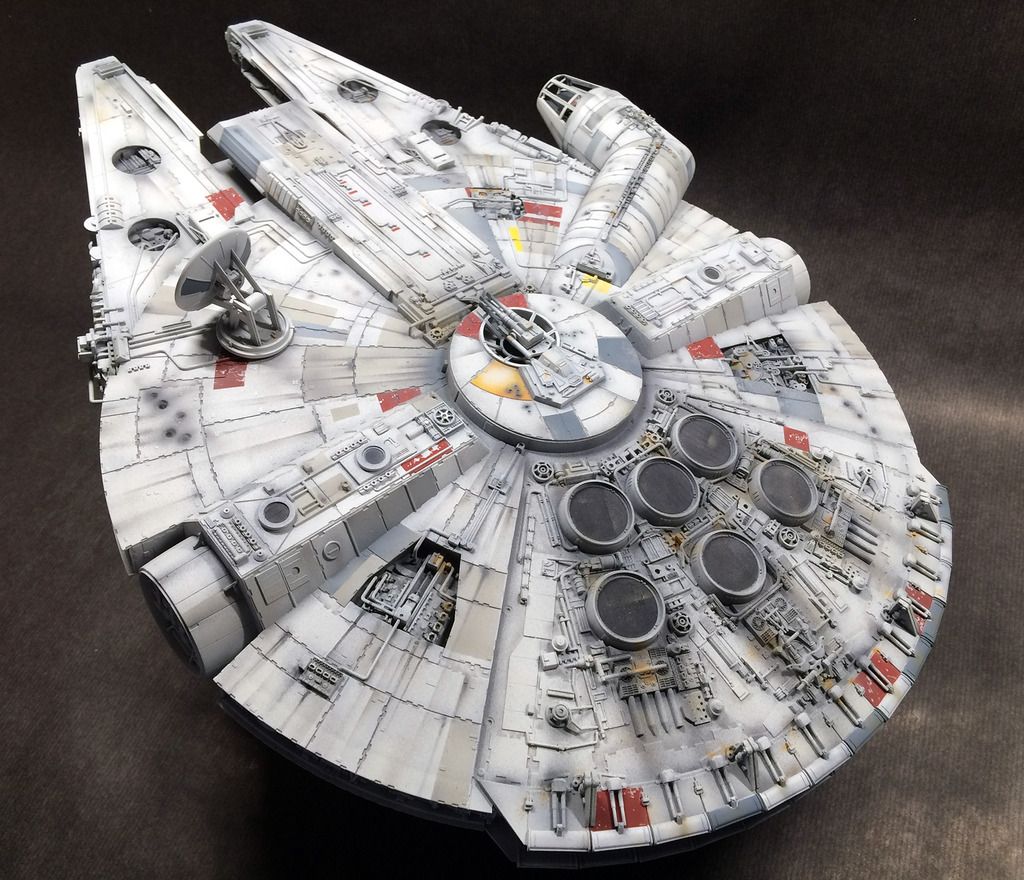 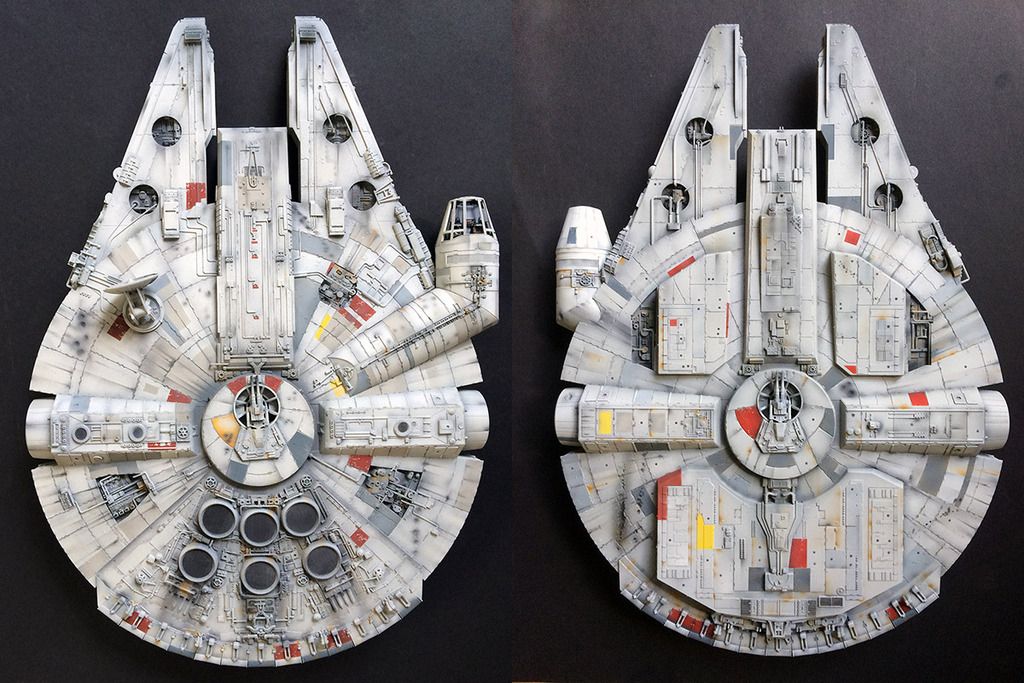
|
|
|
|
|
Stunning work, a lot of time and effort gone into that. Your brother is a very lucky man. Regards
Markwarren
(Mark) Admin
|
|
|
Rank: Semi-Pro Level 1 Groups: Registered
Joined: 25/05/2015 Posts: 66 Points: 204 Location: Minneapolis
|
Cheers, Mark! I've learned a lot from following your build, so thank you. Also, while I was working on the smaller Falcon, I noticed that the DeAgo engine cover panels include a couple of pretty visible seams that won’t be hidden by greeblies later on. I tried to minimize these with lots of ABS cement and bending, but I’m still going to have to fill them. That’s one of the rare cases with this kit which otherwise has some smart design ideas to keep its construction hidden. 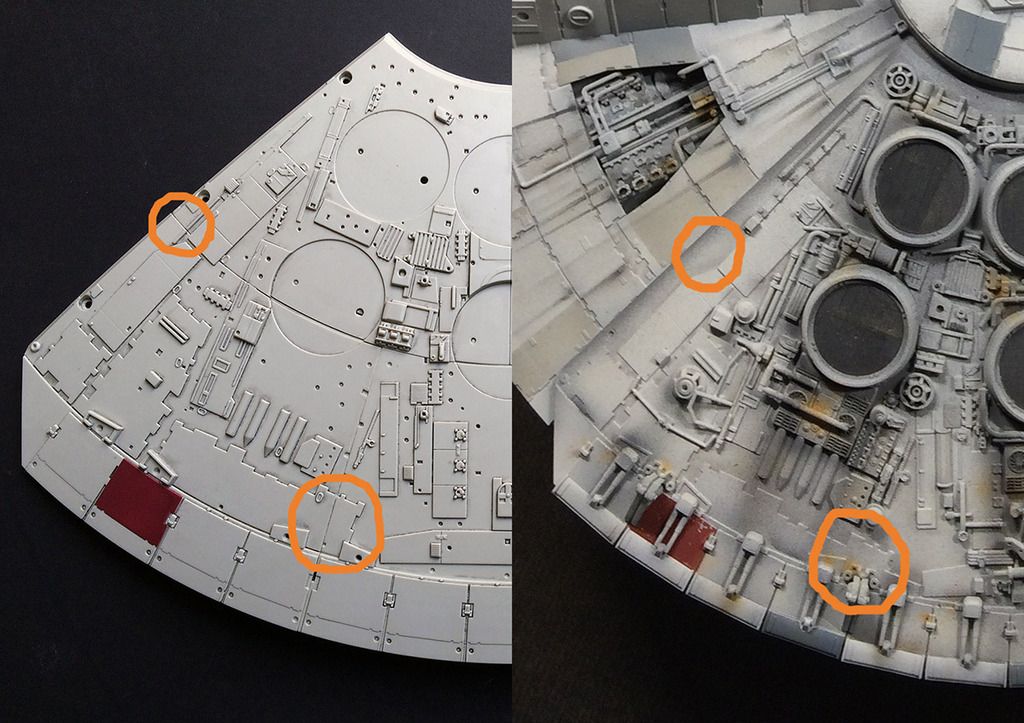
|
|
|
 Rank: Amateur level 2 Groups: Registered
Joined: 24/08/2016 Posts: 45 Points: 138 Location: Maryland
|
Yow! Your painting skills are enviable. I hope the best I do looks half as good as your brother's gift.
|
|
|
Rank: Semi-Pro Level 1 Groups: Registered
Joined: 25/05/2015 Posts: 66 Points: 204 Location: Minneapolis
|
Some work on one of the mandibles. Painting this was fun: lots of layers, taking advantage of the translucency of Insignia White. I've moved from pre-shading to just building layer upon layer of warm and cool grays sandwiched between the base colour. Nice to see it taking shape. 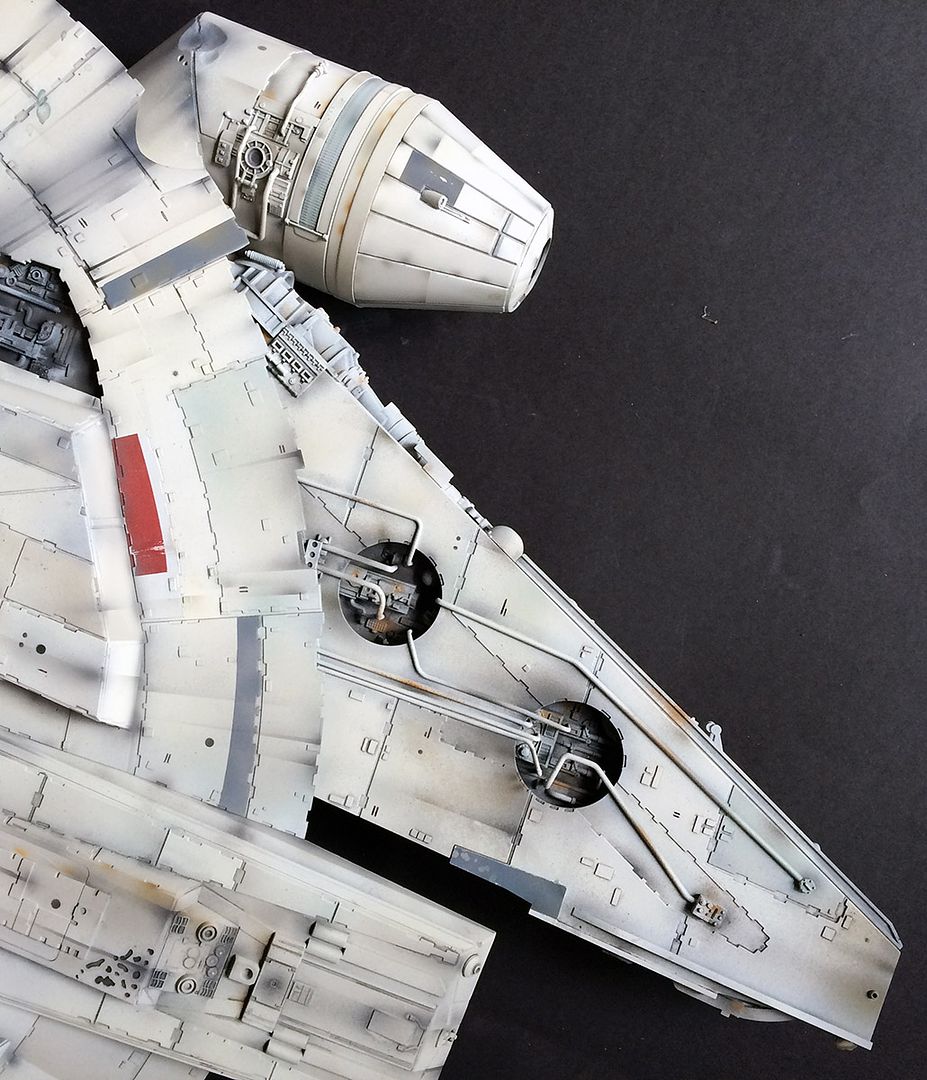
|
|
|
 Rank: Super-Elite      Groups: Registered
Joined: 27/01/2014 Posts: 5,060 Points: 14,980
|
Splendid work Al   I managed to get hold of an original Finemolds Falcon at original retail price a while back. I started to customise it with all the landing lights and Paragrafix Photoetch as welll as clear resin parts and custom lightIng chip, but sadly it got boxed before completion and is now sat on that shelf of I really most finish this  Here's a link to the build log http://forum.model-space...aspx?g=posts&t=14302
|
|
|
|
|
I have to say that is looking rather stunning, coming together very nicely. Mark Regards
Markwarren
(Mark) Admin
|
|
|
Rank: Semi-Pro Level 1 Groups: Registered
Joined: 25/05/2015 Posts: 66 Points: 204 Location: Minneapolis
|
Thanks Dave and Mark. I appreciate support from the pros - and the super-elite pros!
Mark, I scrutinize your work, and it's hard to believe how beautifully it holds up at close range. I'm just trying to get this thing to hold up to medium-to-long range inspection, but I'm going to attack the side panels as well as I can.
I have other paintings to make, but this thing is addictive. I think I'm dreaming painting techniques these days.
|
|
|
 Rank: Vice-Master Groups: Registered
Joined: 05/03/2015 Posts: 561 Points: 1,713 Location: South Carolina
|
A Thumbs wrote:I have other paintings to make, but this thing is addictive. I think I'm dreaming painting techniques these days. Yep... you've been hooked... and you're right it is addictive! Now you see what I end up doing in my spare time most of the time! Great work so far bro. Love the paint job on your FM Falcon! Nicely done!
|
|
|
 Rank: Pro  Groups: Registered
Joined: 16/03/2016 Posts: 122 Points: 381 Location: Layton, Utah
|
A Thumbs wrote:
I have other paintings to make, but this thing is addictive. I think I'm dreaming painting techniques these days.
 I hear you... I haven't even started my exterior weathering yet and I'm dreaming of painting techniques. Two more months I think before I'll be ready to start on that, and the waiting is killing me. If at first you don't succeed,
maybe you should skip the chainsaw juggling...
|
|
|
Rank: Semi-Pro Level 1 Groups: Registered
Joined: 25/05/2015 Posts: 66 Points: 204 Location: Minneapolis
|
Happy New Year, Falconers! I've been working steadily, painting bits of the upper hull, in parts and together to get a sense of the whole. There's a long way to go, of course, but with the final shipment coming this month the end is in sight. 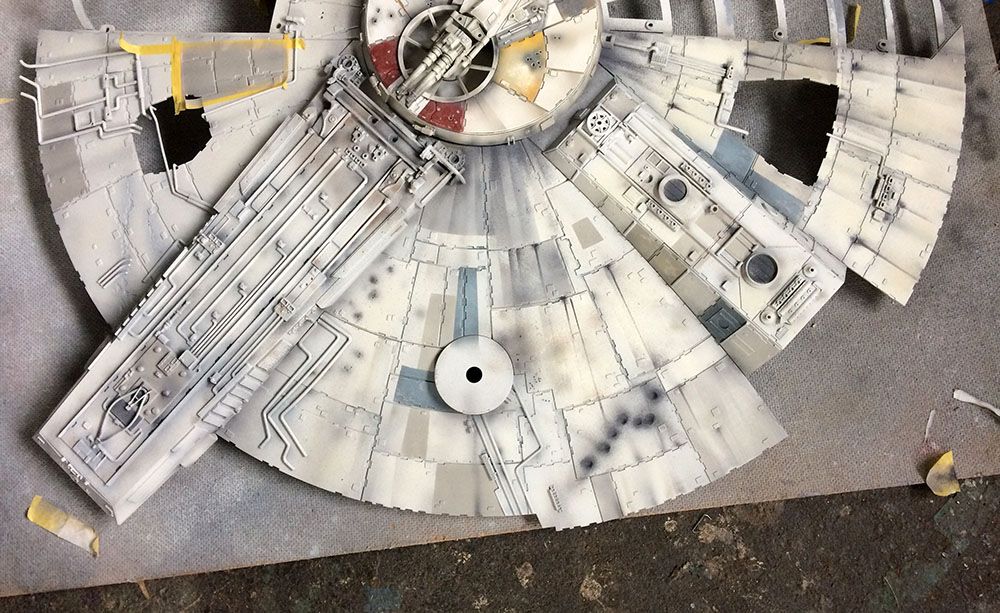 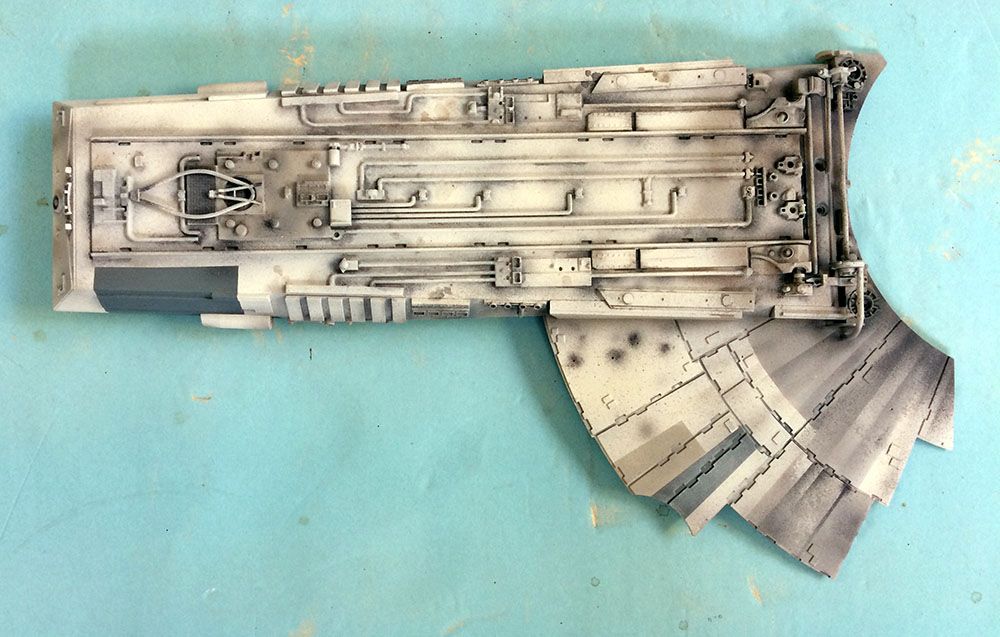 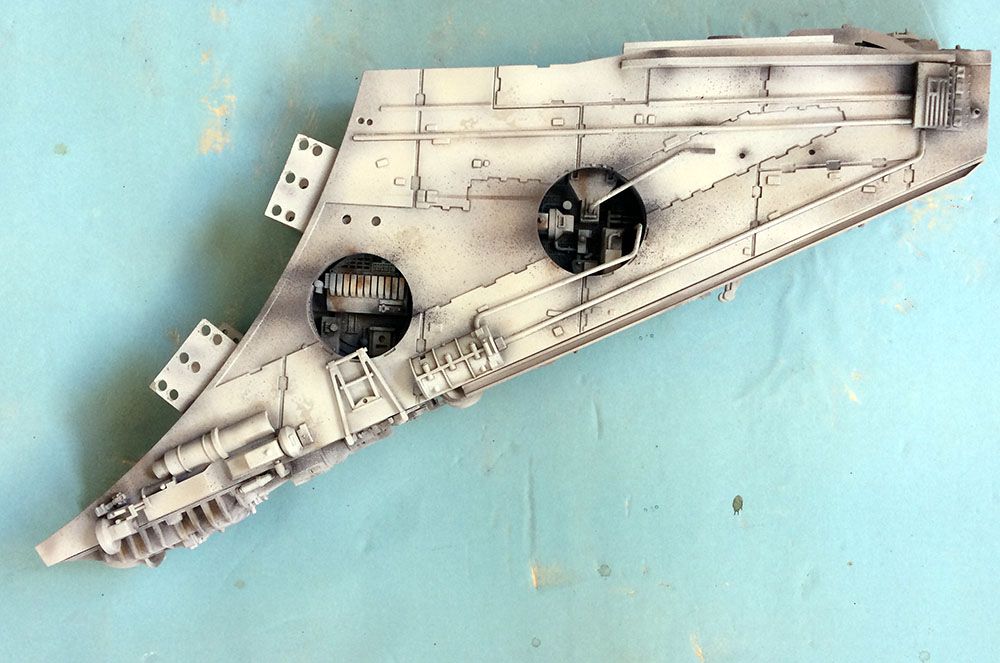 I've also decided to try to fix the port mandible. I'm not agonizing over accuracy, but there are some design choices on this model that don't capture the character of the original. One of the great design aspects of the Falcon is the way each separate section connects to the next, and this little area needs to connect the mandible to the hull.  I pushed the boxy greeblie back into its correct position, then built it out a bit so that it overlaps the pipes from the rectenna. I also extended the pipes on the mandible to meet the hull. In addition, I'm going to build the two little pipes that hang over the edge of the mandible and connect top to side panel. There are other missing bits around here too, but I'm trying not to get too hung up on that. Hope it looks OK when painted.
|
|
|
|
|
Looking good, lovely work..... Regards Alan
|
|
|
|
|
Looking really good, love the weathering you are achieving. Regards Mark Regards
Markwarren
(Mark) Admin
|
|
|
Rank: Pro  Groups: Registered
Joined: 13/05/2016 Posts: 130 Points: 386 Location: Murrieta, CA (USA)
|
Very nice work while I have pretty much all the parts I really just started my build back in May (I think) should be recieving shipment for month 25 any day now. Make things as simple as possible but not simpler... - Albert Einstein
|
|
|
Rank: Semi-Pro Level 1 Groups: Registered
Joined: 25/05/2015 Posts: 66 Points: 204 Location: Minneapolis
|
Thanks for the comments and encouragement. It's certainly exciting to see it coming together - too much so, perhaps. I'm trying not to rush anything just to see it completed, but I had to post an image of the mandibles (nearly) complete and together... 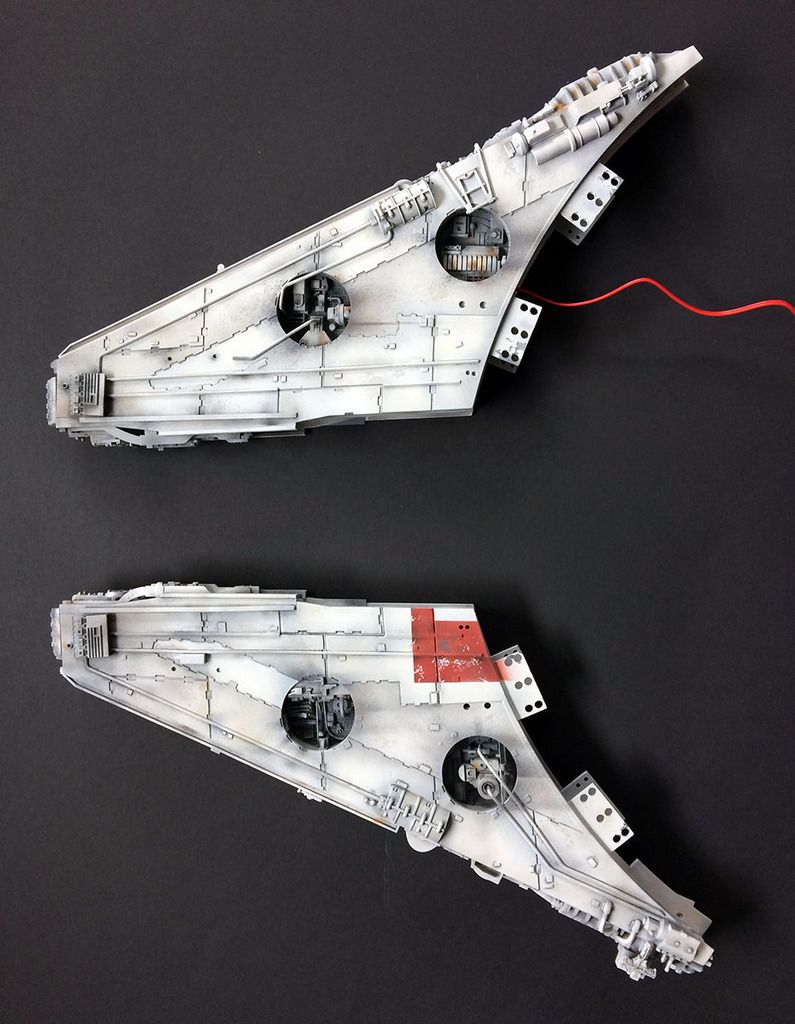 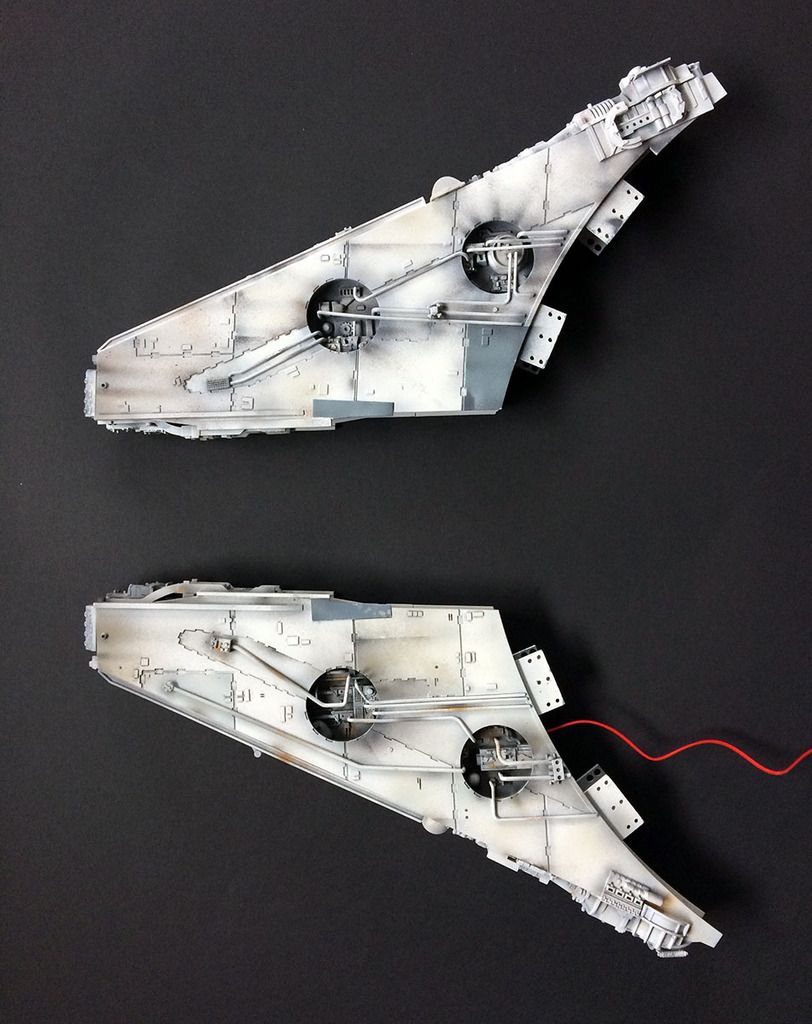 ...as well as the greeblies I added. Gave up on scratch building them and ordered them from Shapeways instead. Worth it? I'm in so deep now that questions like that hardly bare thinking about. 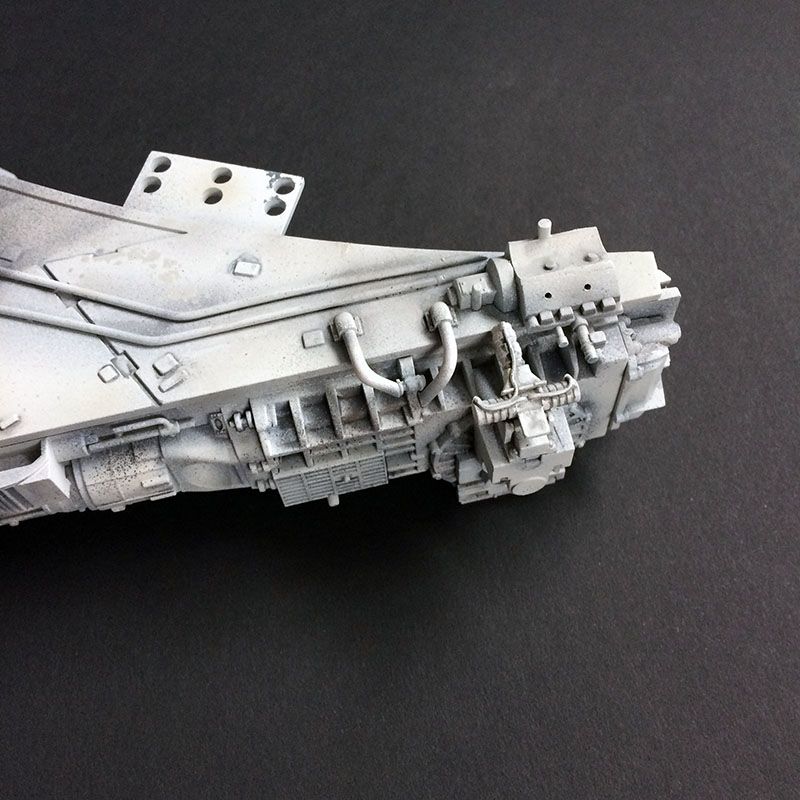
|
|
|
|
|
Very nice work, looking great.... Regards Alan
|
|
|
|
|
Very nice work, looking great.  Regards Mark Regards
Markwarren
(Mark) Admin
|
|
|
Rank: Semi-Pro Level 1 Groups: Registered
Joined: 25/05/2015 Posts: 66 Points: 204 Location: Minneapolis
|
With some time on my hands, I've been plugging away at different parts, mostly painting things, which to me is the most rewarding part of this long process. Of all the areas, the recesses are the most satisfying to build, paint and install; DeAg have done a great job of nailing the complexity to these areas and turning them into well-fitting kit parts. Thanks for looking. 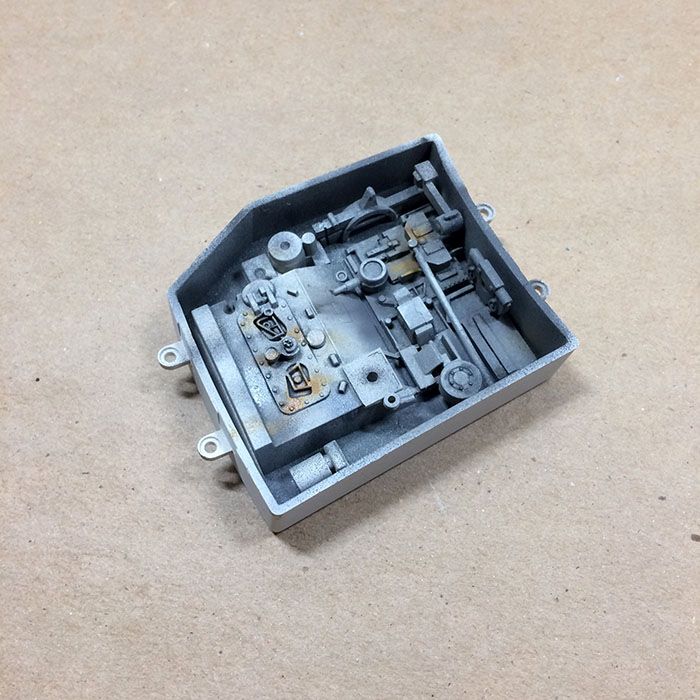 The forward recess, and installed... 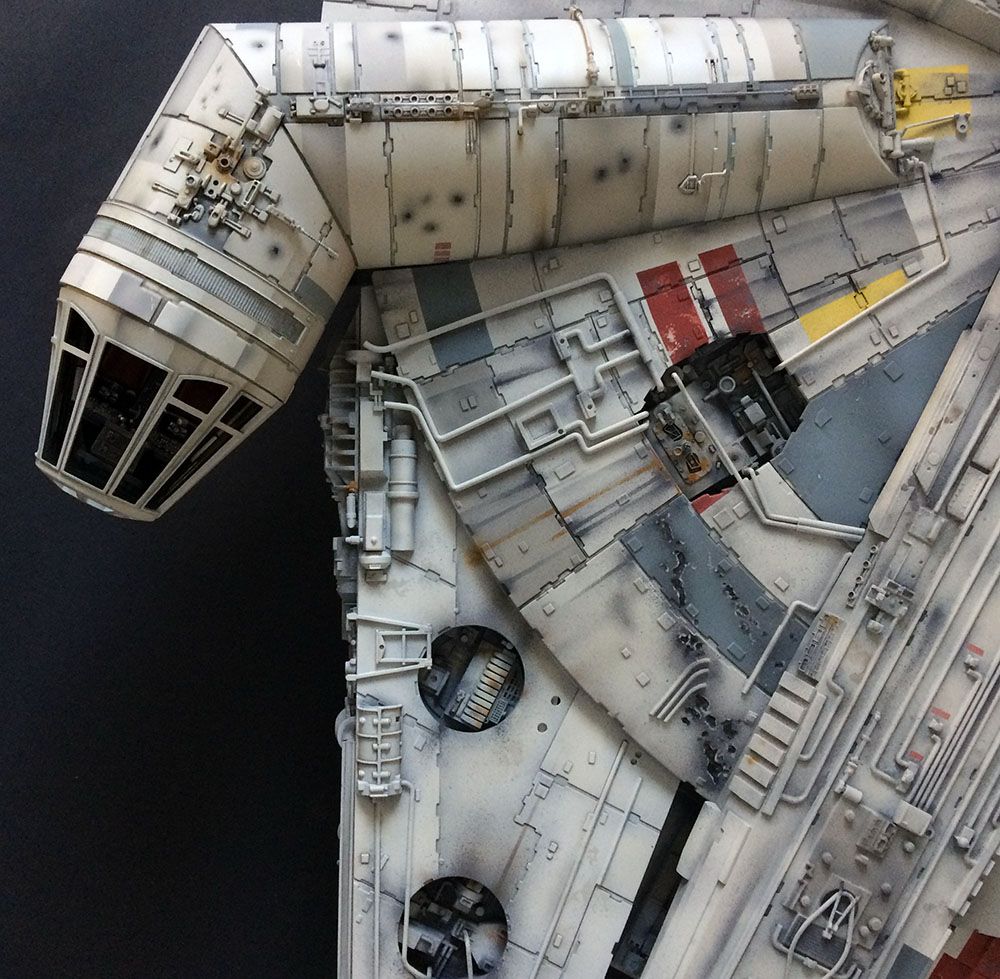
|
|
|
Rank: Super-Elite Groups: Registered
Joined: 27/01/2014 Posts: 5,060 Points: 14,980
|
You're doing a fantastic job with the paintwork, it's really bringing out all the detail
|
|
|
Rank: Semi-Pro Level 1 Groups: Registered
Joined: 25/05/2015 Posts: 66 Points: 204 Location: Minneapolis
|
Thanks everyone, thanks Dave. How's yours progressing, by the way? Posting anything soon?
Just got the mandibles screwed down and lights plugged in. After two years, and months when it felt like it would never end, it's possible to see a final result.
|
|
|
|
Guest
|
 UK
UK

