|
|
 Rank: Pro   Groups: Registered
Joined: 16/03/2016 Posts: 122 Points: 381 Location: Layton, Utah
|
Just got notification that they've processed my 2nd month's payment, so if the timeline is consistent with the first month, I should be getting shipments 3 and 4 by the end of the month. I really hope my drill bits get in soon, so I can finish up with what I've gotten so far by the time packs 9-16 get in. If at first you don't succeed,
maybe you should skip the chainsaw juggling...
|
|
|
Rank: Pro Groups: Registered
Joined: 16/03/2016 Posts: 122 Points: 381 Location: Layton, Utah
|
I got my drill bits and I finished the fiber optics I'm going to do in the cockpit. I might do more in the gun turret stations, but I won't be doing any on the interior. Here are pics of the things I've gotten done since the last ones: Weathered the Quad Laser Cannon: 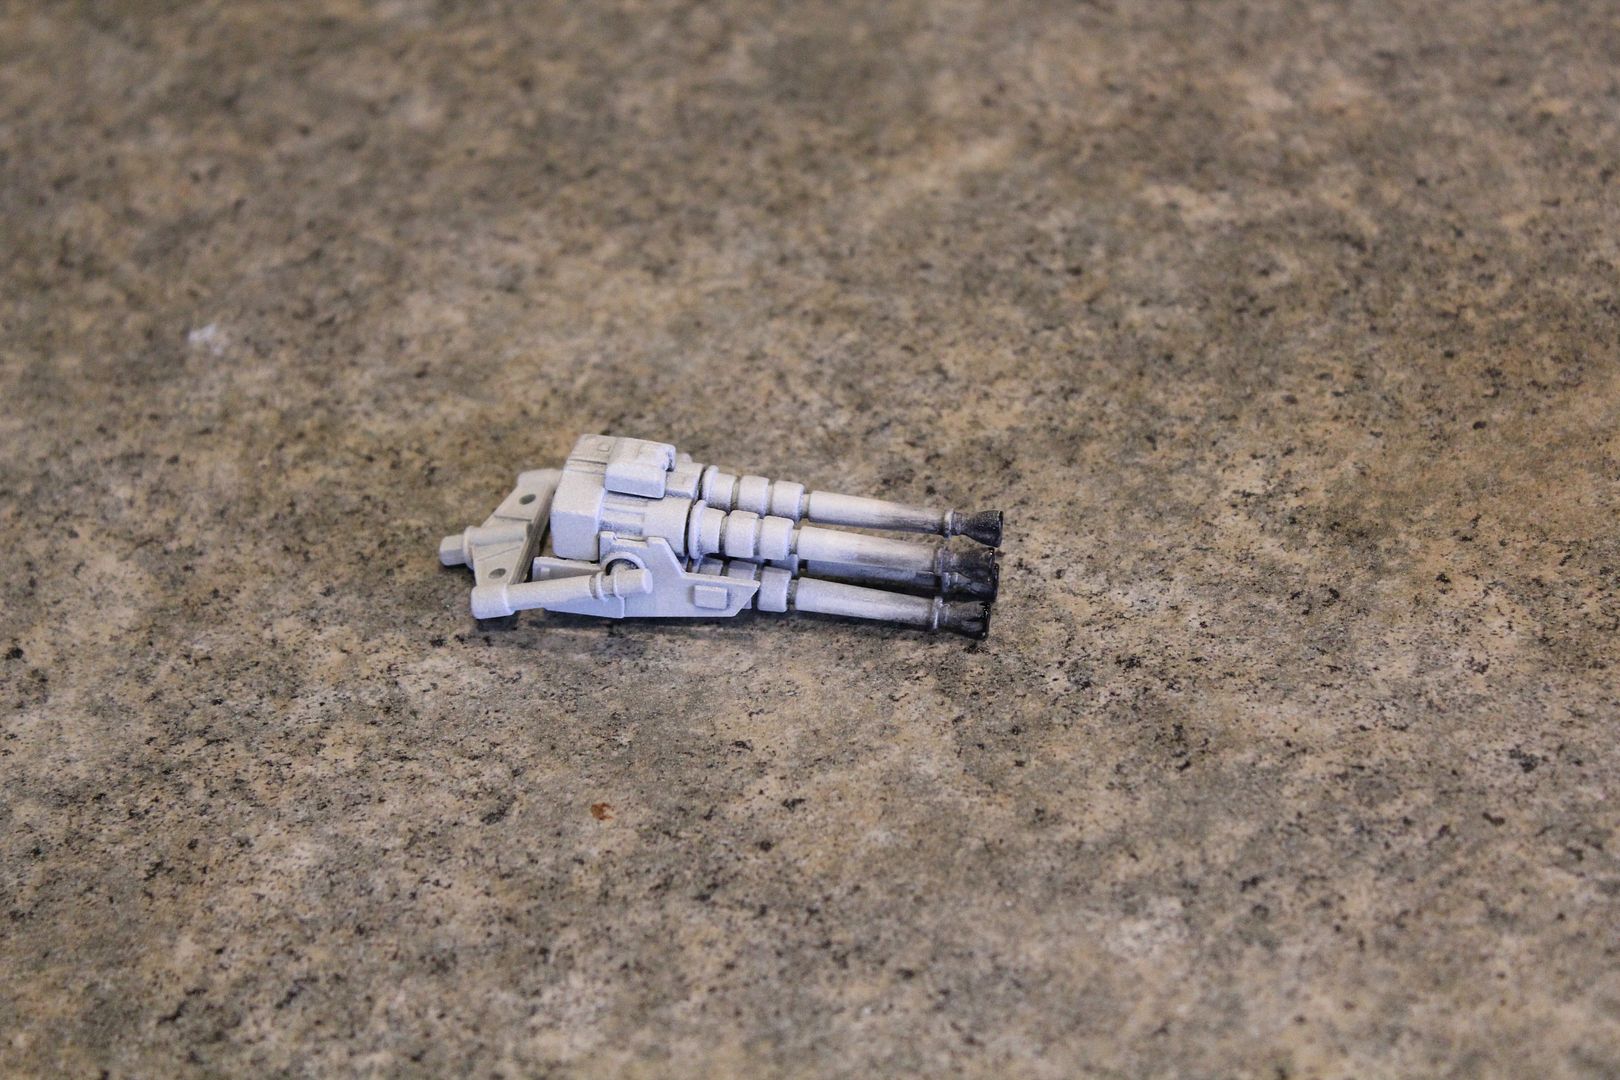 A few different shots of the cockpit with the fiber optic lighting: 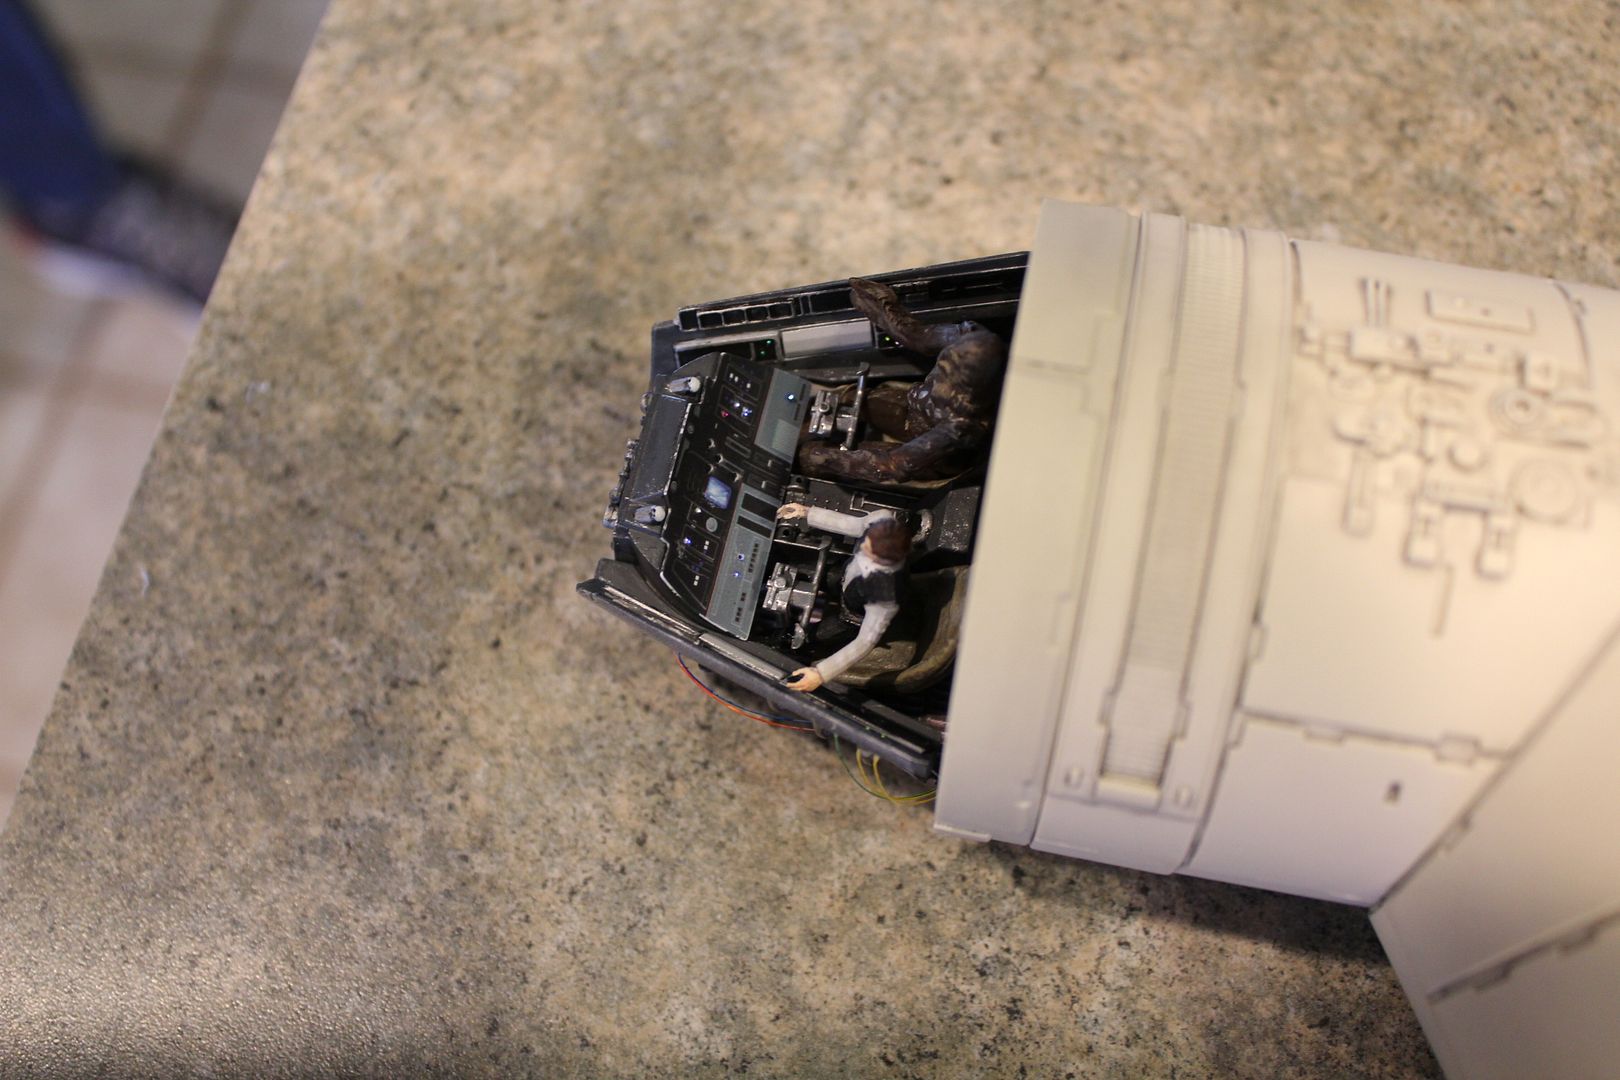 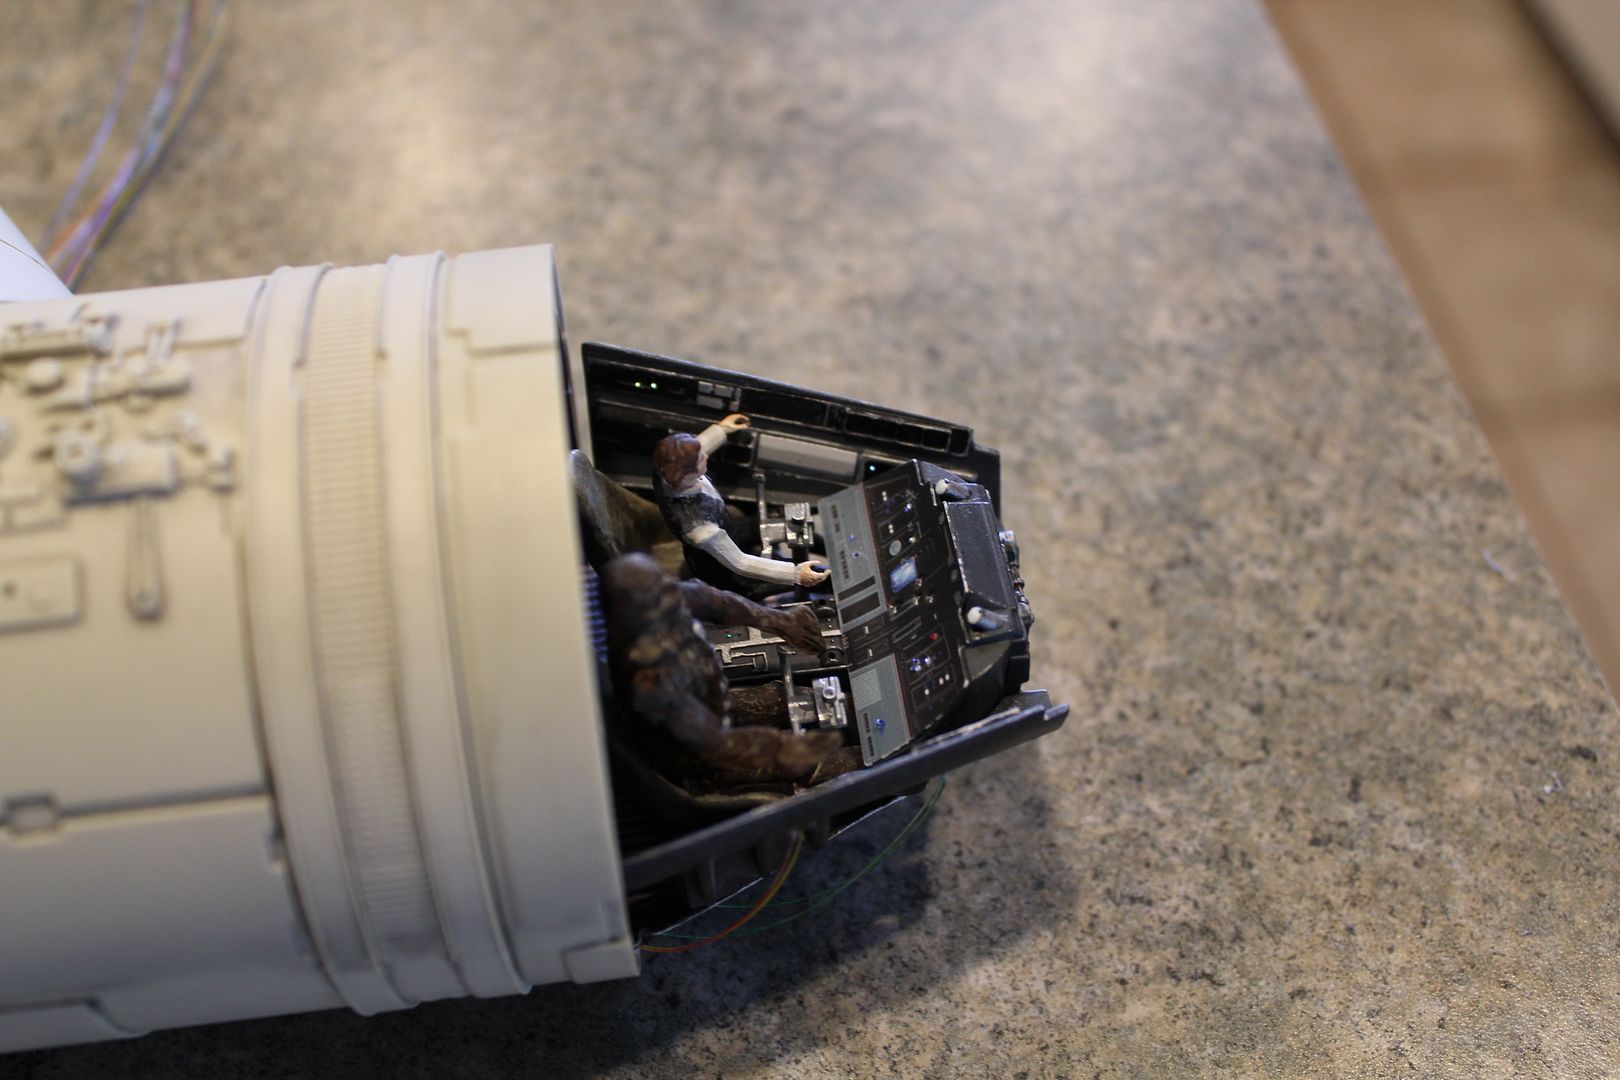 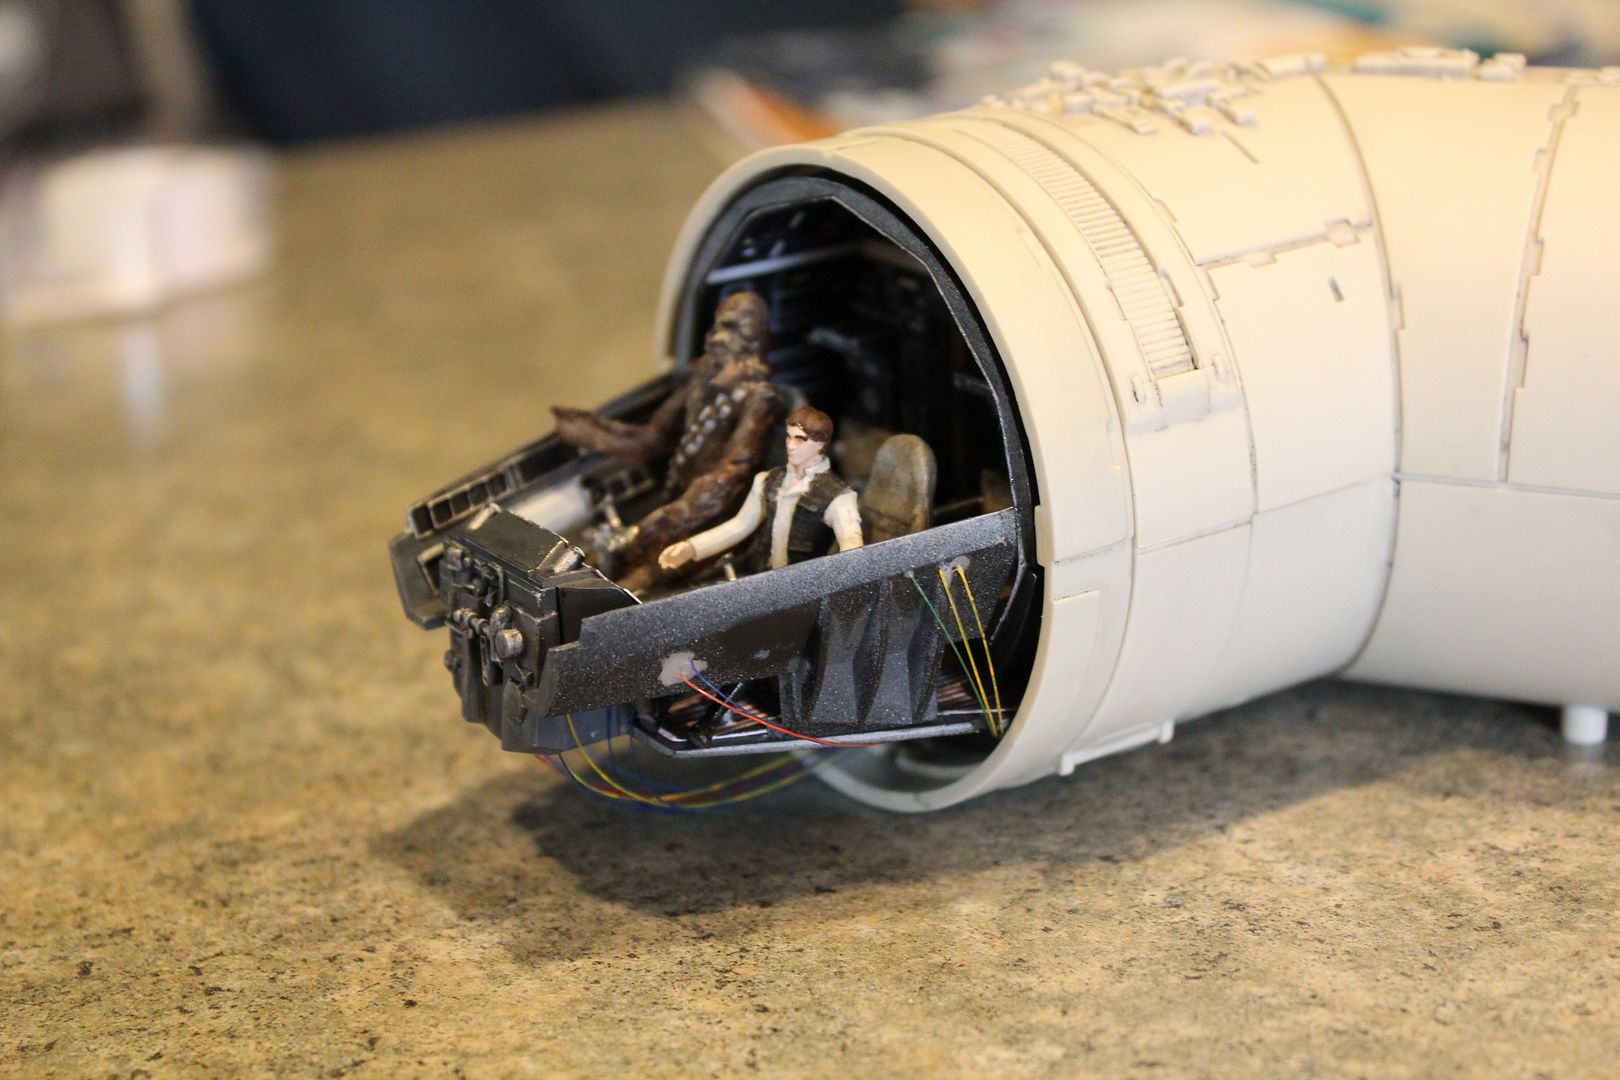 There are more lights in the rear-side panels, but they don't show up all that well, so I didn't take any pics of them. I don't know if its the angle, or if my optic fibers got too kinked when I put the corridor hull plates around them, but they just don't show up well. If at first you don't succeed,
maybe you should skip the chainsaw juggling...
|
|
|
Rank: Pro Groups: Registered
Joined: 16/03/2016 Posts: 122 Points: 381 Location: Layton, Utah
|
Speaking of lighting, I've been watching some of the build logs on youtube, and I've noticed a couple of them doing light-blocking. One of them has been painting the back side of the hull-plates silver, while another is painting them black. Is there a better color to paint them? My instinct was to go with black, but the guy who is painting them silver says that the silver will reflect the light back and not allow it to seep out. What are your thoughts? If at first you don't succeed,
maybe you should skip the chainsaw juggling...
|
|
|
|
|
 Why use silver paint if you use cooking foil it will do the job better and will block any glow through the plastic from any LED'S or any of the lighting systems being used by the scratch builders  Current builds:-C57,Zero, Lamborghini Countach, Caldercraft HMS Agamemnon,Robi,R2-D2, MFH Cobra .
|
|
|
|
|
Nice work, looking really good. Your fibres might have got kinked or pulled out slightly, but I don't think you will notice it too much once the rear back panel it lit. I still have to stop the light bleed on mine, thinking of using an aluminium tape, rather than paint it, that way I can overlap the tape on the seems. Keep up the good work.
|
|
|
Rank: Pro Groups: Registered
Joined: 16/03/2016 Posts: 122 Points: 381 Location: Layton, Utah
|
arpurchase wrote: Why use silver paint if you use cooking foil it will do the job better and will block any glow through the plastic from any LED'S or any of the lighting systems being used by the scratch builders I hadn't considered foil. That sounds like a good plan! Thanks! If at first you don't succeed,
maybe you should skip the chainsaw juggling...
|
|
|
 Rank: Super-Elite      Groups: Registered
Joined: 16/08/2010 Posts: 2,771 Points: 8,344 Location: Brighton
|
Hi Goofyfoot. Great start to your build. Look forward to seeing your progress. Ian Current builds.Hachettes build the bismark,HMS Victory, HMS Hood.
Finished Builds Corel HMS Victory cross section.
|
|
|
 Rank: Vice-Master Groups: Registered
Joined: 05/03/2015 Posts: 561 Points: 1,713 Location: South Carolina
|
Something I use is aluminum ducting tape. It's got a very strong adhesive on the back and is excellent for blocking light. Quite inexpensive too. Think of it as aluminum foil that comes on a roll that already has glue on it like masking tape! Works very well!
|
|
|
Rank: Pro Groups: Registered
Joined: 16/03/2016 Posts: 122 Points: 381 Location: Layton, Utah
|
Now that I've finally gotten Month 7 and had some time to catch up, I plan on taking some photos and updating my log this weekend. The next big thing I'm waiting on is the lighting kit I bought from Chris Holland. http://mybuildsandmods.b...com/p/blog-page_28.html
Once I have that, I can finish my lower hull (with the exception of the weathering...I think I'm going to try to hold off on any large scale weathering until I have all the hull parts.) Oh, and I have decided to use the foil tape for my light blocking. Thanks for the suggestion LS! If at first you don't succeed,
maybe you should skip the chainsaw juggling...
|
|
|
Rank: Pro  Groups: Registered
Joined: 13/05/2016 Posts: 130 Points: 386 Location: Murrieta, CA (USA)
|
About drilling... I removed most of the plastic that goes behind the decals. I then used a hot needle to make the hole for my fibers. I use my soldering iron to warm up the end of the fiber so that it creates a small mushroom, this stops the fiber from pulling through. Used epoxy to hold the fibers in place. Make things as simple as possible but not simpler... - Albert Einstein
|
|
|
 Rank: Amateur level 2 Groups: Registered
Joined: 24/08/2016 Posts: 45 Points: 138 Location: Maryland
|
For light blocking the hull I am using a single coat of silver spray, followed by a single coat of matte black spray. It blocked the light *completely* for me. For seams (especially in the photoetch parts), I used the copper foil tape used in making stained glass windows. It comes in various reasonable widths.
|
|
|
Rank: Vice-Master Groups: Registered
Joined: 05/03/2015 Posts: 561 Points: 1,713 Location: South Carolina
|
Looks like everything is coming along nicely my friend... you did a wonderful job on those figures I made! :)
|
|
|
Rank: Super-Elite Groups: Registered
Joined: 17/12/2013 Posts: 3,982 Points: 11,974 Location: NY, USA
|
|
|
|
Rank: Pro Groups: Registered
Joined: 16/03/2016 Posts: 122 Points: 381 Location: Layton, Utah
|
|
|
|
Rank: Pro Groups: Registered
Joined: 16/03/2016 Posts: 122 Points: 381 Location: Layton, Utah
|
As I mentioned earlier in the thread, I'm not doing a lot of customization on the interior portions of the kit, as I will be displaying it "in flight", and I don't anticipate exposing the interior for view very often. All I did was some basic weathering, and that's likely to be the finished state. If at first you don't succeed,
maybe you should skip the chainsaw juggling...
|
|
|
|
|
Nice work on the hold and corridor sections. I look forward to seeing your weathered hull when finished, looks like you've got your work cut out for now. Nice work, keep posting. Mark
|
|
|
Rank: Pro Groups: Registered
Joined: 16/03/2016 Posts: 122 Points: 381 Location: Layton, Utah
|
Markwarren wrote:Nice work on the hold and corridor sections. I look forward to seeing your weathered hull when finished, looks like you've got your work cut out for now. Nice work, keep posting.
Mark Thank you! You can see my first attempt at weathering a Falcon here: http://forum.us.model-sp...=204359&#post204359
I hope to make this one even better. If at first you don't succeed,
maybe you should skip the chainsaw juggling...
|
|
|
Rank: Pro Groups: Registered
Joined: 16/03/2016 Posts: 122 Points: 381 Location: Layton, Utah
|
I've just purchased Fine Mold's 1/48 Tie Fighter to include in the display diorama I'm planning for this. The scale's not perfect, but it should be pretty close. I plan on doing my own version of the "Asteroid Chase" in ESB. I'm hoping that my skills will be able to rise to the level of my ambition...  If at first you don't succeed,
maybe you should skip the chainsaw juggling...
|
|
|
|
|
If you put your mind to it, you'll achieve anything. It will be interesting though!!!! 
|
|
|
Rank: Pro Groups: Registered
Joined: 16/03/2016 Posts: 122 Points: 381 Location: Layton, Utah
|
Just waiting on Pack 25 to finish her up. I suspect I'll post a couple of pics at some point this holiday break. If at first you don't succeed,
maybe you should skip the chainsaw juggling...
|
|
|
|
Guest
|
 UK
UK

