|
|
 Rank: Pro   Groups: Registered
Joined: 22/03/2016 Posts: 175 Points: 552 Location: Merseyside
|
Hi dave I'm going to build it as it comes for now and probably strip back down then complete with said mods Built- Shelby Mustang, Lamborghini Huracan
Building-Spitfire, Redbull racing RB7, 3d printer, Honda CB750, Stage coach and Revell 1/400 Titanic
|
|
|
 Rank: Super-Elite     Groups: Registered
Joined: 16/08/2010 Posts: 2,771 Points: 8,344 Location: Brighton
|
Hi Steve. Great build diary. look forward to seeing your progress. Ian. Current builds.Hachettes build the bismark,HMS Victory, HMS Hood.
Finished Builds Corel HMS Victory cross section.
|
|
|
Rank: Pro Groups: Registered
Joined: 22/03/2016 Posts: 175 Points: 552 Location: Merseyside
|
Thanks to those taking the time to follow my build. more issues will be updated shortly. Im sadly still waiting to recieve the free gifts (Lighter and T-shirt) im assuered they will be sent out soon tho...... On a plus note ive managed to purchase another Mustang binder to add to the collection. Just a simple phone call and about a week later it was with me. Lastly Im pondering the idea of starting a Huracan diary as ive also subscribed to that build but im unsure as there seems to be plenty of them about so you would of already seen it all. hmmmm?? thats all for now but updates on the build will soon follow Built- Shelby Mustang, Lamborghini Huracan
Building-Spitfire, Redbull racing RB7, 3d printer, Honda CB750, Stage coach and Revell 1/400 Titanic
|
|
|
Rank: Pro Groups: Registered
Joined: 22/03/2016 Posts: 175 Points: 552 Location: Merseyside
|
Built- Shelby Mustang, Lamborghini Huracan
Building-Spitfire, Redbull racing RB7, 3d printer, Honda CB750, Stage coach and Revell 1/400 Titanic
|
|
|
Rank: Pro Groups: Registered
Joined: 22/03/2016 Posts: 175 Points: 552 Location: Merseyside
|
Welcome back and on we go with issues 25 - 28
The first thing to add is im Very happy with this months delivery as it contained the much awaited Shelby T-shirt and Zippo lighter. The T-shirt, Cap and binders will be display items with the completed Shelby as will the lighter but im really impressed with the zippo. A nice quality lighter that will compliment the collection

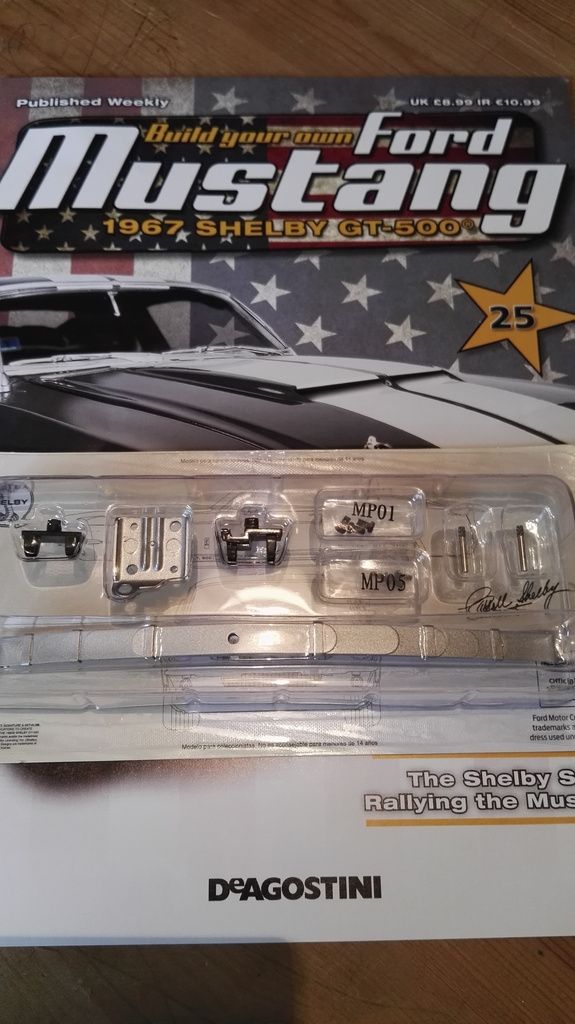
ok and on with the build its been a long month awaiting the next delivery but again a sense of satisfaction when completed (thats partworks) :-)ISSUE 25Firstly ive got to say i'm pleasently surprised at the detail in the leafspring, it is built up from individual strips of metal just as the real thing, you know its a good build when the surprises keep coming :-)PARTS LISTLeft rear leaf spring
Front and rear hinges
pins
supporting plate
screws
 THE BUILDWe start with attching the front and rear hinges onto the leaf spring using the supplied pins (pliers are advised for this) then we install the leaf spring onto the main chassis along with the support plate using the supplied screws. THE BUILDWe start with attching the front and rear hinges onto the leaf spring using the supplied pins (pliers are advised for this) then we install the leaf spring onto the main chassis along with the support plate using the supplied screws.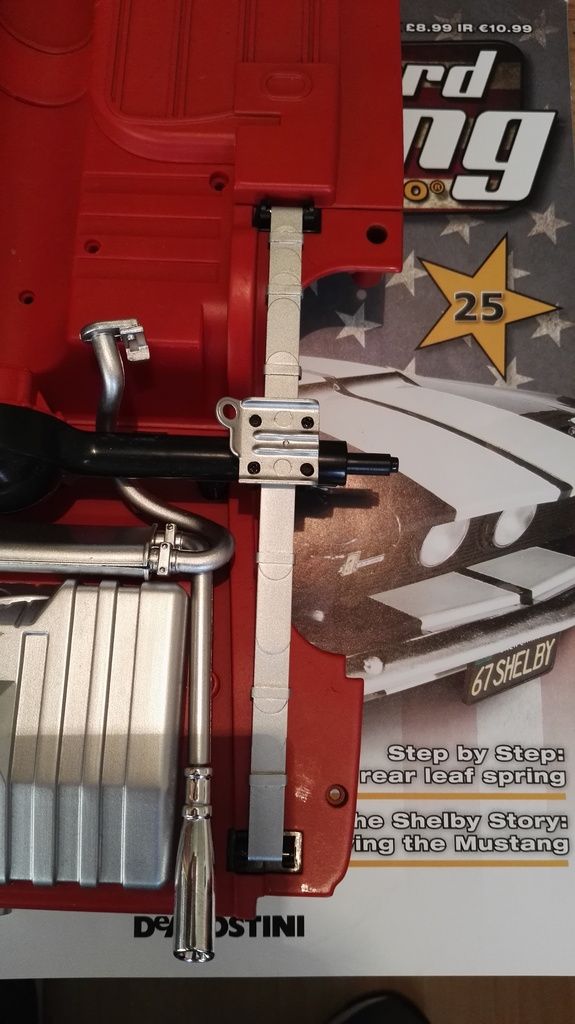 HINTS*Ensure you identify the front and rear of the leaf spring as it can be easy to get mixed up, Also when fitting the leaf spring to the chassis, if you find it a bit of a fiddle like i did to get both hinges aligned, press slightly in the middle of the spring to aid fitting.ISSUE 26PARTS LISTShock absorber hinge HINTS*Ensure you identify the front and rear of the leaf spring as it can be easy to get mixed up, Also when fitting the leaf spring to the chassis, if you find it a bit of a fiddle like i did to get both hinges aligned, press slightly in the middle of the spring to aid fitting.ISSUE 26PARTS LISTShock absorber hinge
Shock absorber body
Shock absorber pin
Shock absorber piston
Left rear brake
Screws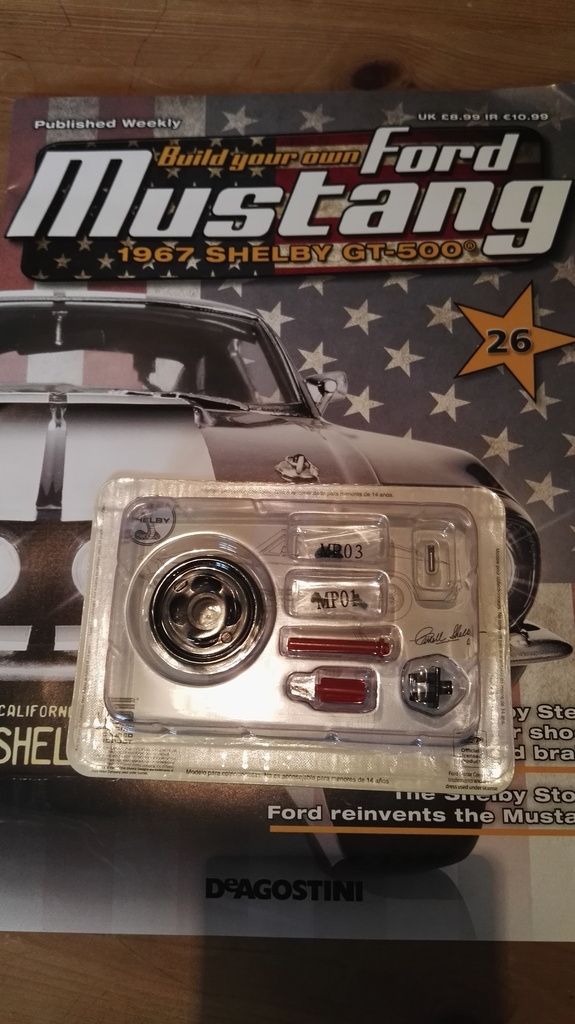 THE BUILD THE BUILD
I found this one bit of a fiddle. We start with mounting the shock and hinge together, simple enough with just a push pin.
Next remove the support plate for the leaf spring and we are ready to marry the shock to the chassis. I found this bit a tad confusing to follow. Look carefully and the shock base is slanted and must lean to the rear of the chassis - Probably just me but i needed a moment to make sense of that bit, Long nose pliers or tweezers are a good help to fit in place here. Sorry if this is a bit long winded but there is something to report in the build section finally. We also recieve the rear brake drum to be fitted later.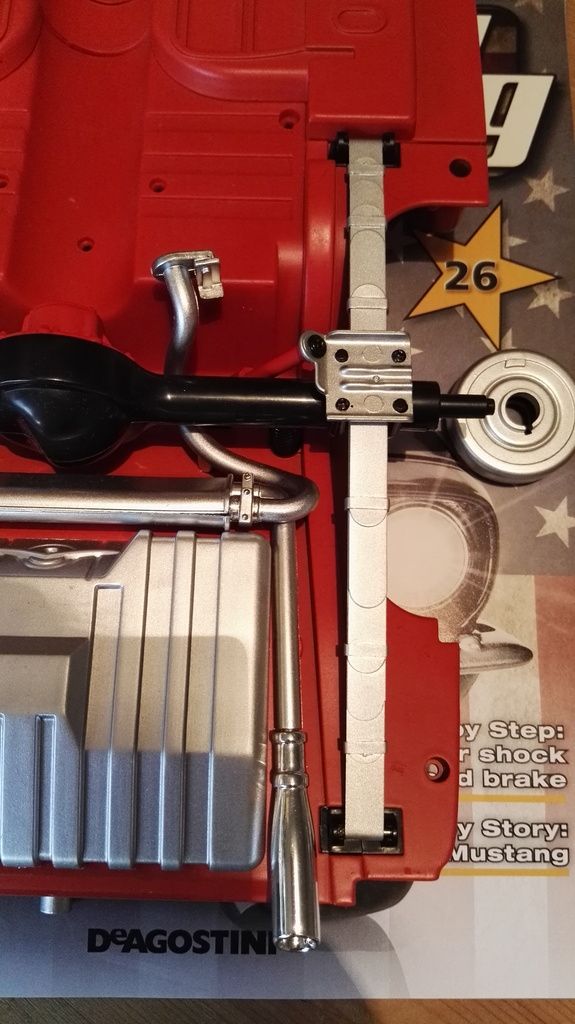 HINT*Double check you have the shock absorber the right way around as it is very easy to get mixed up as it is only a slight lean.Suggested ModificationsPaint brake drum maybe the matching blue to the car or maybe get a couple more issue 8's to do a rear disc/caliper conversionISSUE 27PARTS LISTWheel HINT*Double check you have the shock absorber the right way around as it is very easy to get mixed up as it is only a slight lean.Suggested ModificationsPaint brake drum maybe the matching blue to the car or maybe get a couple more issue 8's to do a rear disc/caliper conversionISSUE 27PARTS LISTWheel
Tyre
Shelby logo wheel cover
Screws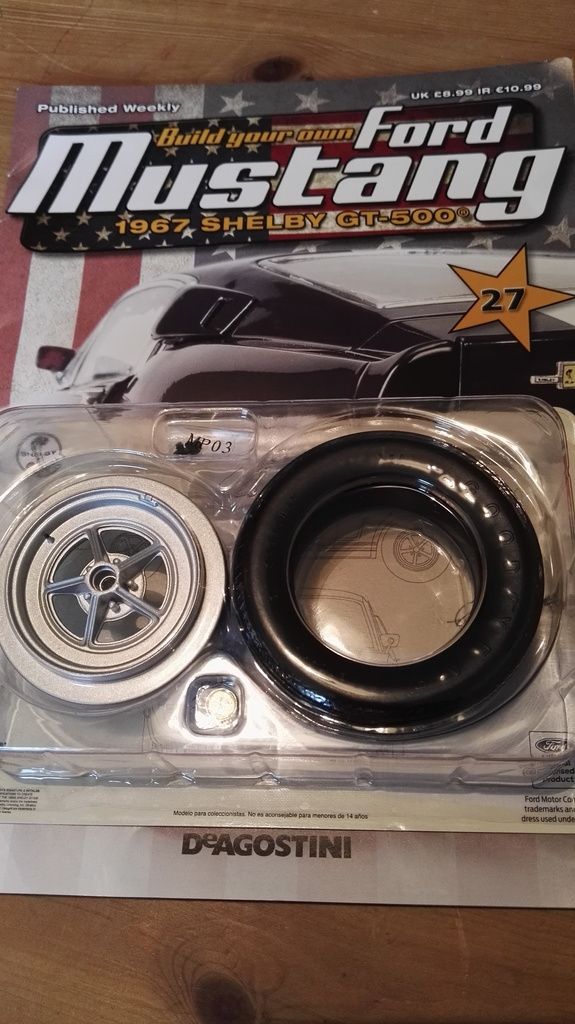 THE BUILDTo start this stage we just replicate issue 2, soaking the tyre in hot water and if your like me with the 2 previous wheels before, get your fingers burtnt HAHA. THE BUILDTo start this stage we just replicate issue 2, soaking the tyre in hot water and if your like me with the 2 previous wheels before, get your fingers burtnt HAHA.
Once the tyre is fitted onto the rim we move onto the brake drum supplied in issue 26, simply fit the drum to the wheel ensuring it is fitted to the location notch on the wheel, then simply offer it up to the rear axle and secure it with the supplied screws (careful not to over tighten the screws) and simply finish it off with that all important shelby logo wheel cover. HINTS*Soak the tyre in hot (not boiling) water to soften the tyre making it easier to get it onto the wheel, then allow it to cool again, being careful not to distort the shape.SUGGESTED MODIFICATIONSHighlight lettering on tyre in white HINTS*Soak the tyre in hot (not boiling) water to soften the tyre making it easier to get it onto the wheel, then allow it to cool again, being careful not to distort the shape.SUGGESTED MODIFICATIONSHighlight lettering on tyre in white
Paint wheels fully black or maybe white rim with blue spokes.ISSUE 28Ok to conclude this part of the build diary we have issue 28 and things are getting exciting again as the rear end of the mustang really starts to take shape.PARTS LISTLeft rear wheel arch
Screws
 THE BUILDVery simple step to conclude this section, just locate the posts on the rear wheel arch to the chassis and secure it with the 3 screws supplied, again another simple but satisfying part of the build THE BUILDVery simple step to conclude this section, just locate the posts on the rear wheel arch to the chassis and secure it with the 3 screws supplied, again another simple but satisfying part of the build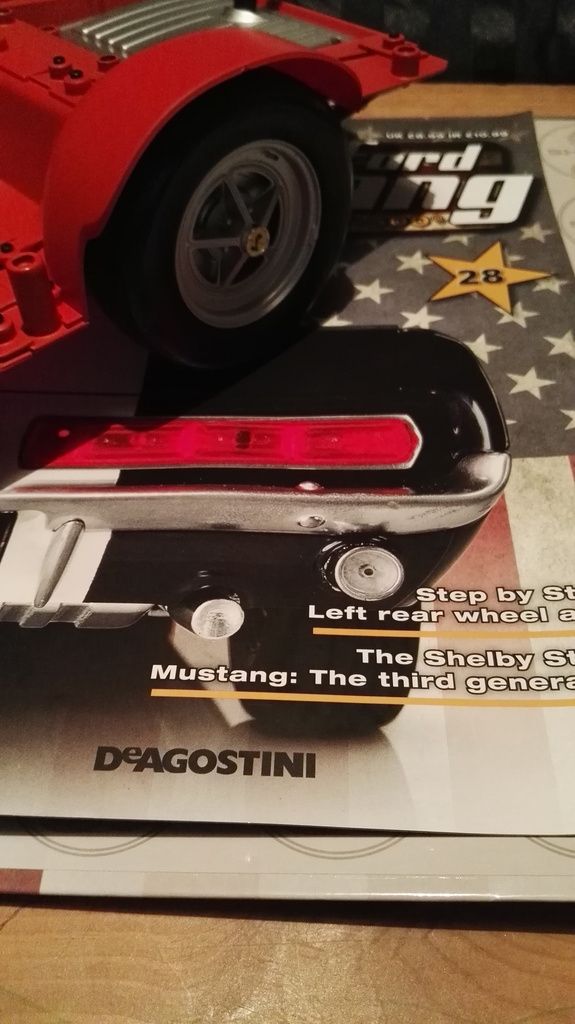 SUGGESTED MODIFICATIONSPaint the inside of the wheel arch black or white to give it that immaculate look. SUGGESTED MODIFICATIONSPaint the inside of the wheel arch black or white to give it that immaculate look. That concludes this months build I hope its enjoyable for everyone else as it is for me. I promised from the start i would keep it all original and its become a hard thing todo as new modified Mustang diarys with amazing detail have popped up (dont forget to follow them)
but im true to my word and will keep this build original (for now haha)
Ok thats me and will see you in a month
Happy modellingBuilt- Shelby Mustang, Lamborghini Huracan
Building-Spitfire, Redbull racing RB7, 3d printer, Honda CB750, Stage coach and Revell 1/400 Titanic
|
|
|
Rank: Pro Groups: Registered
Joined: 22/03/2016 Posts: 175 Points: 552 Location: Merseyside
|
Right on with my build, I am up to issue 29 an I am starting to see the sheer size of the model coming together and its big :-)
Issue 29 Parts List: Right Rear leaf springs
front and rear hinges pins
supporting plates
screws The Build: On this step we start with attaching the front and rear hinges onto the leaf spring using the supplied pins (pliers are advised for this) Then we install the leaf spring onto the main chassis along with the support plate using the supplied screws. Hint*
Ensure you identify the front and rear of the leaf spring as it can be easy to get it mixed up. also when fitting the leaf spring to the chassis, if you find it a bit fiddly like I did to get both hinges aligned, press slightly in the middle of the spring to aid fitting. also you might want to use pliers when putting the pins into the hinges. Issue 30 Parts list: Shock absorber hinge
shock absorber body
Shock absorber pin
Shock absorber piston
Left rear brake
Screws The build: As with issue 26 I found this one a bit of a fiddle. We start with mounting the shock and hinge together... simple enough with just a push pin.
Next remove the support plate for the leaf spring and we are ready to marry the shock to the chassis. the first time I did this step in issue 26 I found the explanation a tad confusing to follow. look carefully at the shock base and you will see it is slanted slightly and the shock must lean to the rear of the chassis. Long nose pliers or tweezers are a good help to fit in place here. we also get the right rear brake drum to be fitted later. Hint* Double and Triple check you have the shock absorber the right way around as it is so easy to get it the wrong way around. Modifications: Paint the brake drum maybe a matching blue to the car or maybe a couple more of issue 8 to do a rear disc/calliper conversion. Issue 31 Parts list: Wheel
Tyre
Shelby logo wheel cover
Screws The build: To do this stage we just replicate issues 2 and 27. we soak the tyre in hot water, and if your like me with the previous wheels, burn your fingers. Once the tyre is fitted onto the rim we move onto the brake drum supplied in issue 30, we simply fit the drum to the wheel ensuring it is fitted to the location notch on the wheel, then we simply offer it u to the rear axle and secure with the supplied screws. then we simply finish it off the main important thing which is the Shelby logo wheel cover. Hint* Soak the wheel in Hot (not boiling) water to soften making it easier to get onto the wheel, then allow to cool again, always being careful not to distort the shape. Modifications: Highlight the lettering on the tyre in white
Paint the wheels fully black and maybe white rim with blue spokes. Issue 32 Parts List: Right rear wheel arch
Screws The build: This step is a very simple step. all we do here is locate the posts on the rear wheel arch to the chassis and secure them with the 3 screws. Modifications: Paint the inside of the wheel arch black or white to give it that immaculate look. Issue 33 Parts list: Middle chassis
Screws The build: This step again is another very simple step, here you will need the rear chassis assembly you have already built, Align the middle and rear chassis and the holes should match up. Press them together from each side just to make sure they fit. Insert the 4 screws provided and tighten and you are done with this issue. Issue 34 Parts List: Front floor plan
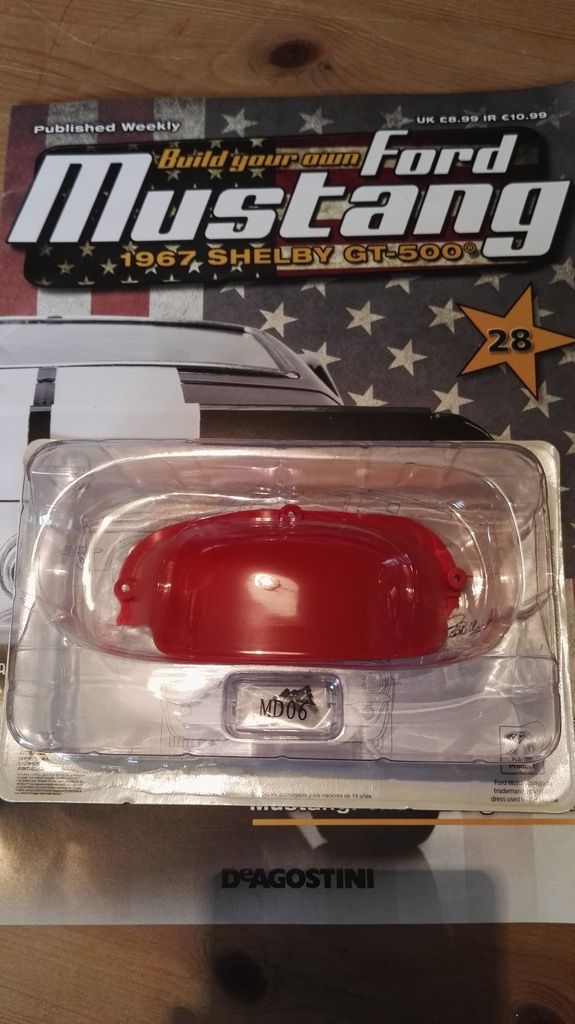
Screws The build: Again on this step you will need the rear chassis. With this issue you simply place the front floorplan into place, making sure it fits before putting the screws in. make sure you but the right screws into the corresponding holes otherwise it will not stay in place. I found that the MP03 screw didn't catch properly and had to change it for an MD06 screw which was longer. Once you have all screws in place then tighten. Hint* Make sure this piece fits into place before you tighten any screws. Issue 35 Parts list: Upper driveshaft
Lower driveshaft
Screws The build: Place the upper driveshaft and lower driveshaft together and place 3 screws in to hold it together, then you simply push the driveshaft into the differential cover making sure the 2 posts align with the holes and push it into place. Turn the whole Chassis over and screw the driveshaft to the chassis with the 2 screws provided. Issue 36 Parts List: Gearbox
Cross member
Screws The build: Place the gearbox over the end of the driveshaft making sure the 2 posts from the chassis fit into the gearbox. Turn the chassis over and tighten the 2 screws provided. Align the 2 posts on the cross member with the holes in the chassis, again turn the chassis over and tighten the screws and you are done. Well Again that is it for this section, that was 2 months worth up to date now, I am really enjoying this build and I am really happy now I am seeing it coming together now, I didn't realise how big it is going to be, I am looking forward to next months issues as it should give me a better idea of the overall size, but for now I hope you are enjoying my diary as much as I am. Built- Shelby Mustang, Lamborghini Huracan
Building-Spitfire, Redbull racing RB7, 3d printer, Honda CB750, Stage coach and Revell 1/400 Titanic
|
|
|
Rank: Super-Elite  Groups: Registered
Joined: 27/01/2014 Posts: 5,060 Points: 14,980
|
Looking good Steve. It certainly is getting big, not to mention heavy.
Your suggestion of a rear brake conversion sounds very interesting, isn't his something you are going to attempt?
|
|
|
Rank: Pro Groups: Registered
Joined: 22/03/2016 Posts: 175 Points: 552 Location: Merseyside
|
Hi dave yeah it certainly is gaining some weight isnt it. wonder how heavy the finished product is going to be. yeah i think the rear disc conversion would give it that subtle yet modern touch. just toying with ideas as i go along to be honest. but for now it stays original. Built- Shelby Mustang, Lamborghini Huracan
Building-Spitfire, Redbull racing RB7, 3d printer, Honda CB750, Stage coach and Revell 1/400 Titanic
|
|
|
Rank: Pro Groups: Registered
Joined: 22/03/2016 Posts: 175 Points: 552 Location: Merseyside
|
All most forgot to mention. As i didnt purchase the display case for the Mustang ive been toying with some ideas on how to display it. What do you think of a garage setting? Building a 2 post ramp to hold the Mustang with the bonnet/hood open. That sort of thing. Built- Shelby Mustang, Lamborghini Huracan
Building-Spitfire, Redbull racing RB7, 3d printer, Honda CB750, Stage coach and Revell 1/400 Titanic
|
|
|
|
|
I think that's a brilliant idea and certainly something different will be following your build (:-) Rgd Martyn Building ?
Completed. Soliei Royal . Sovereign of the Seas . Virginia . Scotland . San Felipe . Corel vasa , Santisima Trinadad X section , Vasa
Next Build ?
When sailors have good wine, They think themselves in heaven for the time. John Baltharpe
|
|
|
Rank: Pro Groups: Registered
Joined: 22/03/2016 Posts: 175 Points: 552 Location: Merseyside
|
Cheers Martyn it will certainly be different and finish it off nicely i think Built- Shelby Mustang, Lamborghini Huracan
Building-Spitfire, Redbull racing RB7, 3d printer, Honda CB750, Stage coach and Revell 1/400 Titanic
|
|
|
 Rank: Semi-Pro Level 1  Groups: Registered
Joined: 22/08/2016 Posts: 56 Points: 164 Location: Tyler, Texas
|
Looking good Steve. Current DeAgostini Model Space Builds:
Millennium Falcon; Sovereign of the Seas, Ford Mustang Shelby
Current "Other" Model Builds:
Bandai 1/12 C-3PO (Japan Import); Revell 1/48 X-Wing "Master Series"
On The Shelf Waiting to Be Started:
Revell 1/72 Millennium Falcon "Master Series"; Bandai 1/12 Boba Fett; Bandai 1/72 Y-Wing Star Fighter; Bandai 1/72 A-Wing Starfighter
|
|
|
 Rank: Master  Groups: Registered
Joined: 07/07/2015 Posts: 1,292 Points: 3,928 Location: Allentown PA
|
Little jealous you guys get the shirt. I been toying with the idea of a garage set up as well. Lots of stuff in 1/10 something that I may build a garage dio and park car in front of it. We're you planning on using 1/10 parts or building your own 1/8 garage scale parts?
DeAgostini kit builds:
Millennium Falcon: 18% Complete
Shelby GT-500: 28% Complete
Thunderbird 2: 13.75% Complete
|
|
|
Rank: Pro Groups: Registered
Joined: 22/03/2016 Posts: 175 Points: 552 Location: Merseyside
|
Metal Mech wrote:Little jealous you guys get the shirt. I been toying with the idea of a garage set up as well. Lots of stuff in 1/10 something that I may build a garage dio and park car in front of it. We're you planning on using 1/10 parts or building your own 1/8 garage scale parts? Do you get something different in place of the shirt? I was thinking of building my own scale parts but at the minute its just an idea will probably draw something up and go from there  Also following your build I think its a great idea the museum display, gives others a real insight of how it all comes together Built- Shelby Mustang, Lamborghini Huracan
Building-Spitfire, Redbull racing RB7, 3d printer, Honda CB750, Stage coach and Revell 1/400 Titanic
|
|
|
Rank: Master Groups: Registered
Joined: 07/07/2015 Posts: 1,292 Points: 3,928 Location: Allentown PA
|
usersteve83 wrote:Metal Mech wrote:Little jealous you guys get the shirt. I been toying with the idea of a garage set up as well. Lots of stuff in 1/10 something that I may build a garage dio and park car in front of it. We're you planning on using 1/10 parts or building your own 1/8 garage scale parts? Do you get something different in place of the shirt? I was thinking of building my own scale parts but at the minute its just an idea will probably draw something up and go from there Also following your build I think its a great idea the museum display, gives others a real insight of how it all comes together Nope nothing in place of the shirt. Appreciate the comment about my build. Been wanting to do a display for them for a while now and the whole "different each month" thing is in spirit with how they do there displays at the museum. Been following yours and been taking notes for when I actually get to start building. Really appreciate the time your taking for you build diary. I look forward to what you come up with for display pieces. I am not great at scratch building but it looks like the path I may need to go down for 1/8th scale.
DeAgostini kit builds:
Millennium Falcon: 18% Complete
Shelby GT-500: 28% Complete
Thunderbird 2: 13.75% Complete
|
|
|
Rank: Pro Groups: Registered
Joined: 22/03/2016 Posts: 175 Points: 552 Location: Merseyside
|
I think its a great idea people will be able to apprieciate the level of effort that goes into these builds rather then just seeing the finished product. My scratch building skills will certainly be tested if i go down that route but its all trial and error  Glad your enjoying the build hopefully another update will follow soon Happy modeling Built- Shelby Mustang, Lamborghini Huracan
Building-Spitfire, Redbull racing RB7, 3d printer, Honda CB750, Stage coach and Revell 1/400 Titanic
|
|
|
Rank: Pro Groups: Registered
Joined: 22/03/2016 Posts: 175 Points: 552 Location: Merseyside
|
Welcome back everyone its time for another month update. 
ISSUE 37
PARTS LIST Front chassis
Fixing screws 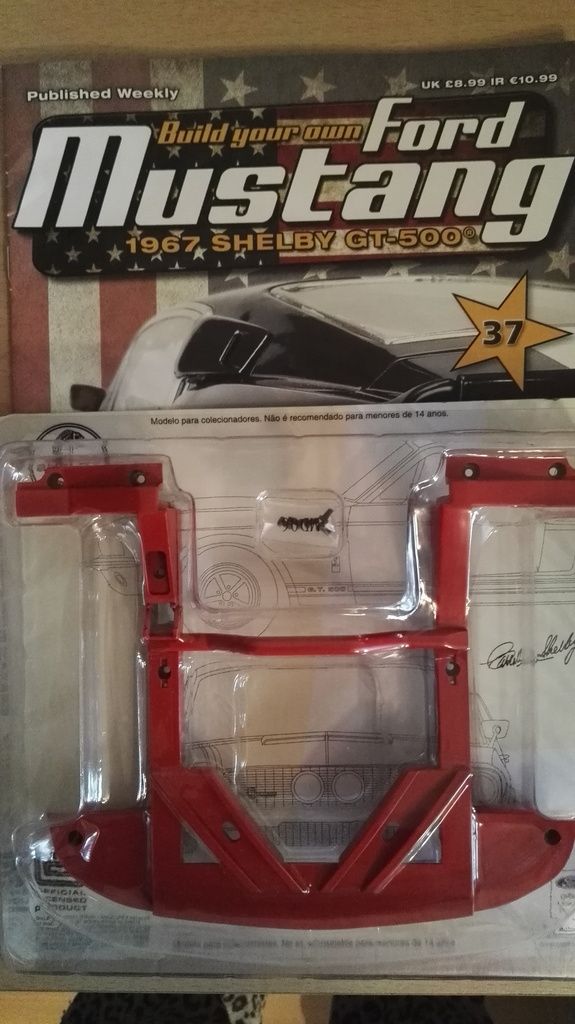 THE BUILD For this step you will need the rest of the chassis from earlier stages.
Line up the 4 posts and simply tighten the MD06 screws provided. Thats it. Job done..
Not a huge update I know but the satisfaction factor here is we now have the full length of the chassis and WoW it is impressively BIG and the shear weight of the mustang this far speaks for the quality of the supplied parts.
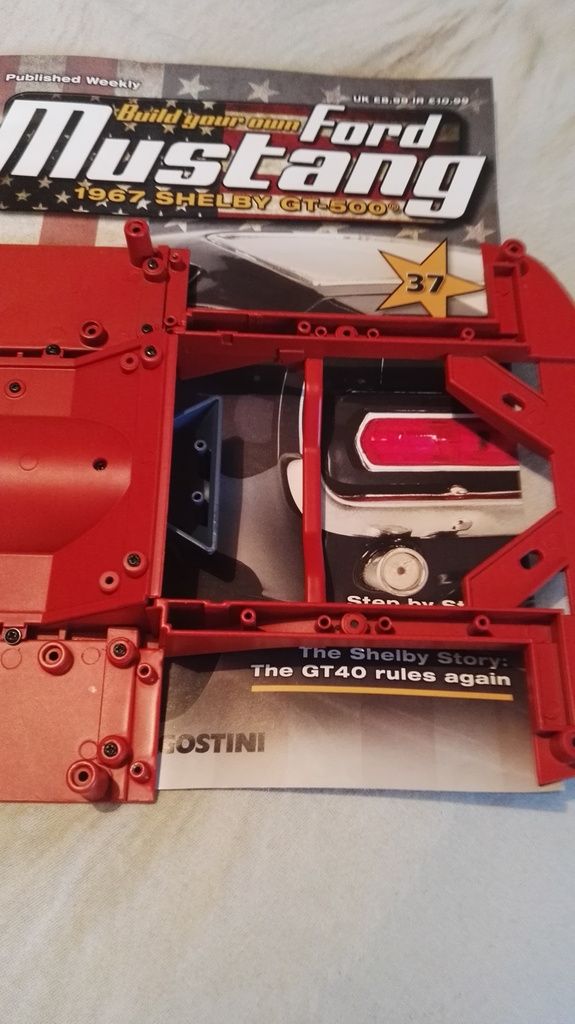 No Mods, Hints or tips here. A very straight forward stage ISSUE 38 We start the assembly of the front end. Just to add the magazines supplied with the Shelby still carry a great informative story and im certainly being educated along the way. PARTS LIST Left and Right fender splash panels
Fixing screws 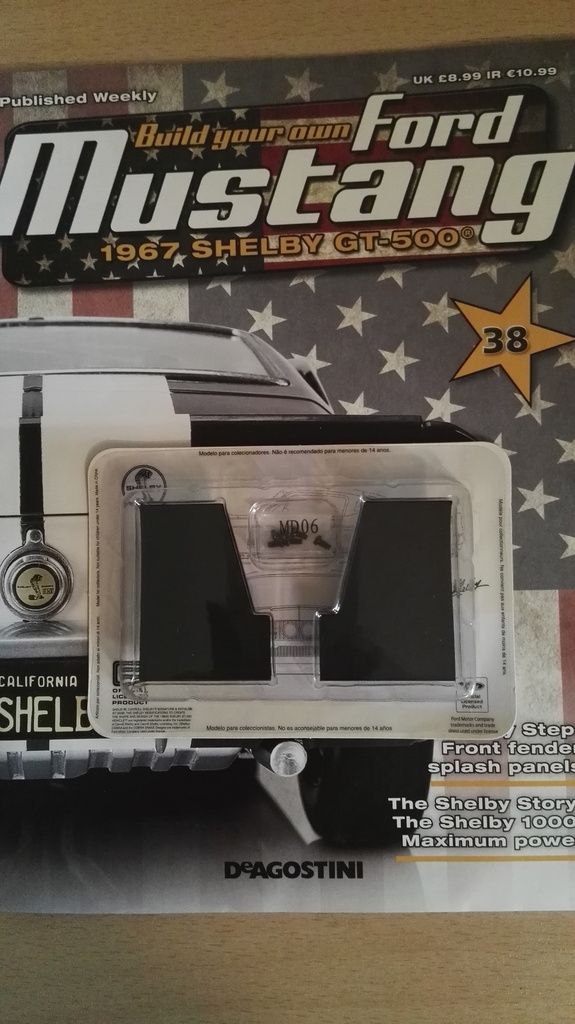 THE BUILD Align the 2 posts on the chassis to the recessed areas on the splash panels (ensure you have them on the correct side) then simply button up with the 2 MD06 screws supplied. A very simple stage again but another part of the Mustang comes to life 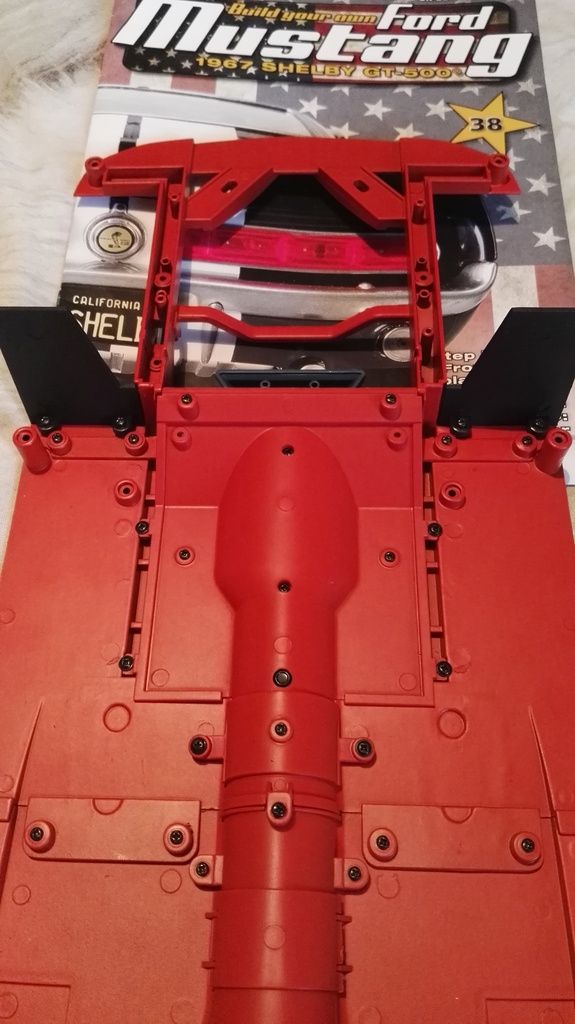 Again no mods here and the only real tip would be to make sure you have the splash panels on the correct side ISSUE 39 This issue has us starting to assemble the mechanics of the steering so you will also need the front wheels supplied in issues 8 and 2 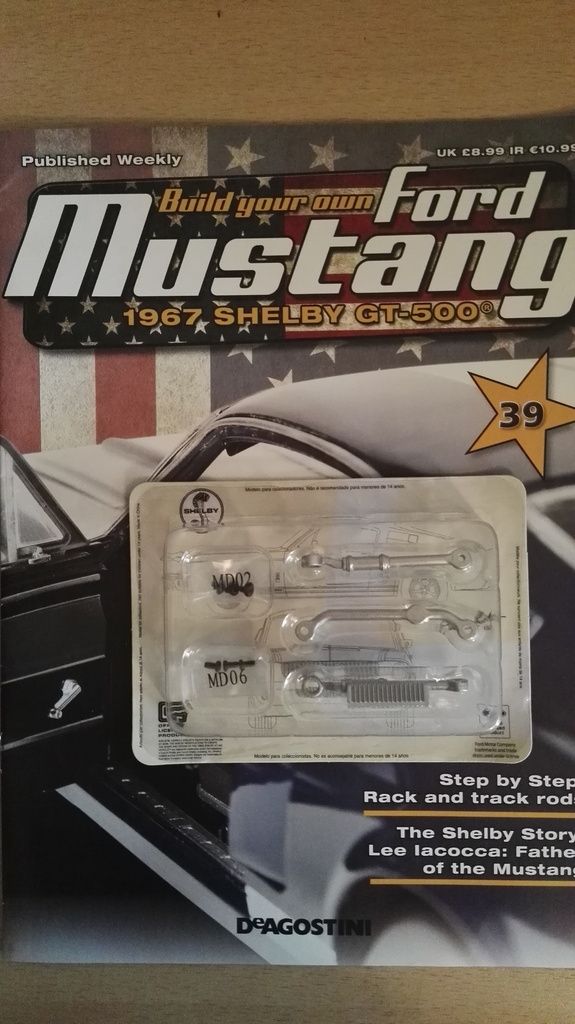 THE BUILD Align the the two holes from the central and the right track rods and secure with an MD06 screw but be careful not to over tighten the screw as these are moving parts. I found if you tighten it all the way then back it off around a quarter of a turn it gives plenty of play.
Align the hole at the other end of the track rod with the indicated hole in the rack, double check you have the parts the right way round then secure with a MD06 screw again careful not to over tighten as this also need room to move.
Now we align the track rod with the corrosponding post on the wheel and secure with an MD02 screw. Now align the post on the rack with the other wheel and again tighten with an MD02 screw
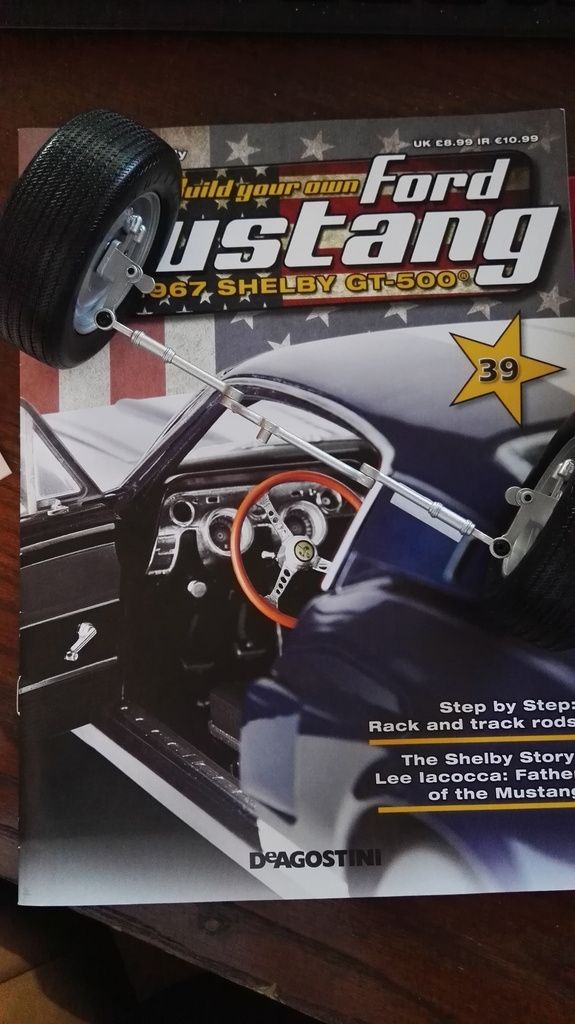 HINT* make sure you have the assembly the correct way round. very easy to get this wrong. Be sure not to over tighten the screws allowing the assembly to have movement
SUGGESTED MODS I would personal paint the rods and rack in black ISSUE 40 Ok onto the last issue for this month and at the end of this we will be 40% through the build and i can still honestly say im impressed with the parts supplied and how the Mustang is really starting to take shape.
Anyone still on the fence about investing in this build I would definatly say go for it. you wont be dissappointed
PARTS LIST Suspension arm mounts
Steering box
Steering cylinder
Screws 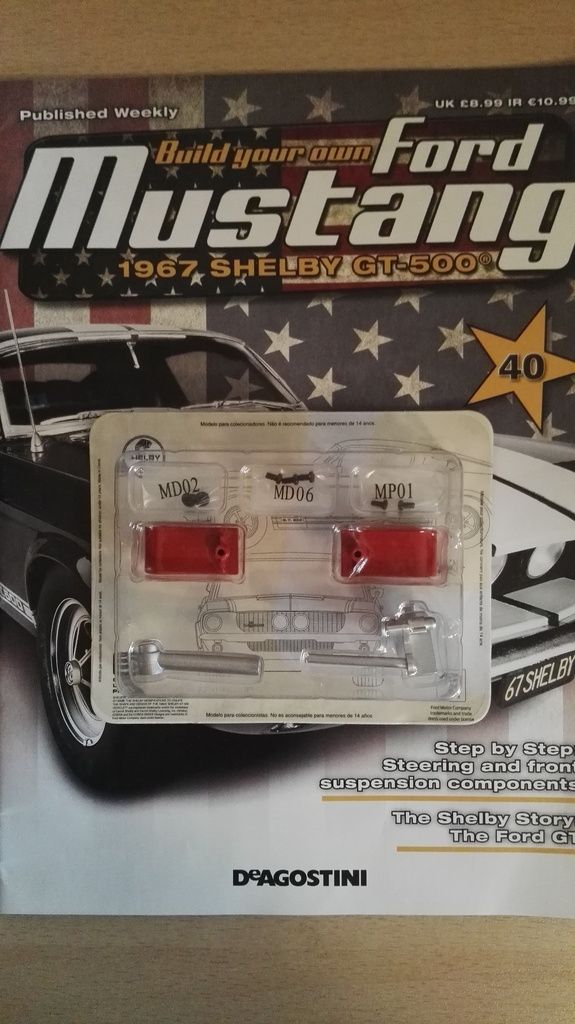 THE BUILD For this section you will need the chassis.
Turn the chassis over so your working on the underside and align the suspension arm mounts with the corrasponding holes on the chassis and secure with 4 MD06 screws.
Next we fit the steering box onto the chassis.
Place the steering box into the recess on the chassis making sure the rod is pointing inwards. secure with the MP01 screw provided.
Next retrieve the front wheels and track rod assembly from earlier, Take the steering cylinder and fix this onto the central track rod using an MD02 screw. Again be careful not to overtighten as this part also needs to move freely. 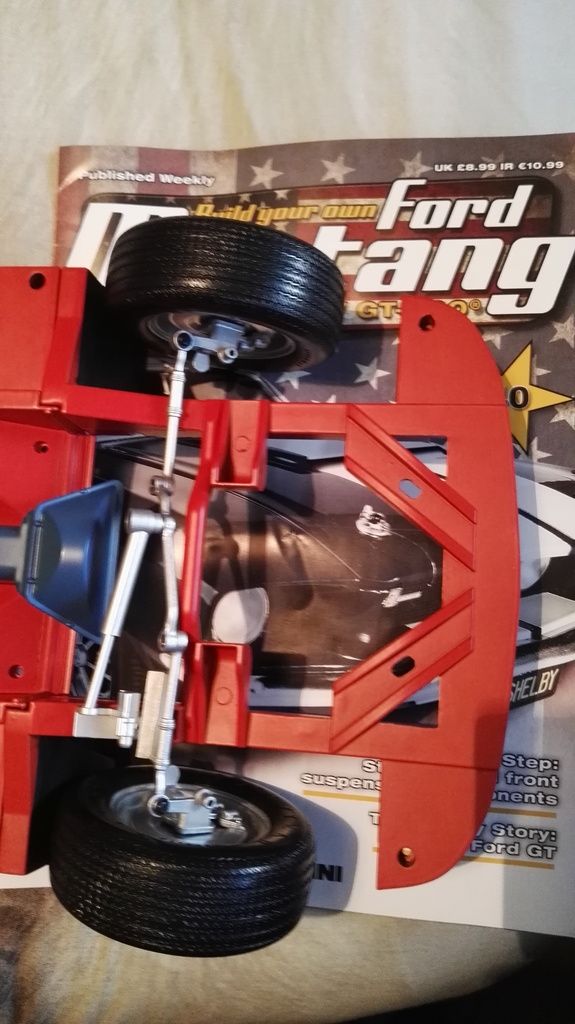 SUGGESTED MODS Paint steering box and cylinder Black
Thats the end of another month I hope those following are enjoying the build diary as much as I am enjoying the build.
Built- Shelby Mustang, Lamborghini Huracan
Building-Spitfire, Redbull racing RB7, 3d printer, Honda CB750, Stage coach and Revell 1/400 Titanic
|
|
|
Rank: Super-Elite Groups: Registered
Joined: 27/01/2014 Posts: 5,060 Points: 14,980
|
Nice update, you aren't kidding when you say wow at seeing the full size, you know that these 1/8 scale kits are big but it's not until you get the complete chassis that you really appreciate that size 
|
|
|
Rank: Pro Groups: Registered
Joined: 22/03/2016 Posts: 175 Points: 552 Location: Merseyside
|
Cheers Dave. Im looking forward to dropping the body on, that really will throw it all into perspective Built- Shelby Mustang, Lamborghini Huracan
Building-Spitfire, Redbull racing RB7, 3d printer, Honda CB750, Stage coach and Revell 1/400 Titanic
|
|
|
Rank: Pro Groups: Registered
Joined: 22/03/2016 Posts: 175 Points: 552 Location: Merseyside
|
Welcome back we have now finally got this months issues after a little postal delay. Im finding it harder and harder to keep the Mustang all original as promised, after looking around at some of the fantastic detailed work in the other builds im following Issue 41PARTS LIST:suspension arm pins Stabiliser bar Screws 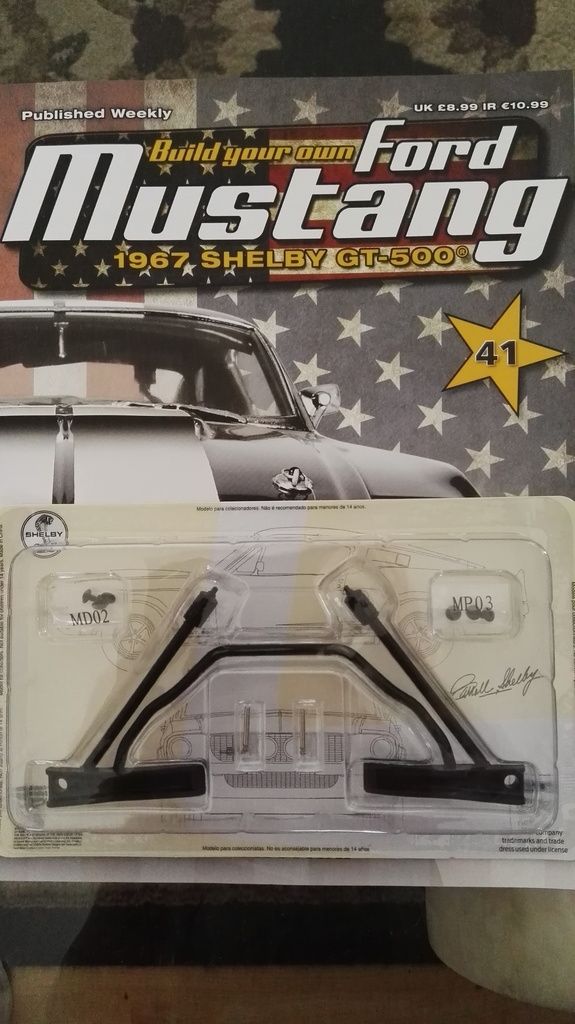 THE BUILD: THE BUILD:Ok we start here with placing the suspension arms into the suspension arm mounts from the previous issue. Then align the holes in the suspension arms the secure with a push pin. I found it a little bit of a fiddle to get the holes aligned but a little fiddle and a push on the pin and its home. Next we insert the post at the from of the stabaliser bar into the mounting holes on the chassis and simply secure with the 2 MP03 screws provided. For the final step we turn the chassis back over and get the front wheel assembly from earlier. Now we need to place the steering cylinder over the steering box rod at the same time fitting the steering rack into place, the we just attach the two front wheels to the suspension arms with the 2 MD02 screws. Thats this stage complete  HINTS/TIPS/MODS HINTS/TIPS/MODSMake sure you have the front wheel assembly the correct way around, seems very easy to get it the wrong way around. If like me and you do get it the wrong way round a bit of head scratching and wondering why it wont fit you soon learn to just flip it over the other way ISSUE 42PARTS LIST:A-Frame upper arms Upper arm mounts Upper arm pins Screws 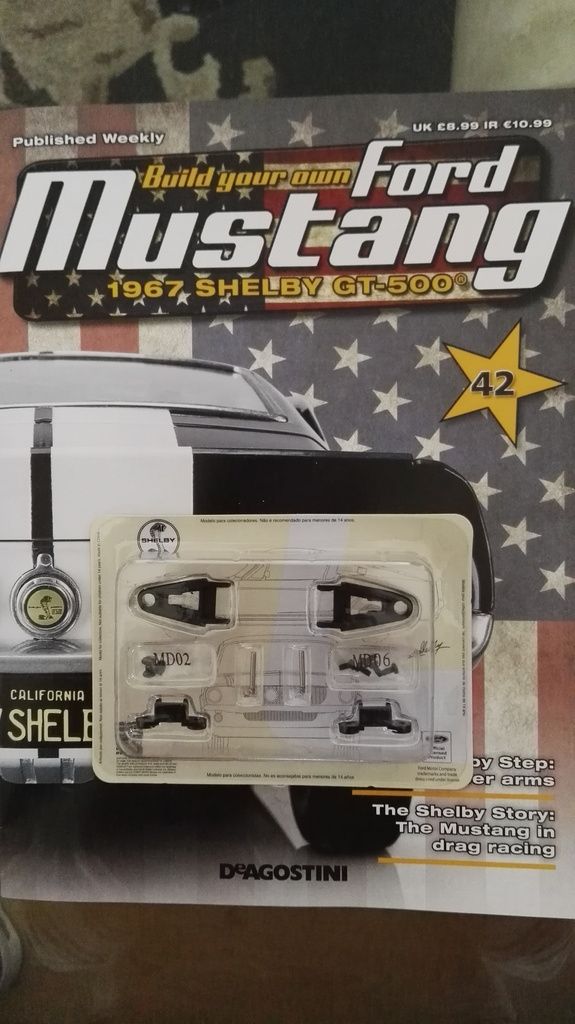 THE BUILD: THE BUILD:Assemble the A frame upper arms - nice and simple, just a push pin, now attach to the chassis via 2 MD06 scres and 1 MD02 screw secures the front wheels in place. Once completed you should be able to turn the front wheels nice and smoothly in unison 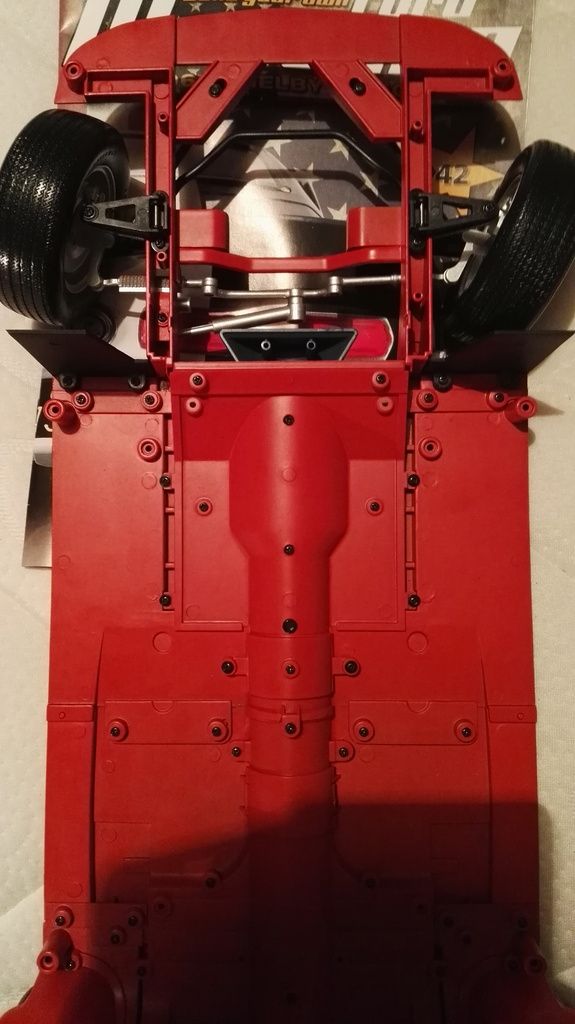 HINT/TIPS/MODS HINT/TIPS/MODSNo mod ideas yet for this stage ISSUE 43PARTS LIST: Exhaust pipes Silencer upper halves Screws 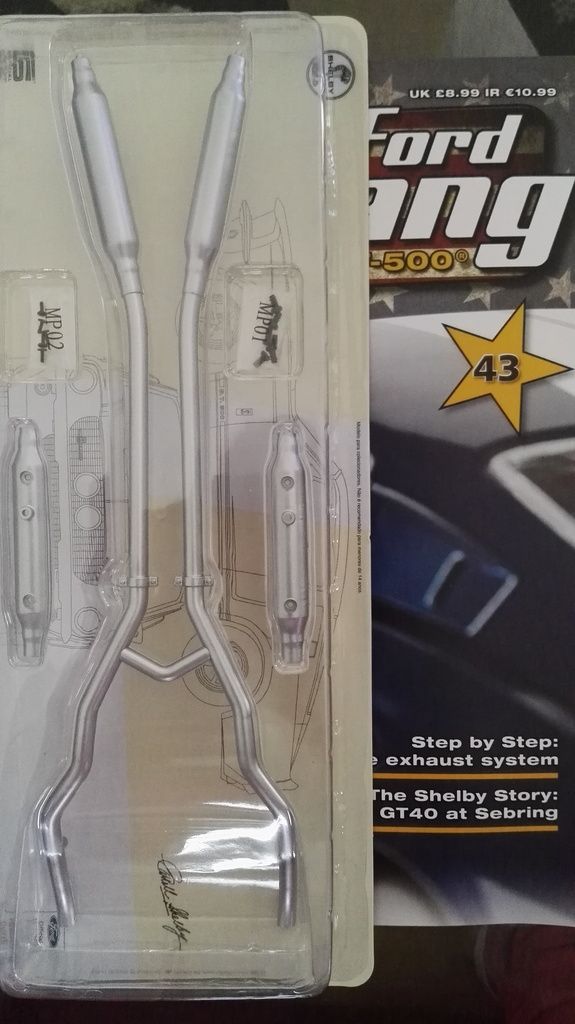 THE BUILD: Here we attach the two rear silencer halves to the rest of the exhaust assembly using 4 MP02 screws then marry it to the chassis using the 4 MP01 screws provided, Nice and simple , Job complete 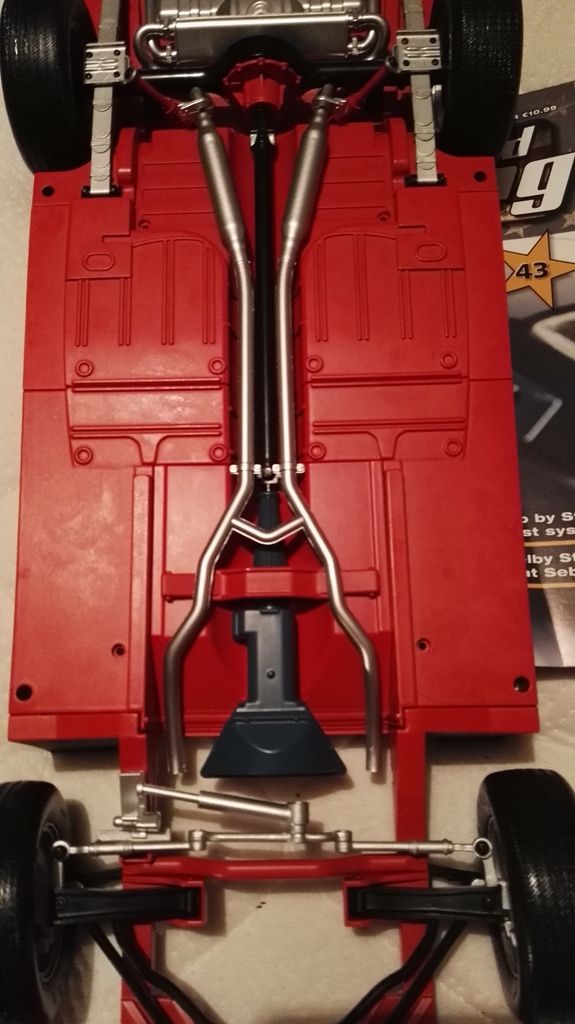 HINTS/TIPS/MODS HINTS/TIPS/MODSSmooth out the join lines of the silencer halves. Also here id add a little dab of glue at the rear silencers to help it sit better with the rear exhast system ISSUE 44PARTS LIST:Front floor Gears shift Screws 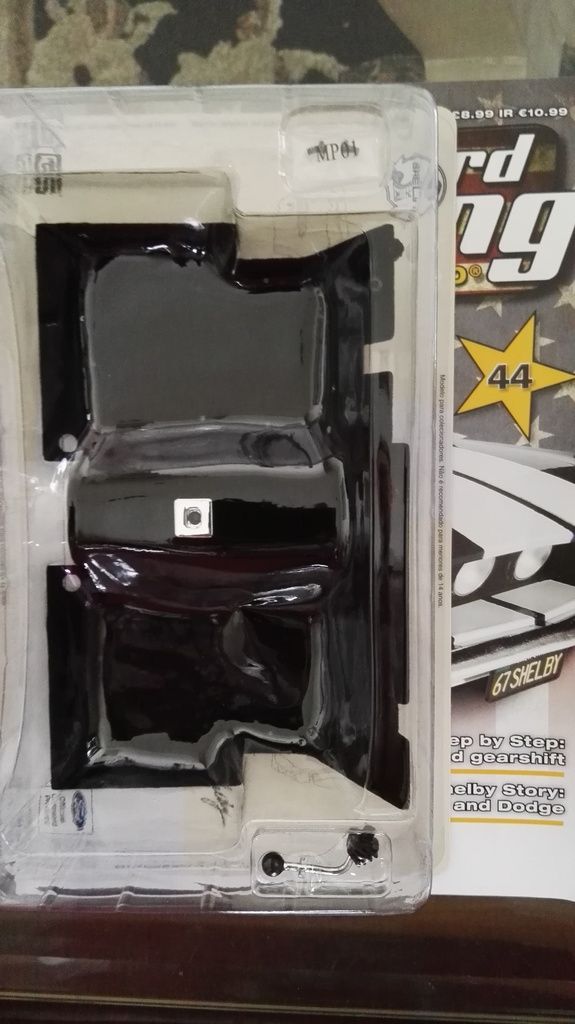 THE BUILD: THE BUILD:We start work here on the interior the front floor and gear stick (shifter) The floor here has a nice effect to image the carpet on the real thing. All we have to do is attach the gear stick with 1 MP01 screw, Simple enough job. Not sure here if it is just the part i recieved but in the magazine it shows the gear knob with the nicely detailed numbers but the one I have is blank. Shame really 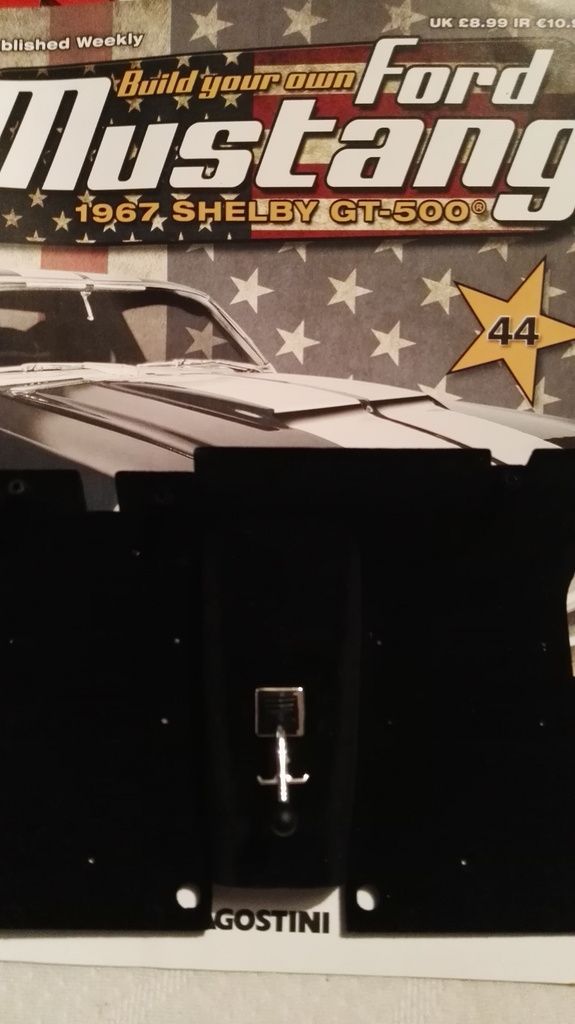 HINTS/TIPS/MODS Put the detailed numbers on the gear knob, Now ive seen them I want them on there Well thats it for this month hope you enjoyed this months work as much as I did Built- Shelby Mustang, Lamborghini Huracan
Building-Spitfire, Redbull racing RB7, 3d printer, Honda CB750, Stage coach and Revell 1/400 Titanic
|
|
|
|
Guest
|
 UK
UK

