|
|
 Rank: Semi-Pro Level 2    Groups: Registered
Joined: 08/12/2016 Posts: 87 Points: 254 Location: Fife
|
Great to see one of these again. This was my first DeAg partwork. (Never finished due to a house move) But where on earth did you dig this up from??? I have been hunting for this for several years now but never seem to be able to find a complete set :( Great work so far though, look forward to seeing it progess 
|
|
|
 Rank: Pro Groups: Joined: 24/08/2009 Posts: 48,827 Points: -13,348
|
forgotmylogin wrote:But where on earth did you dig this up from??? I have been hunting for this for several years now but never seem to be able to find a complete set :( There are lots of R/C Spitfire kits out there, the ones from YT International are some of best there is http://www.ytinternational.co.uk/warbird.htm
|
|
|
Rank: Pro Groups: Joined: 24/08/2009 Posts: 48,827 Points: -13,348
|
forgotmylogin wrote:But where on earth did you dig this up from??? I have been hunting for this for several years now but never seem to be able to find a complete set :( There are lots of R/C Spitfire kits out there, the ones from YT International are some of best... http://www.ytinternational.co.uk/warbird.htm
|
|
|
Rank: Administration      Groups: Registered, Forum Support Team, Administrators, Global Forum Support Team, Moderator, Official Builds Joined: 09/11/2012 Posts: 8,388 Points: 24,255 Location: East midlands
|
forgotmylogin wrote:Great to see one of these again. This was my first DeAg partwork. (Never finished due to a house move) But where on earth did you dig this up from??? I have been hunting for this for several years now but never seem to be able to find a complete set :( Great work so far though, look forward to seeing it progess You don`t have to look too hard.  Check out this link. Full Deag RC SpitfireRegards delboy271155 (Derek) COME BACK GUY FAWKES "YOUR COUNTRY NEEDS YOU"
|
|
|
Rank: Pro Groups: Registered, Moderator Joined: 20/01/2013 Posts: 161 Points: 455 Location: Celle, Germany
|
Wow...Really nice build Shaun  Der gesamte Baubericht und alle Fotos unterliegen dem Urheberrecht. Verwendung außerhalb dieses Forums bedürfen schriftlicher Genehmigung. © Levelord
@work: X-Wing,Dodge Charger, MIG-29
Completed: McLaren MP4-23, Hummer H1, RedBull RB7, Easy Rider Bike, Jaguar E-Type, Porsche 911, Ferrari F2004, AMG DTM Mercedes, Ford Mustang, R2-D2, C57, Modellbahn,Rossi Bike,VW Käfer 1303,VW T1 Samba Bus
|
|
|
Rank: Pro Groups: Registered
Joined: 08/02/2015 Posts: 274 Points: 812 Location: Malmesbury
|
Hi everyone and thank you for your comments. Forgotmylogin as Derek has said i purchased as a complete kit from eBay about 18 months ago. I also have a second complete kit which I purchased about 6 months ago on eBay which I was originally going to use for spare parts buck have since decided to build both. This one will use the stock Leo 40 engine and the second I will convert to electric and will have a sound generator onboard with the sound of the merlin engine running. Tomick, I will be filling all the joints and sanding before applying the heat shrink covering as you suggested. I have also decided not to use the stock engine cowling and have purchased a replacement on made from fibreglass. I have been busy the last few weeks and hope to continue with this build and also make a start on my build of the year in the next few days. Regards Shaun Building-RC spitfire
Build- titanic,Skyrider drone, solar system, T72 tank
|
|
|
Rank: Pro Groups: Registered
Joined: 08/02/2015 Posts: 274 Points: 812 Location: Malmesbury
|
Time for update 20. Parts supplied with this issue are three 6x15x300mm balsa batons, two 6x100x225mm balsa sheets and cutting template. 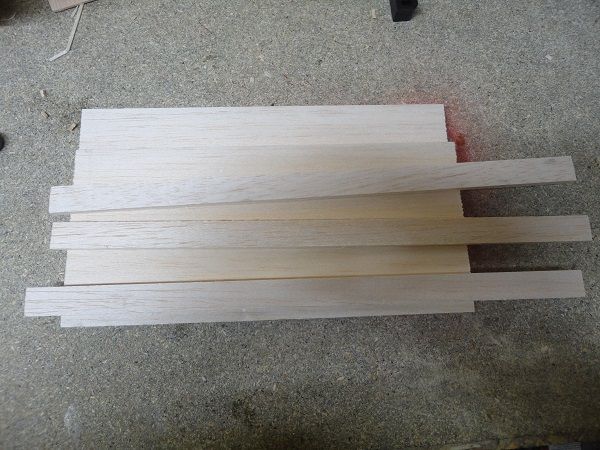 First underside of the tail section of the fuselage is sanded and then 2mm sheets of balsa supplied in issue 18 and glued to this section. Theses are then trimmed and sanded. I will finish filling and sanding the fuselage just before I fit the heat shrink skin covering. 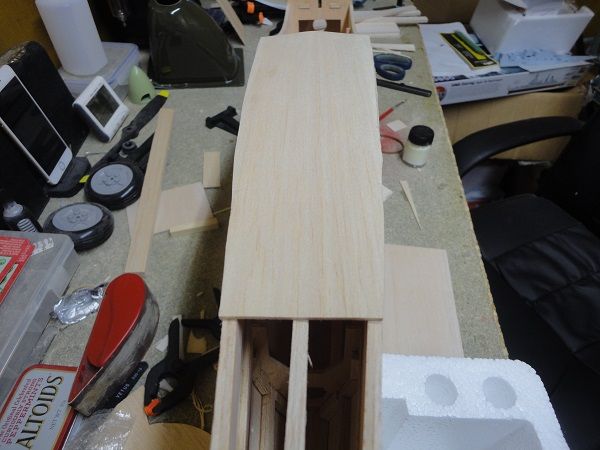 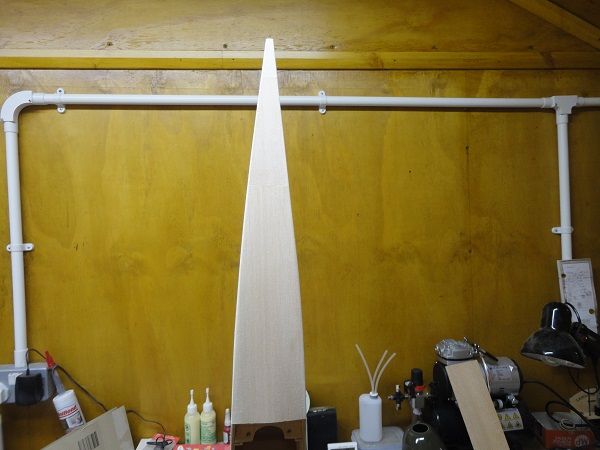 Next I used the template to mark and cut two lengths of balsa baton. These are then glued and left to dry. 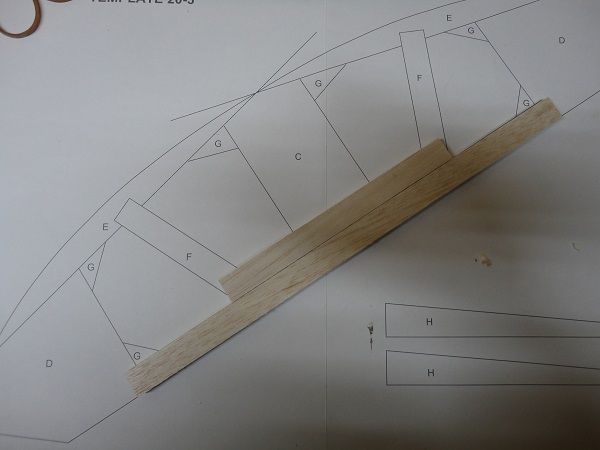 Next one of the balsa sheets is cut into two 100x85mm pieces, these then have the corners notched to fit correctly over the template. These parts are then glued. 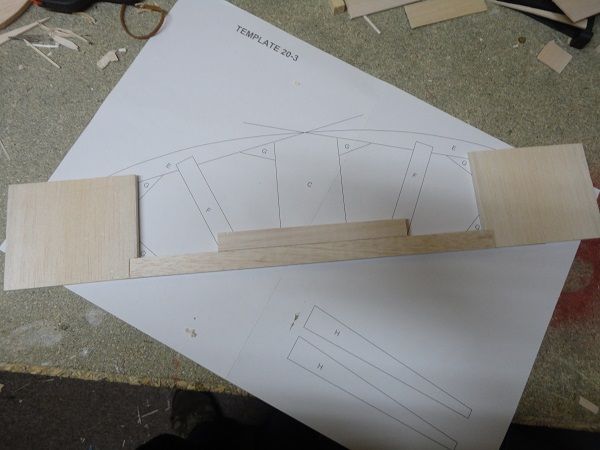 After this the second balsa sheet is cut into one 55x85mm piece and two 22x225mm piece. The 55x85mm piece is then glued into place and the two 22x225mm parts are used to help mark where to cut. 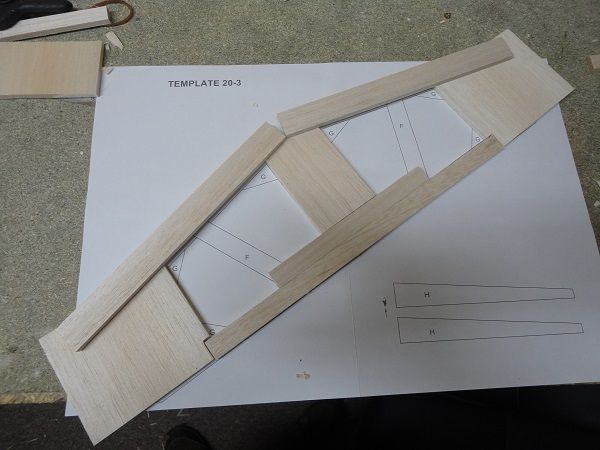 These lines are then cut and the two parts glued into place. Next the template is used to mark to lengths of 6x15mm balsa baton to be used for reinforcements, these are then glued into place using the template for the correct location. 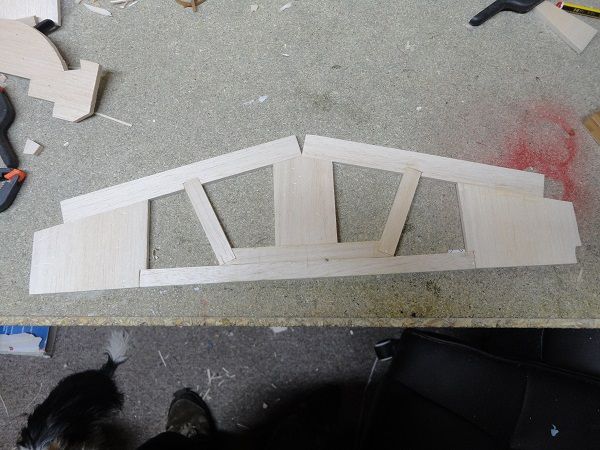 Next I cut the template down to size and glued to the top of the horizontal stabiliser and then used to cut around. 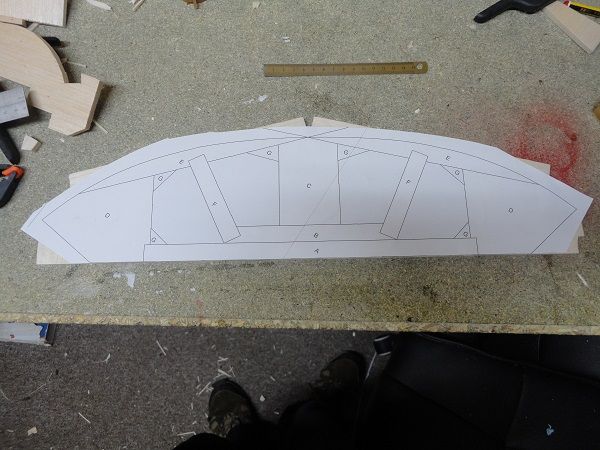 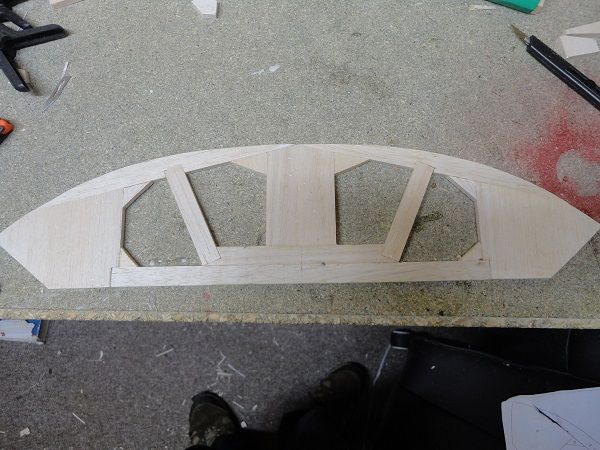 The final step is to cut and glue six reinforcements into each of the corners. 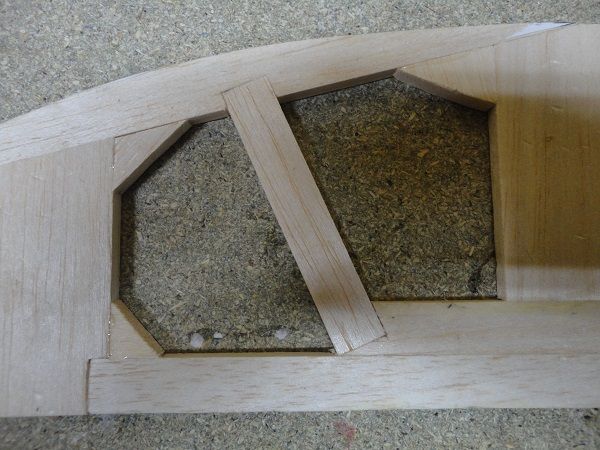 That's finishes the horizontal stabiliser for now and is all for this update. Hope you are all enjoying my build as must as I am enjoying building it. Regards Shaun P.S. I am have had a bit of problem with my Mantau Titanic kit I was going to use for my build of the year. I few parts for the hull are broken. I am hoping to get replacement parts in a week or two at must. If I don't have them by the end of January I will probably use my 1/144 billing boat Titanic I received last year for free as my build. Building-RC spitfire
Build- titanic,Skyrider drone, solar system, T72 tank
|
|
|
Rank: Administration Groups: Registered, Forum Support Team, Administrators, Global Forum Support Team, Moderator, Official Builds Joined: 09/11/2012 Posts: 8,388 Points: 24,255 Location: East midlands
|
Hi Shaun, Good to see you progressing. You are putting together some neat and precise work with this one. Regards delboy271155 (Derek) COME BACK GUY FAWKES "YOUR COUNTRY NEEDS YOU"
|
|
|
 Rank: Super-Elite  Groups: Registered
Joined: 31/05/2010 Posts: 5,679 Points: 17,011 Location: Wiltshire
|
Shaun That looks like a very complex part of the build but your end result is very neat and tidy. Very well done. Happy Modelling
BUILDING: Hachette Spitfire Mk 1A, Constructo Mayflower
SUBSCRIPTION COMPLETE (Awaiting building): USS Constitution, Sovereign of the Seas, 1:200 Bismarck (Hachette)
COMPLETED: Porsche 911, E-Type Jaguar, Lam Countach
|
|
|
Rank: Pro Groups: Registered
Joined: 08/02/2015 Posts: 274 Points: 812 Location: Malmesbury
|
Thanks Derek and Tony for your kind words, this part of the build was very complex and I have about 3hour in this part along. All together I think I have about 30 hours in this build to date including the repair. Regards Shaun Building-RC spitfire
Build- titanic,Skyrider drone, solar system, T72 tank
|
|
|
|
|
Another first class update Shaun...  .. Really enjoying your build.... Regards Alan
|
|
|
Rank: Pro Groups: Registered
Joined: 08/02/2015 Posts: 274 Points: 812 Location: Malmesbury
|
Thank you Alan for your kind words. Update 21 Parts supplied in issue 21 are 2 6x15x300mm balsa batons, 2 6x100x225mm balsa sheets, elevators linking rod and elevator cutting template. 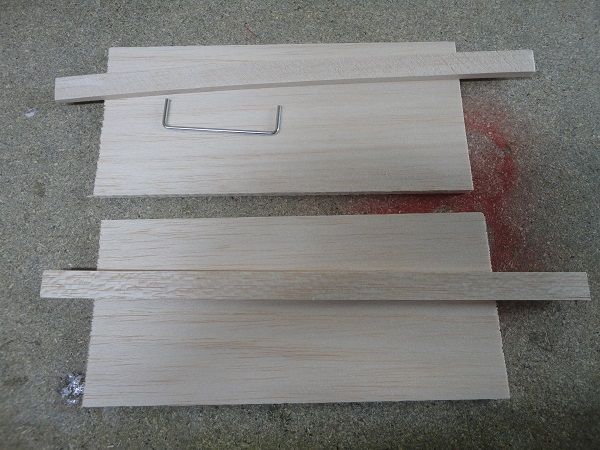 As you can see in the picture above the top balsa baton is bent, I had to order a replacement from ebay as my attempts to straighten it where unsuccessful. The first stage in this issue is to cut one of the balsa sheets into 2 60mm wide and 2 40mm wide pieces. 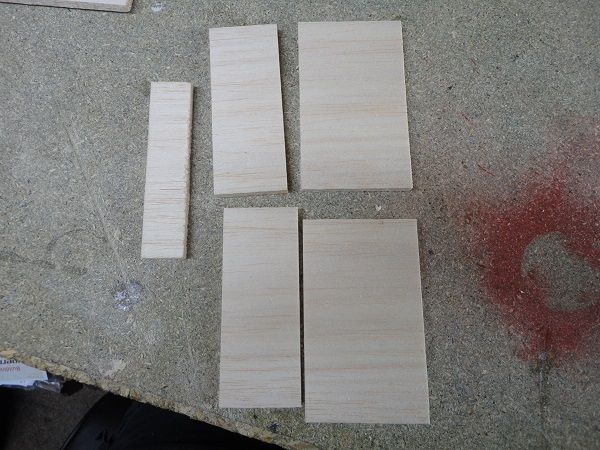 Next the other sheet is cut into 2 35x225mm pieces and 2 30x60mm pieces. 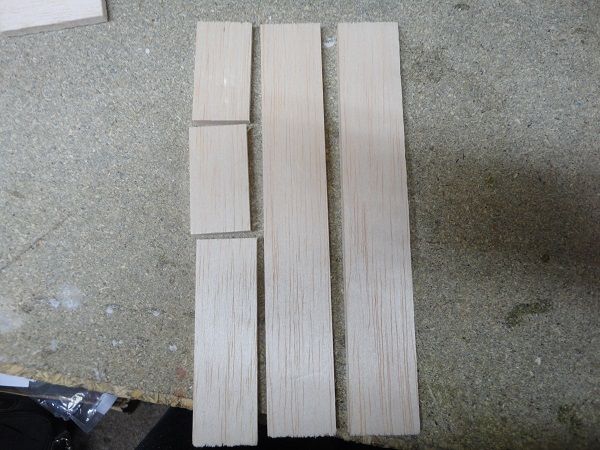 Next the two balsa batons are cut to length using the cutting template and the 100mm and 60mm wide pieces glued into place again using the template to get the correct alignment.  Once the glue has dried the 30x60mm pieces are glued into place.  Next the piece is marked using the template and cut.  The 35x225mm pieces are now glued into place. 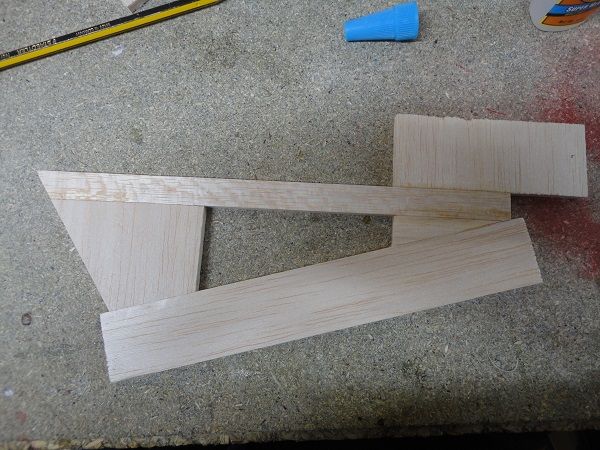 Next the corner reinforcements are cut and glued into place. 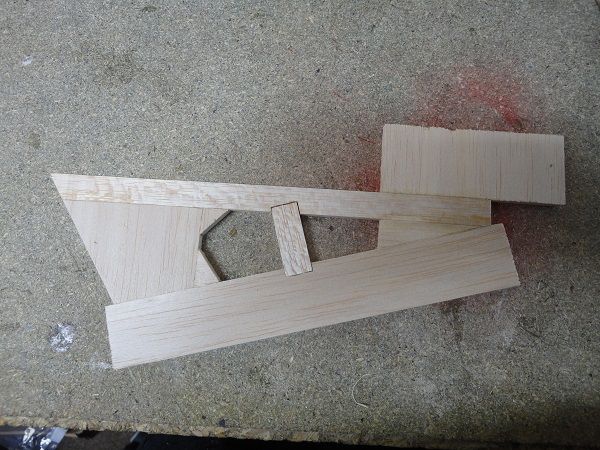 Next the templates are cut out and glued to the top of the parts assembled. Again before cutting the templates photocopies where made. 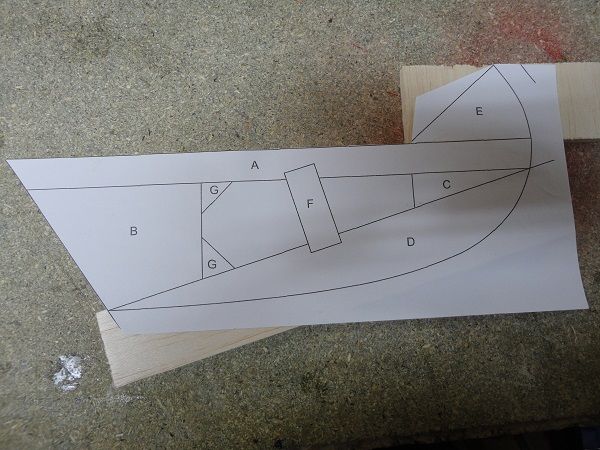 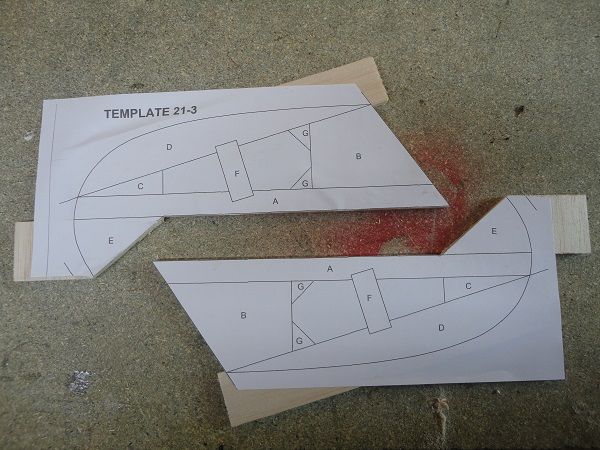 Next using my newly purchased scroll saw I cut out the parts. 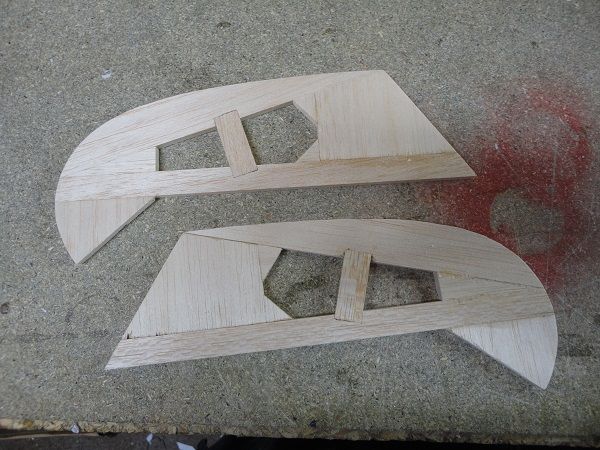 The final step is to sand down the two elevators and horizontal stabiliser and round the egdes. 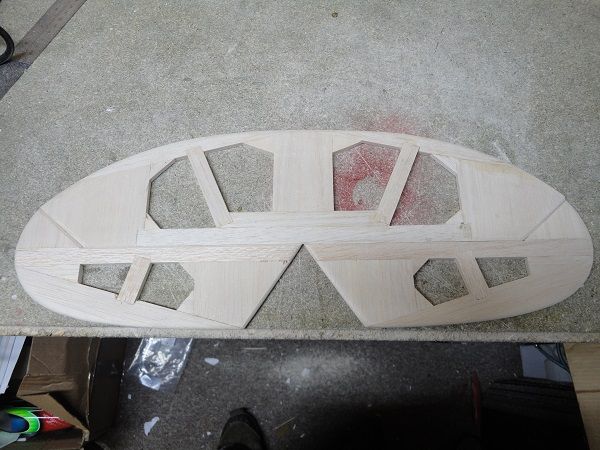 That's all for this update. Regards Shaun Building-RC spitfire
Build- titanic,Skyrider drone, solar system, T72 tank
|
|
|
Rank: Administration Groups: Registered, Forum Support Team, Administrators, Global Forum Support Team, Moderator, Official Builds Joined: 09/11/2012 Posts: 8,388 Points: 24,255 Location: East midlands
|
|
|
|
Rank: Super-Elite Groups: Registered
Joined: 31/05/2010 Posts: 5,679 Points: 17,011 Location: Wiltshire
|
Very skilful bit of building i must say. Its all gone together so nice and tidy. Hope it all continues to go well. Happy Modelling
BUILDING: Hachette Spitfire Mk 1A, Constructo Mayflower
SUBSCRIPTION COMPLETE (Awaiting building): USS Constitution, Sovereign of the Seas, 1:200 Bismarck (Hachette)
COMPLETED: Porsche 911, E-Type Jaguar, Lam Countach
|
|
|
|
|
Great work, all looking fab.... Regards Alan
|
|
|
 Rank: Elite  Groups: Registered
Joined: 20/04/2012 Posts: 1,787 Points: 5,292 Location: Thurso
|
Great job Shaun, brings back memories of building this when it was first released.
Graeme
|
|
|
Rank: Pro Groups: Registered
Joined: 08/02/2015 Posts: 274 Points: 812 Location: Malmesbury
|
Thank you for your kind words in means a lot to me that you are all enjoying the build as much as I am. Regards Shaun Building-RC spitfire
Build- titanic,Skyrider drone, solar system, T72 tank
|
|
|
Rank: Super-Elite  Groups: Registered
Joined: 28/07/2014 Posts: 4,269 Points: 12,713 Location: Scotland
|
Amazing work you are doing Shaun you make it look so easy credit to your skill keep it up regards Phil COMING SOON =1/72 Italeri diorama`s Battle for the Reichstag and Stalingrad battle at the tractor factory 1/16 Trumpeter King Tiger with loads of extras ON THE GO= refurbishment of 1/25 Tamiya tiger 1 , amt Star trek kits and space 1999 models
So Much to Build,But What a Hobby!
|
|
|
Rank: Pro Groups: Registered
Joined: 08/02/2015 Posts: 274 Points: 812 Location: Malmesbury
|
Thanks Phil for your kind words Update 22 In this issue I made the rudder and made reinforcements to the horizontal stabiliser. This this issue I am supplied a sheet of 6x100x195mm balsa, 6x15x300mm balsa baton, cutting template and throttle control rod and tube. 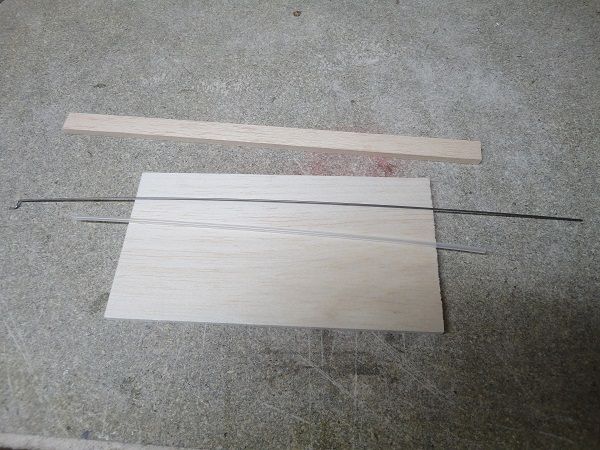 The first step is to cut the balsa sheet into two 35x41mm, one 105x35mm and one 35x186mm piece. 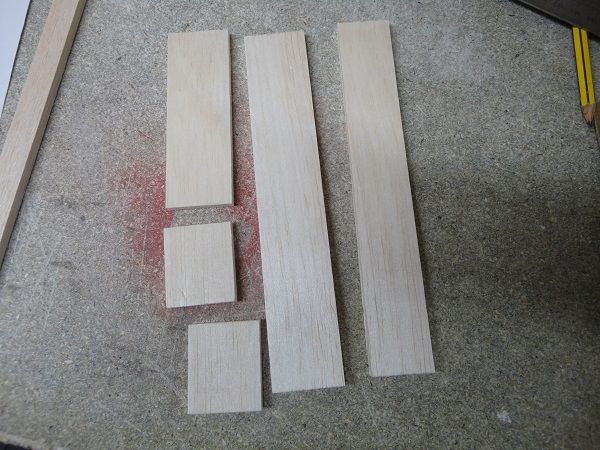 Next the balsa baton is cut to length and one of the 41x35mm piece glued into place using the cutting template to insure correct alignment. 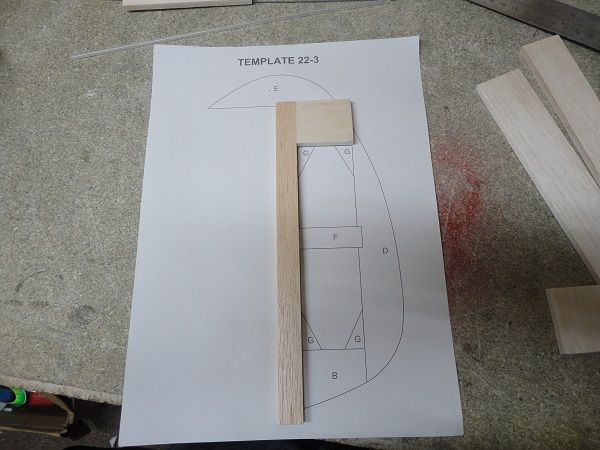 Next the other 41x35mm piece is glued into place. 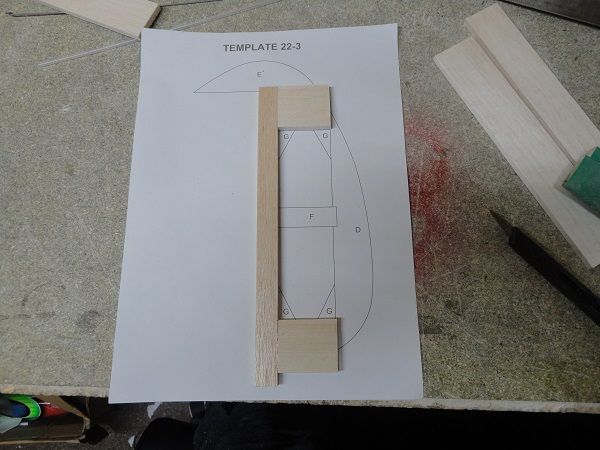 And next the 35x186mm piece is glued into place. 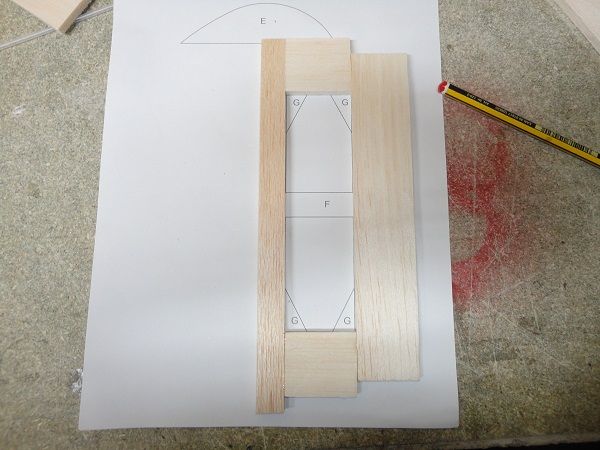 The 105x35mm piece is next to be glued. 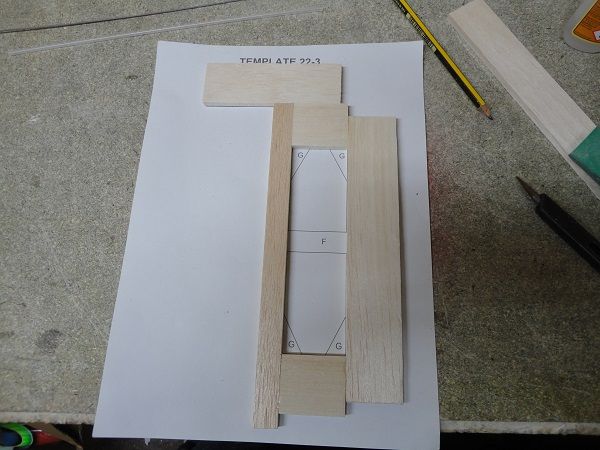 Two notches are now cut for the reinforcement part f shown on the cutting template. I made these cuts on my scroll saw. 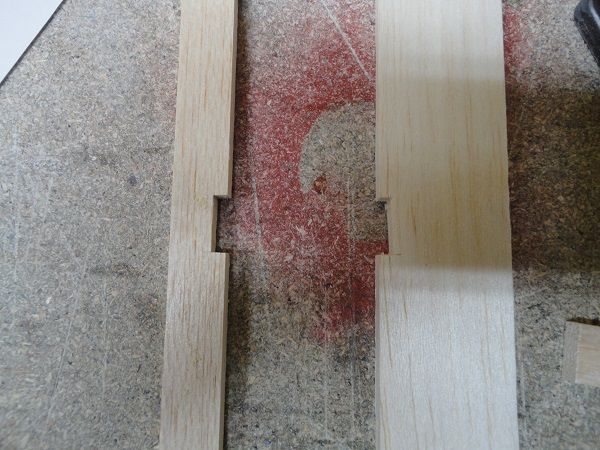 Part f is then glued into place and the cutting template is glued to the rubber assembly. This is then cut out on the scroll saw. 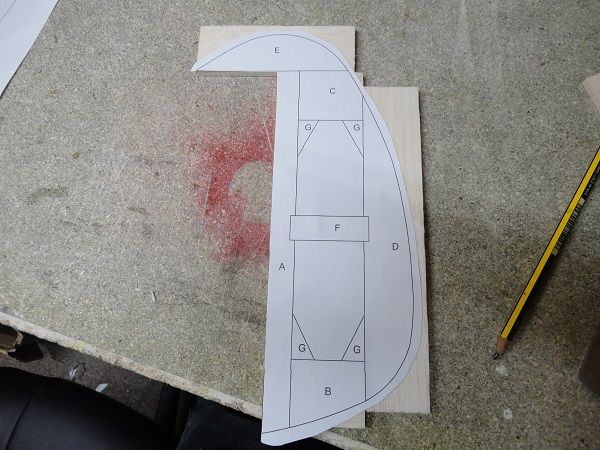 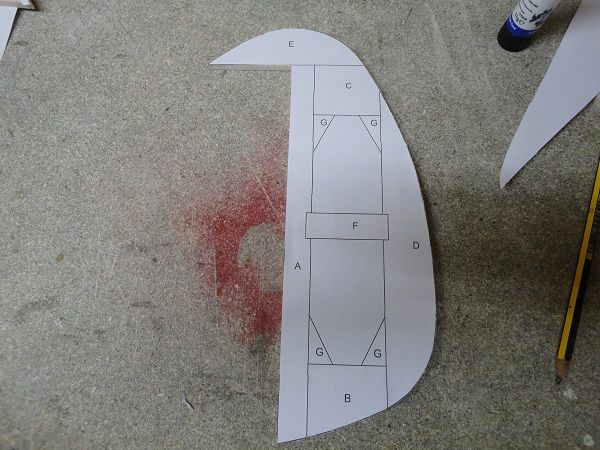 The rudder is then sanded. 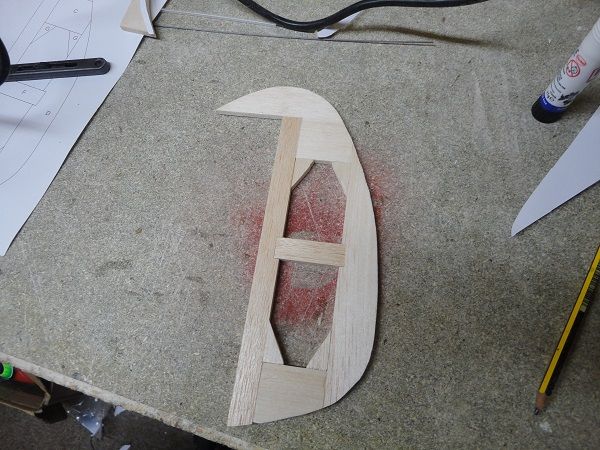 The two reinforcement for the stabiliser are then cut from the 12x20x300mm baton from issue 16 using the template in issue 20. 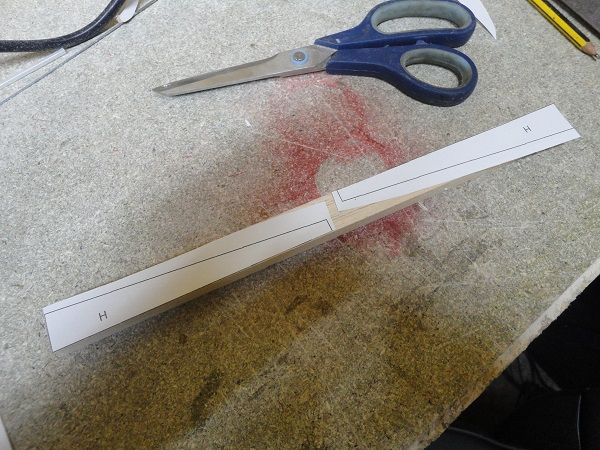 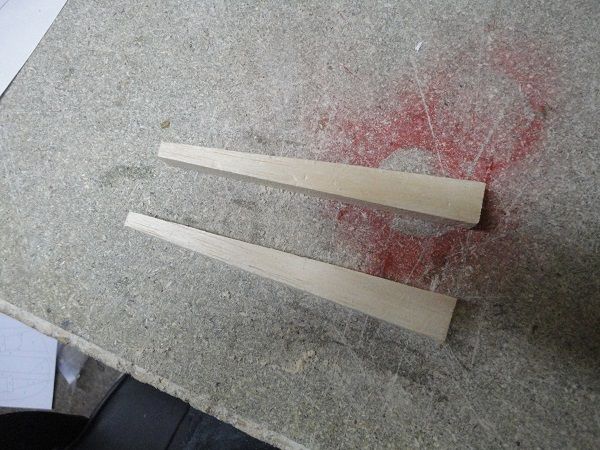 These are then glued and sanded.  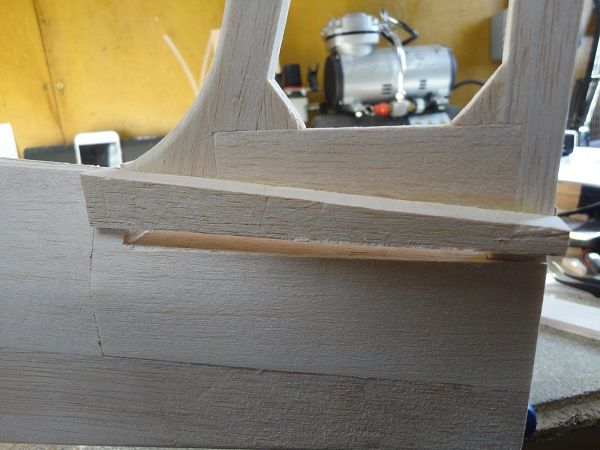 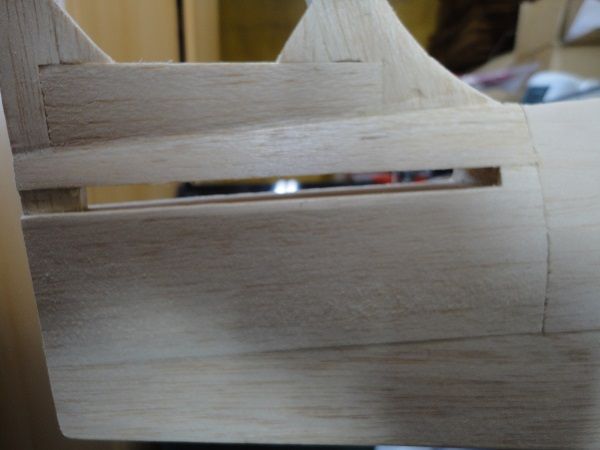 This completes the issue 22. I had about 3 hours in this issue alone with around 30 hours in the hole build so far Regards Shaun Building-RC spitfire
Build- titanic,Skyrider drone, solar system, T72 tank
|
|
|
|
|
Another great update, this build is really coming along.... .. very nice work.... Regards Alan
|
|
|
|
Guest
|
 UK
UK

