|
|
 Rank: Pro   Groups: Registered
Joined: 08/02/2015 Posts: 274 Points: 812 Location: Malmesbury
|
Hi all, this is my first build dairy so you'll all have to bare with me.  For my first build I have decided to go with my RC Deagostini Spitfire I recently acquired. Before I started I have been through the kit and check I have all the parts and that none are damaged. 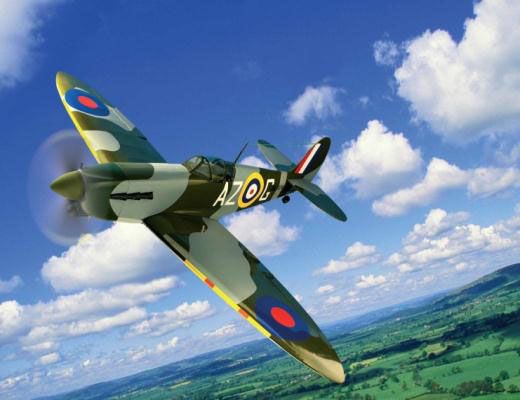 Building-RC spitfire
Build- titanic,Skyrider drone, solar system, T72 tank
|
|
|
|
|
Now this is good news Shaun, hope you thoroughly enjoy your new venture. Look forward to following your progress all the way through and good luck with the build....
Regards
Alan
|
|
|
Rank: Administration      Groups: Registered, Forum Support Team, Administrators, Global Forum Support Team, Moderator, Official Builds Joined: 09/11/2012 Posts: 8,386 Points: 24,249 Location: East midlands
|
Hi Shaun,  I`m sure your diary will be fine. There is a wealth of experience here, so should you need any advice/help then just ask. Most of all enjoy the experience.  Regards delboy271155 (Derek) COME BACK GUY FAWKES "YOUR COUNTRY NEEDS YOU"
|
|
|
|
|
Hi Shaun Will you be doing an IC build or converting her to electric flight and she should be a cool build with plenty of help if you need it. Andy Current builds:-C57,Zero, Lamborghini Countach, Caldercraft HMS Agamemnon,Robi,R2-D2, MFH Cobra .
|
|
|
 Rank: Super-Elite   Groups: Registered
Joined: 30/01/2013 Posts: 4,604 Points: 13,607 Location: Monmouthshire UK
|
Really looking forward to this one Shaun Good luck with it! Steve
|
|
|
Rank: Pro Groups: Registered
Joined: 08/02/2015 Posts: 274 Points: 812 Location: Malmesbury
|
Thanks guys for the support , sure I'm going to need help and advice along the way. Andy I will be building will an nitro IC engine as I have one will the kit and I'm not a big fan of electric motors. I will however be upgrading all the electronics to work with my futaba 10j transmitter I have for my heli. Anyways lets get started with the build, Stage 1, parts supplied 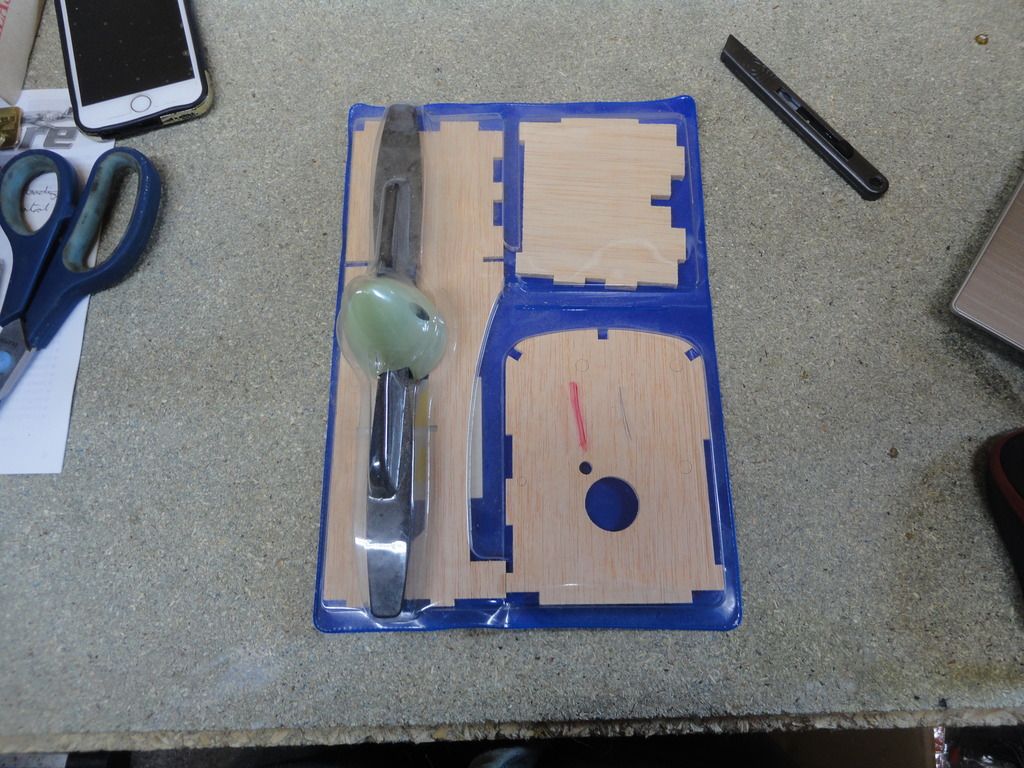 After opening the part I first removed the wooden plugs still in the 5 holes in bulkhead 1, and the gave all the parts a light sand with 240grit to remove any rough edges and residue on the surface, 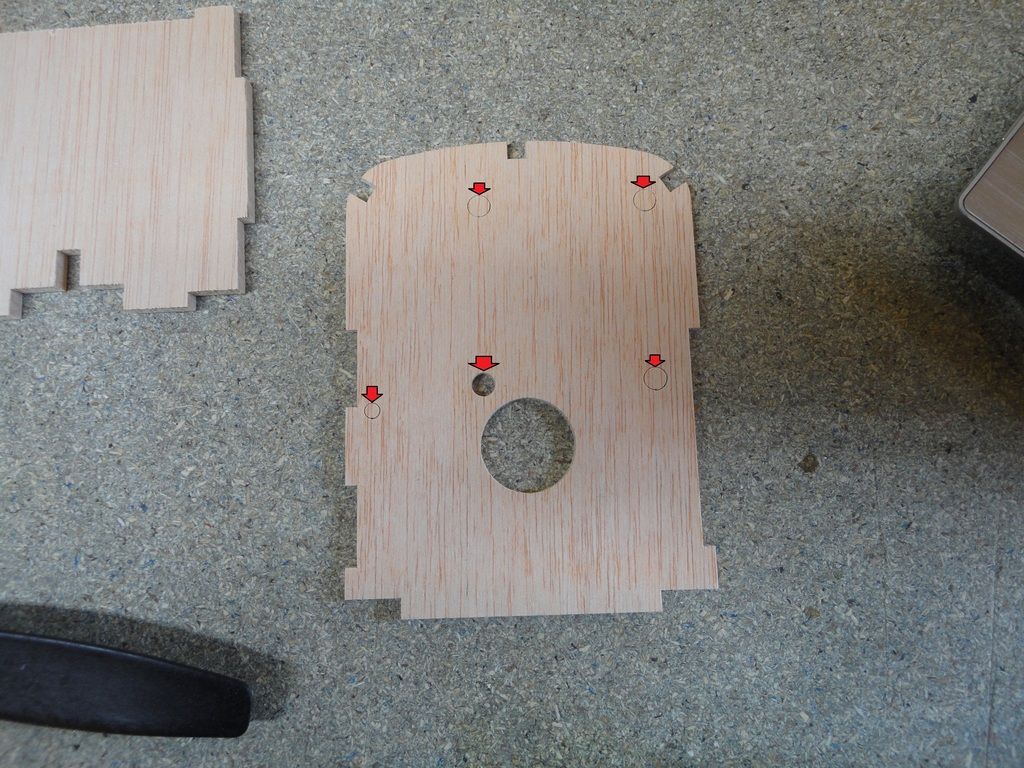 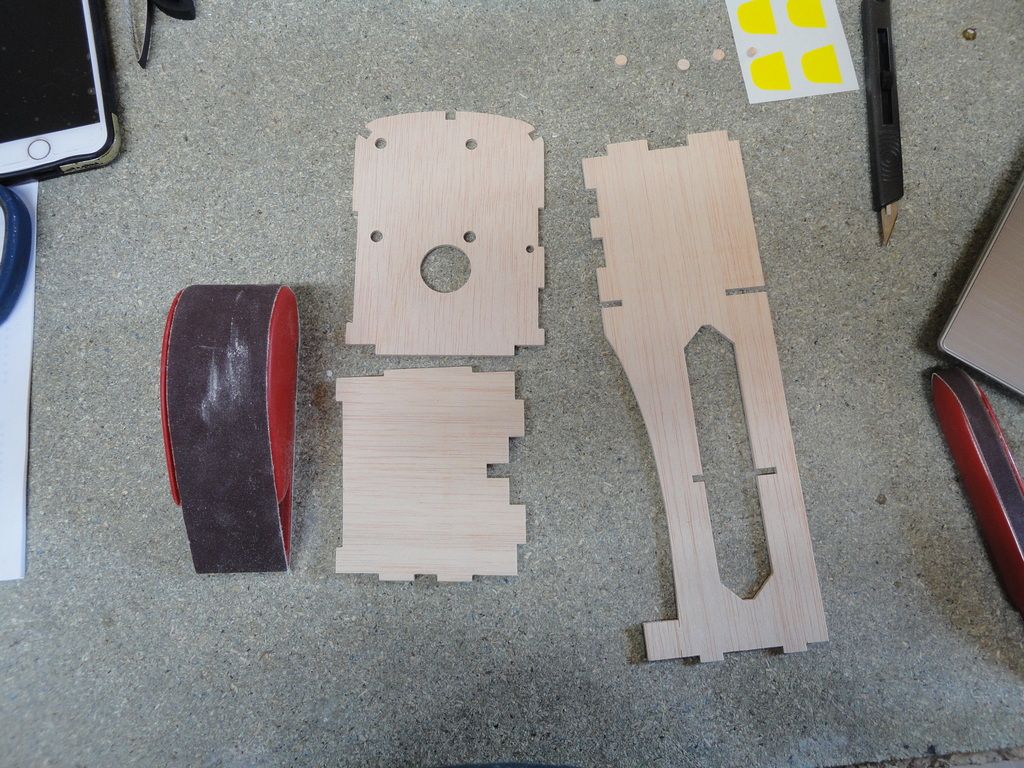 next I test fitted the front fuselage base, right-hand side frame and front bulkhead 1, 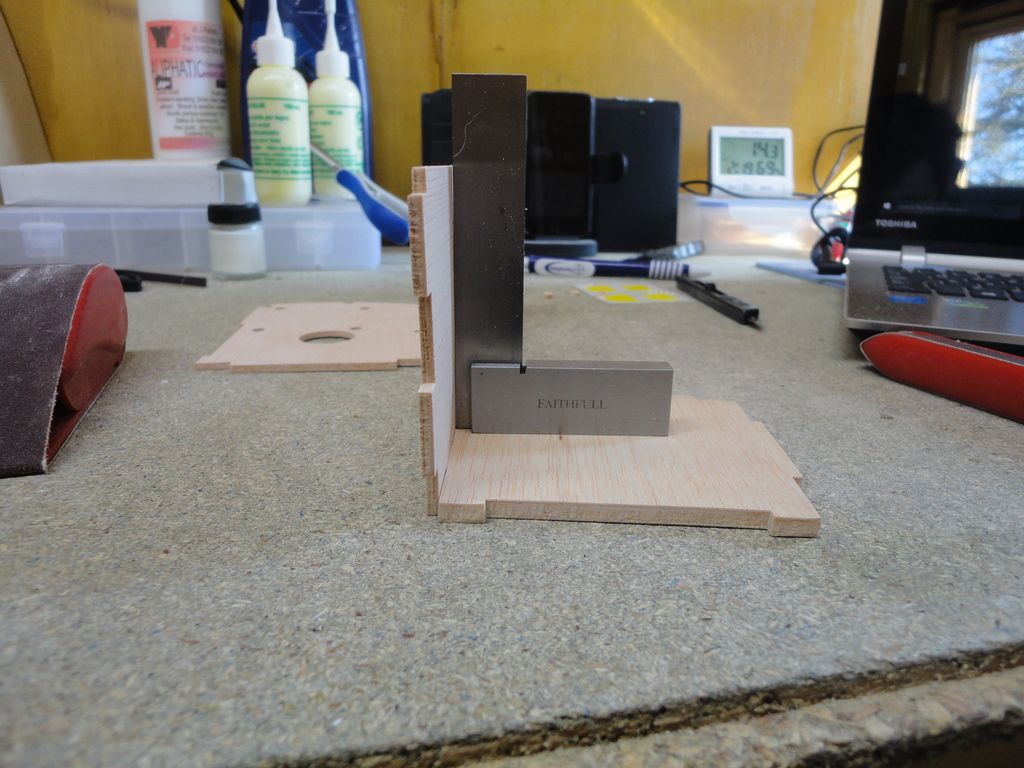 as you can see the front bulkhead sits at an slight angle to the base , 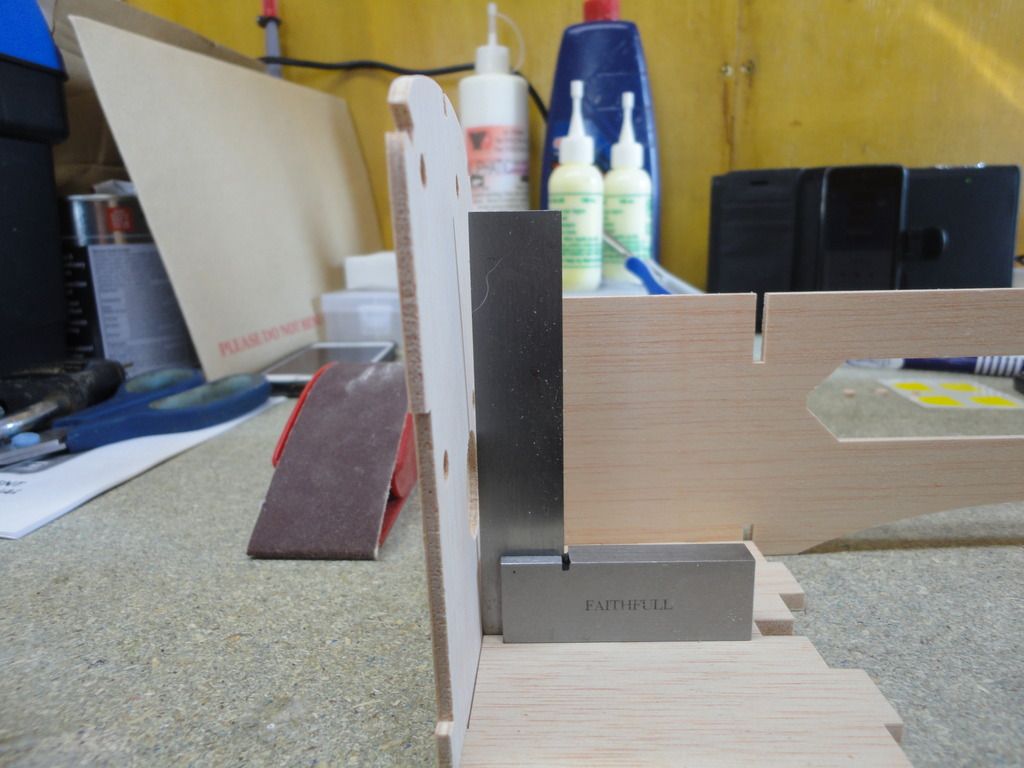 The final step to this stage is to stick the yellow decals on the prop, I am not happy with how the decal look and am thinking of removing them and paint the tips yellow, 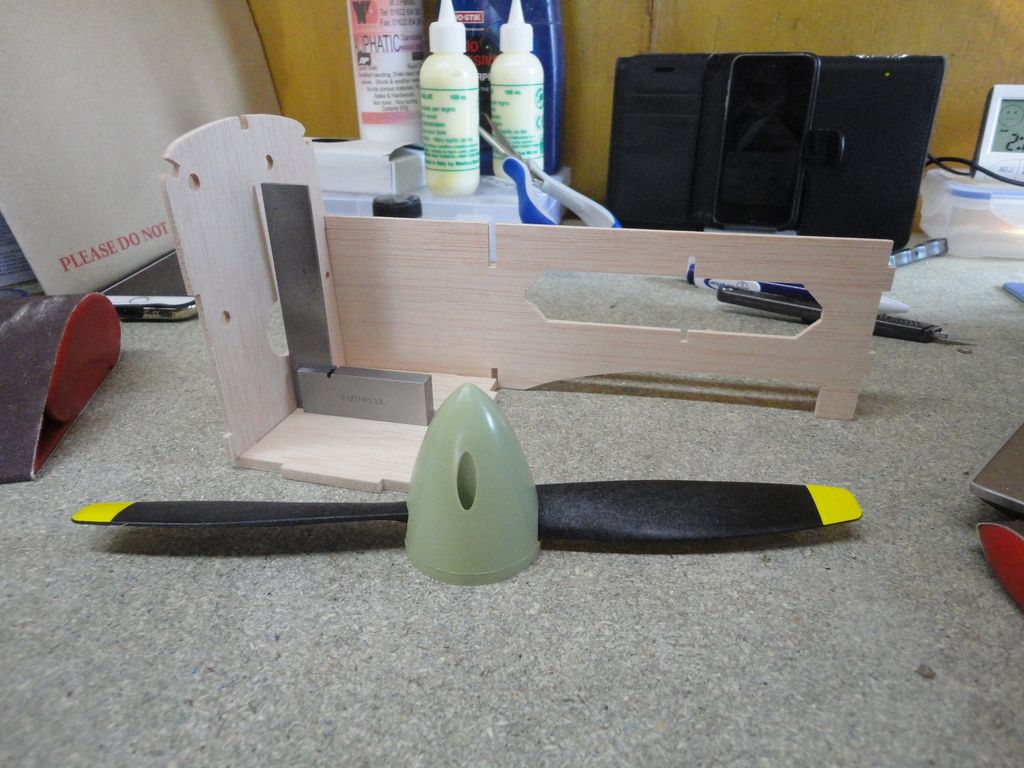 that it for stage 1 regards shaun Building-RC spitfire
Build- titanic,Skyrider drone, solar system, T72 tank
|
|
|
|
|
Looks like a great start Shaun and good presentation on the diary too. Only comment I would have is to make your images just a little smaller, this would save members having to scroll along to see all the pic.... .. Look forward to your next update... Regards Alan
|
|
|
Rank: Pro Groups: Registered
Joined: 08/02/2015 Posts: 274 Points: 812 Location: Malmesbury
|
Lets get straight back at it with stage 2, 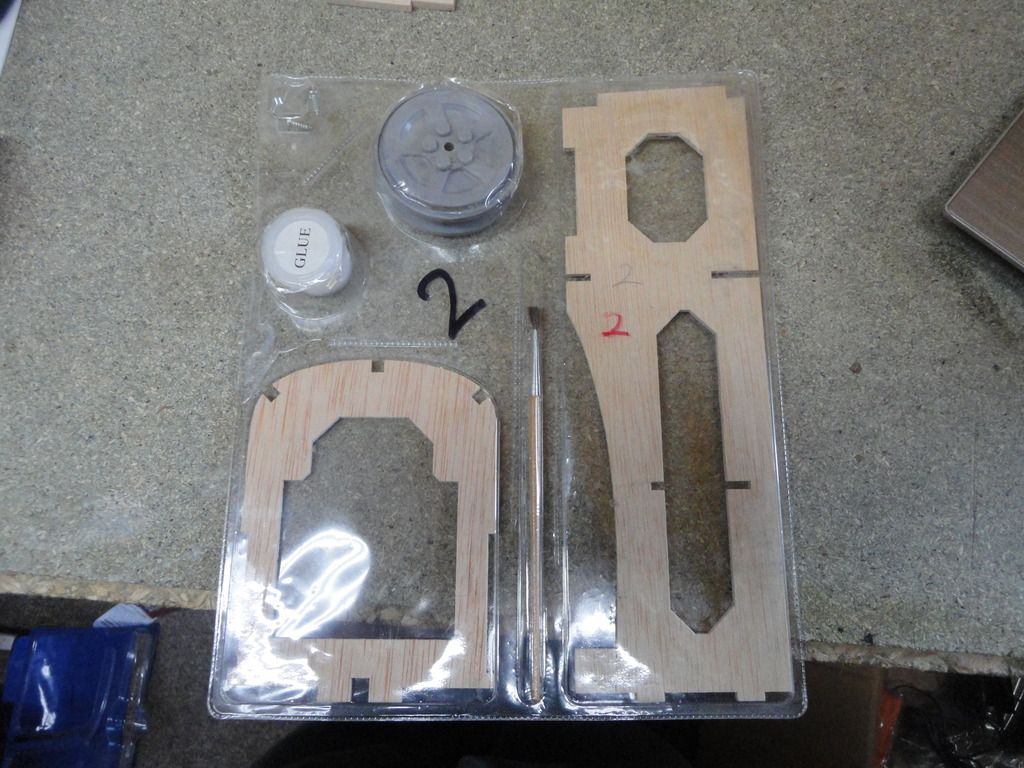 in this stage I have the left main fuselage, bulkhead 2, one of the front wheels, a paint brush for applying glue to the joints and a pot of jelly  that says glue on the top. as before I started by sanding the edges and test fitting the second bulkhead and left hand fuselage frame,  I had to sand a little bit move on the second bulkhead as it was a very tight fit, 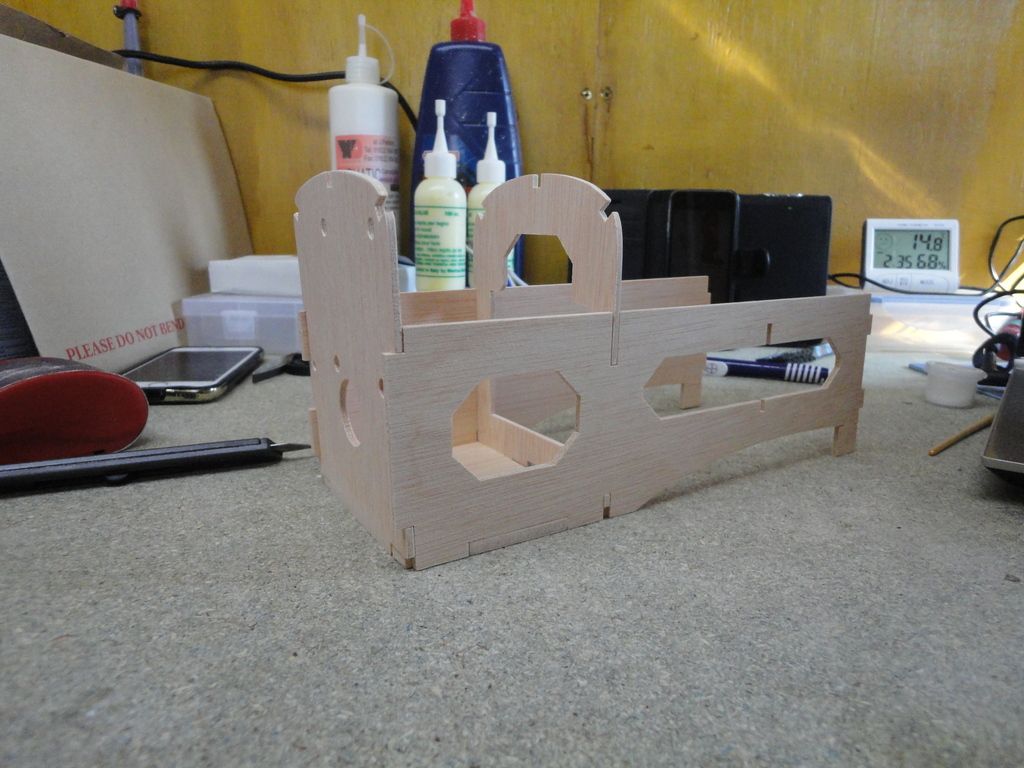 Next I dissembled and then reassembled will aliphatic glue, I assembled one part at a time clamping the parts and allowing to set before continuing, 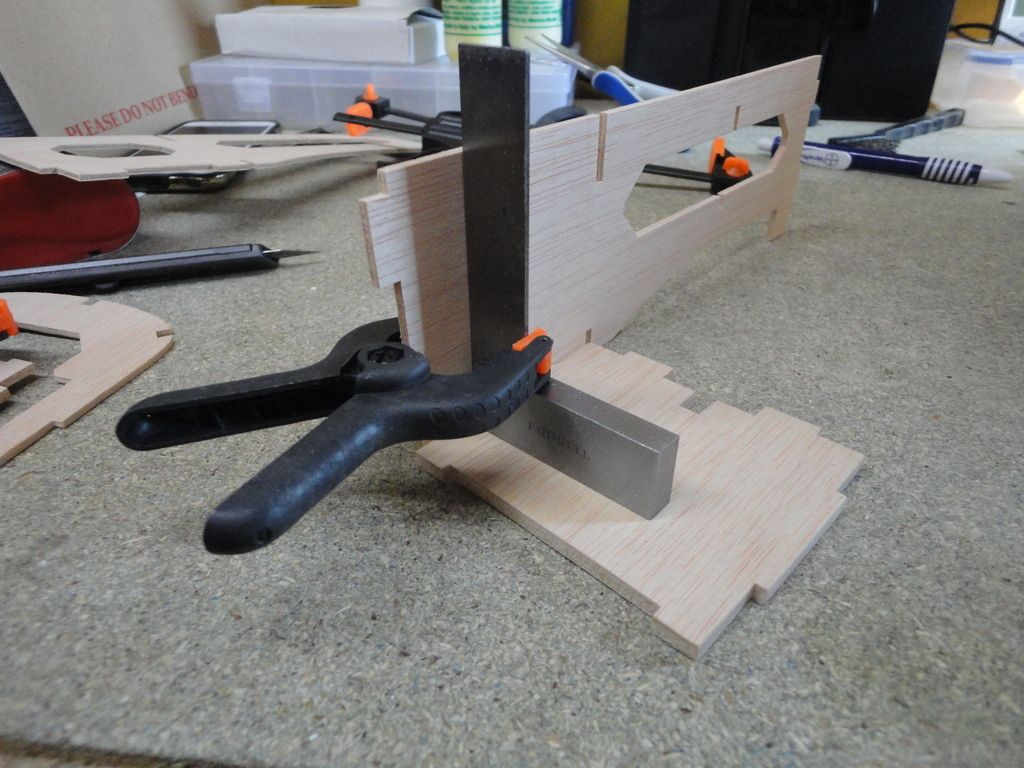 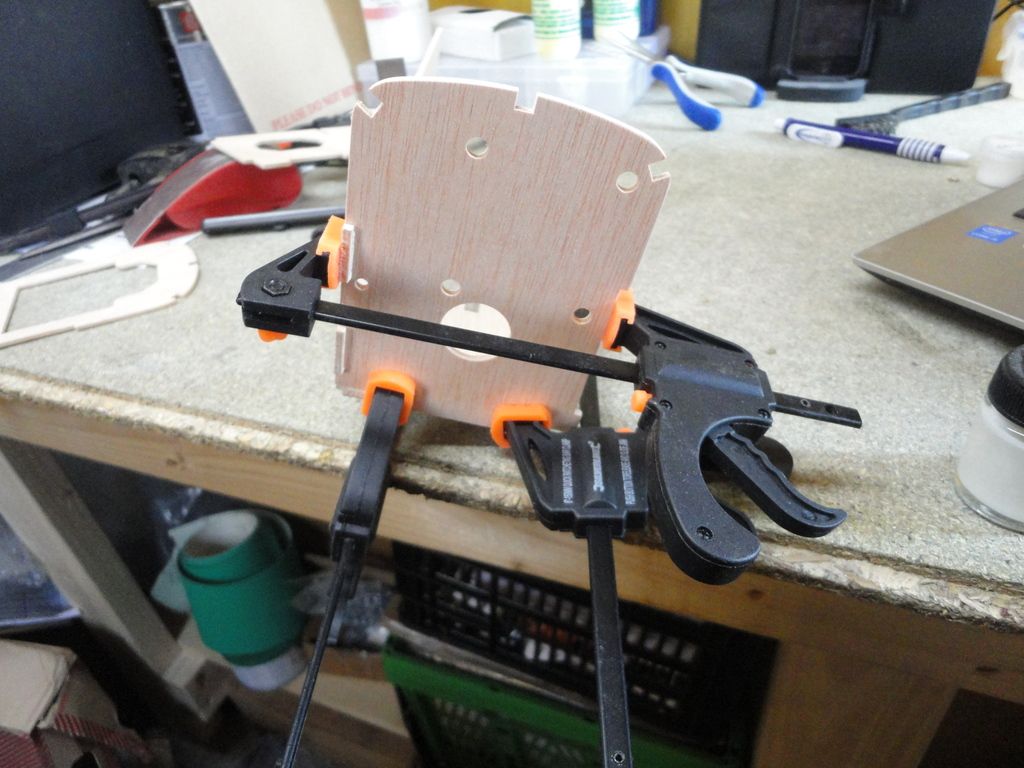 before installing the second bulkhead I brushed glue along the joints to help strengthen 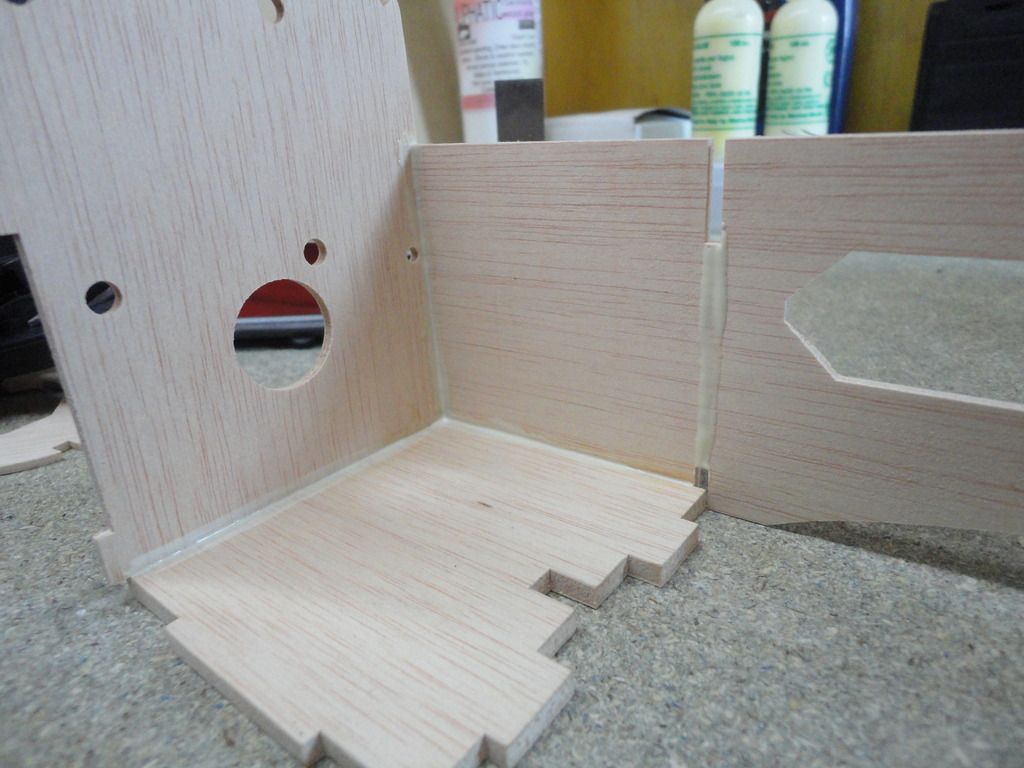 next came the second bulkhead and left hand fuselage, finally I glued the two halves of the front wheel together with super glue and clamped, 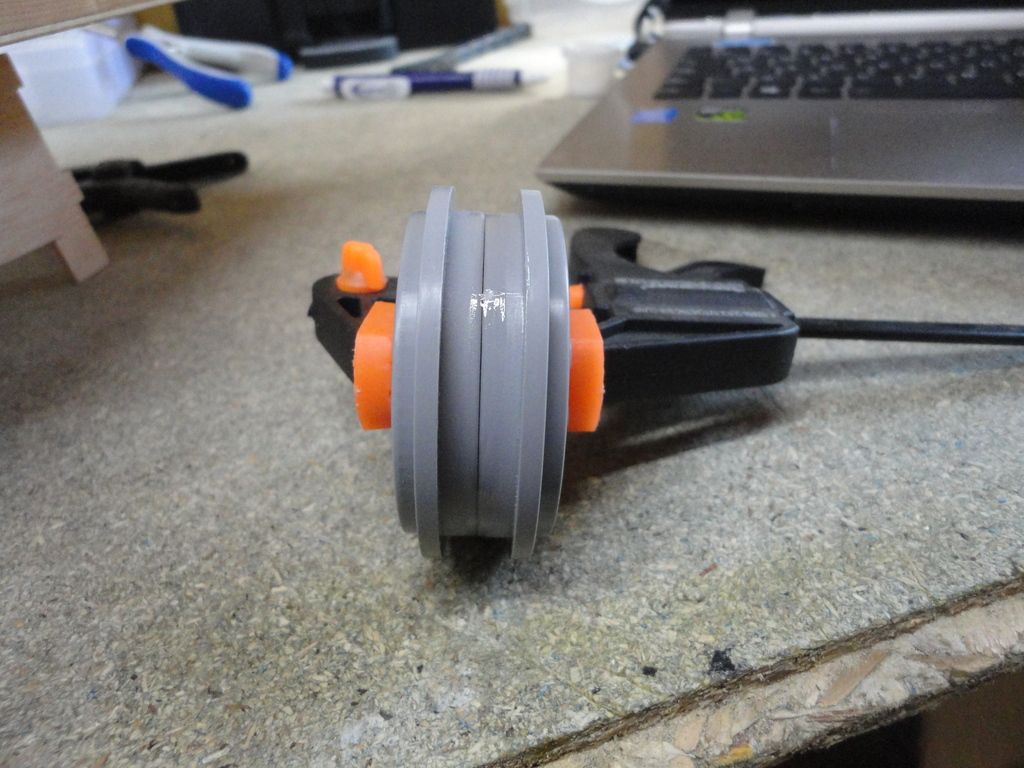 that's it for the day, time to let the glue dry completely and have another go tomorrow, Regards Shaun Building-RC spitfire
Build- titanic,Skyrider drone, solar system, T72 tank
|
|
|
 Rank: Elite Groups: Registered
Joined: 13/02/2011 Posts: 2,239 Points: 6,837 Location: East Sussex
|
Hi Shauncna, Welcome,that's a good looking kit you have, looking forward to your posts. Regards Trev Work in progress: Tombstone (Scratch) - San Francisco 2. -The Mayflower ( scratch by plan).
OcCre- Santa-Maria (Kit).
|
|
|
|
|
|
|
|
Rank: Super-Elite Groups: Registered
Joined: 27/01/2014 Posts: 5,060 Points: 14,980
|
Great start Shaun, looking forward to more and seeing a video of her flying
|
|
|
|
|
Looking great and a very nice start Current builds:-C57,Zero, Lamborghini Countach, Caldercraft HMS Agamemnon,Robi,R2-D2, MFH Cobra .
|
|
|
Rank: Pro Groups: Registered
Joined: 08/02/2015 Posts: 274 Points: 812 Location: Malmesbury
|
Hi guys thanks for your supports and kind words. Alan, I can see what you mean about the photos being a bit big, hopefully I've figured out how to resize them how using window 10  , still used to windows 7 that I use at work . davetwin, going to be a while till I get to fly her, got to get myself a trainer plane and learn to fly first Hopefully there will be any update later today (with resized pics I hope ) Regards Shaun Building-RC spitfire
Build- titanic,Skyrider drone, solar system, T72 tank
|
|
|
Rank: Elite Groups: Registered
Joined: 13/02/2011 Posts: 2,239 Points: 6,837 Location: East Sussex
|
Shauncna, Looking forward to your next post. Trev. Work in progress: Tombstone (Scratch) - San Francisco 2. -The Mayflower ( scratch by plan).
OcCre- Santa-Maria (Kit).
|
|
|
Rank: Pro Groups: Registered
Joined: 08/02/2015 Posts: 274 Points: 812 Location: Malmesbury
|
Hi everyone its time for issue 3 of my build , hopefully the pics will be a more reasonable size this time in issue 3 I have bulkheads 4 and 5, the servo base(not use in this issue), three strings and a front tyre. 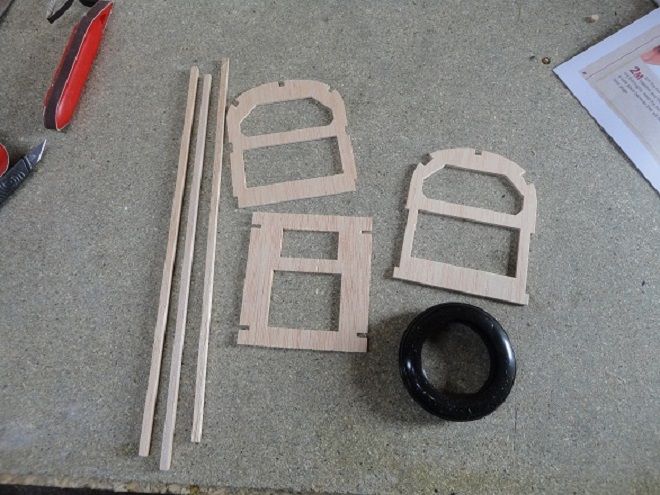 first off as before all parts are sanded with 240grit to remove any rough edges. Next glue is applied to the two fuselage side where bulkhead 4 will fit. 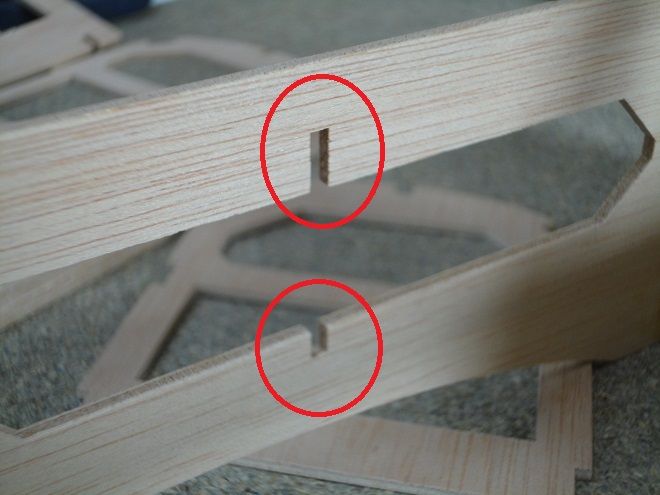 bulkhead 4 so then put in place and clamped, while bulkhead 4 same setting I when ahead and glued bulkhead 5 to the ends of the fuselage and clamped into place 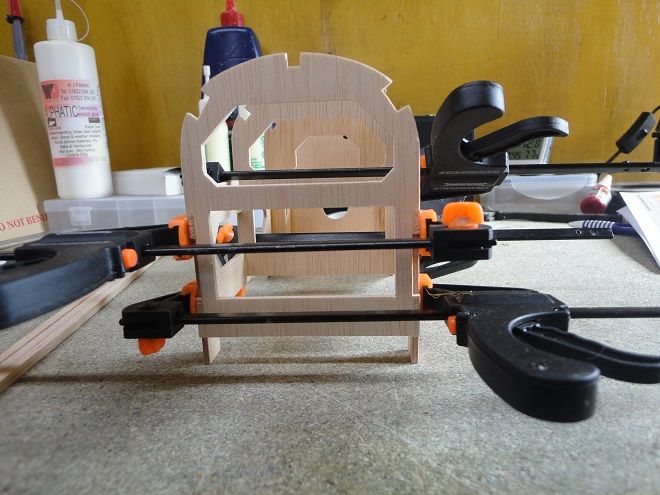 after this glue was applied to the three notches at the top of the bulkhead and a stringer are fitted in to each one and clamped until the glue is dry, 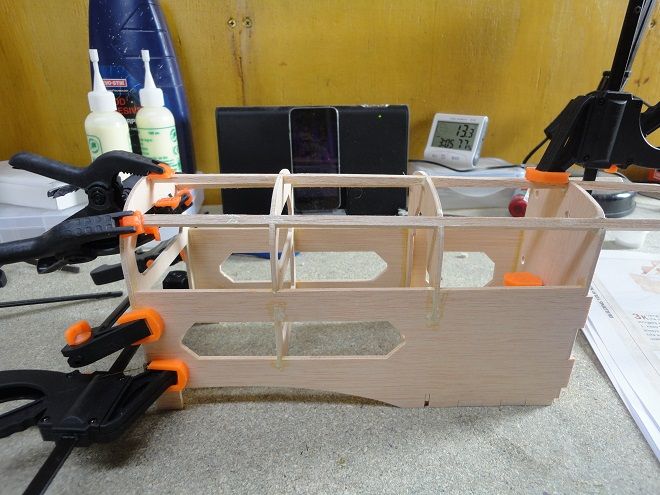 last off the tyre was fitted to the rim assembled in issue 2 with the aid off a pair of tweezers, 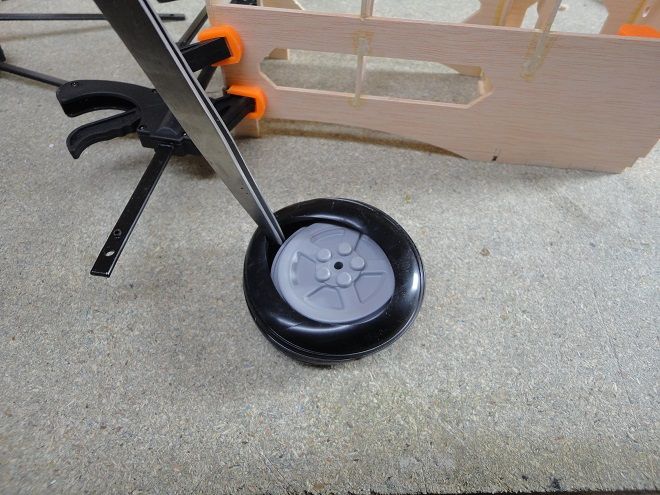 that's it for issue 3, all that remains is to cut the stringer off lever with the bulkheads when the glue dries. 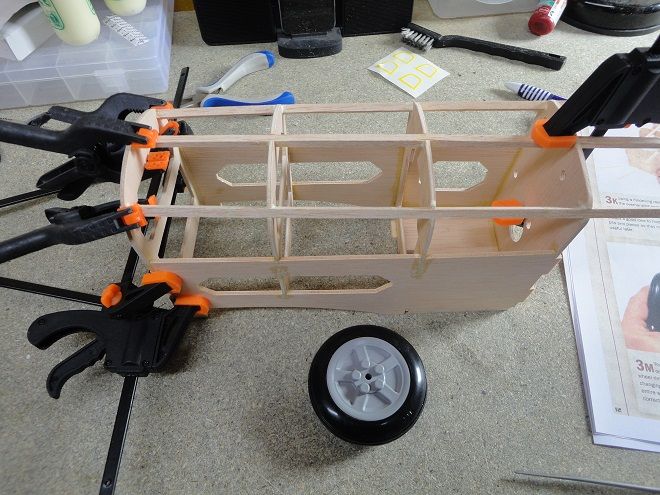 thank you all for looking in and any advice would be much appreciated . The pics size is now set to 660 x 495 pixels, if this is still to big I will resize them just let me know. Regards Shaun Building-RC spitfire
Build- titanic,Skyrider drone, solar system, T72 tank
|
|
|
Rank: Super-Elite Groups: Registered
Joined: 30/01/2013 Posts: 4,604 Points: 13,607 Location: Monmouthshire UK
|
Lovely work, the pic size looks perfect too. Im so glad you have the complete kit - we dont have to wait months for each update now Steve
|
|
|
Rank: Pro Groups: Registered
Joined: 08/02/2015 Posts: 274 Points: 812 Location: Malmesbury
|
Hi Steve thanks for your comments Unfortunately it still going to take a few months to complete as I am just starting my busy season at work and probably only be able too work on the kit every other weekend  . Still I'll work on it when I can and keep everyone posted on my progress Regards Shaun Building-RC spitfire
Build- titanic,Skyrider drone, solar system, T72 tank
|
|
|
Rank: Super-Elite  Groups: Registered
Joined: 16/08/2010 Posts: 2,771 Points: 8,344 Location: Brighton
|
Hi Shaun. Great start to your build. Look forward to seeing this come together. Regards Ian Current builds.Hachettes build the bismark,HMS Victory, HMS Hood.
Finished Builds Corel HMS Victory cross section.
|
|
|
Rank: Elite Groups: Registered
Joined: 13/02/2011 Posts: 2,239 Points: 6,837 Location: East Sussex
|
Coming along at a pace Shaun well done. Regards Trev. Work in progress: Tombstone (Scratch) - San Francisco 2. -The Mayflower ( scratch by plan).
OcCre- Santa-Maria (Kit).
|
|
|
|
|
Hi Shaun If I remember correctly the nose cone is made of an ABS type plastic that needs the holes for the engine, needle valve and exhaust cutting out after cutting the holes it might be a good idea to line the inside area with laminating epoxy and a fine mesh nylon or glass fibre cloth. The reason im suggesting this is ABS plastic will very quickly fracture from the vibrations from the engine lining the insides will strengthen it and it should last longer. Regards Andy Current builds:-C57,Zero, Lamborghini Countach, Caldercraft HMS Agamemnon,Robi,R2-D2, MFH Cobra .
|
|
|
|
Guest
|
 UK
UK

